Showing posts with label outerwear. Show all posts

Thursday, March 28, 2024

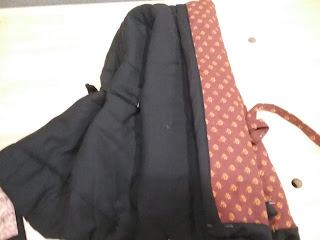
Red Wool Cloak, 18th Century


Cloak!

Based on an 18th century woman's cloak featured in Costume Close-Up. The original garment is in the collection of Colonial Williamsburg. As the garment was later altered, I used this similarly-dated (and similarly-constructed) cloak, also in the Williamsburg collection, for the facing width (2"), placement (on the outside, not the interior) and fastening information (ribbons).

I used 2 3/4 yards red broadcloth, per the original, though I didn't actually have to piece the hood (and the original was comprised of so many little strips that calculating out the sizes would have been more of a headache than actually sewing them together). The facing and hood lining are scrap silk from my collection. Due to the difficulties in finding silk ribbon of sufficient strength, I opted to use a stout replica hook-and-eye clasp on my cloak.

Overall, I'm pretty satisfied with the construction and fit of the cloak--all except the exterior silk facing, which looks rumbled no matter how much I iron it. And it was ironed at every stage of the process: after cutting, after the initial pass of sewing, and then as it was tacked down. I cut it along a pulled thread, so I know the silk's on-grain; at this point I'm pretty sure the problem is that I pulled the wool too tight relative to the silk as I was sewing the first seam. Alas.

Friday, December 30, 2022

Winter Mantle, 1857

Just in time for winter events, I finished my new 1850s mantle, based on a pattern from the December 1857 issue of The Englishwoman's Domestic Magazine.

Winter Mantle. Englishwoman's Domestic Magazine, December 1857.

Per the description, the mantle is made of wool broadcloth, trimmed with velvet ribbon and fringe. Black or brown with matching trim is the preference, though the description also suggests using black trims "with any dark cloth."

I selected a grey broadcloth, which ended up being a few shades lighter than intended. That being said, I think the lighter color is more cheerful than a solid black would have been, and I like how it looks with my mauve hood and knitted comforter.

The buttons and cord fastener don't photograph well against the velvet.

Materials: 

Scant 3 yards grey broadcloth

6 yards of  2" black (cotton) fringe

12 yards 3/8" wide black velvet ribbon

5 yards 1.5" wide black velvet ribbon

8 wood button molds

~6 yards of black beading silk to make the cord fasteners.

Scraps of black silk taffeta and white linen for covering buttons

Scraps of fringe for the 2 tassels

I sketched the 3 pattern pieces--front, back, sleeve--to scale, then made a muslin to test the shoulder and neck fit. The sleeves were delightfully easy, in that there's no underarm seam: just a generous side opening that will easily fit large 1850s pagoda sleeves, and a cape to cover. I sewed the construction seams using a double row of running stitches in grey silk thread, based on the construction notes from an 1780s broadcloth cape in Costume Close Up (which also proved successful on my 16th-17th century cloak). The ribbon and fringe are both attached by small uneven running stitches.

I attempted to make silk tassels out of size FF beading silk, but didn't like how the material behaved; instead, I used the off-cuts of the fringe, sewn tight around the head, to form the two tassels. The finished mantle shows a double line of buttons with cord, which is how I interpreted the fasteners (based on examples like this mantle which uses more elaborate frogging). I considered applying the buttons as a decoration only, and using concealed hooks-and-eyes, but decided to try the buttons and cord loops first. I couldn't find any black cord that I liked, so I used my straw-spinner to twist an 8-strand cord (first twisting two sets of 4-strands, then plying them together). 


Plying cordage.

Compared to the original image, I could have used a darker broadcloth, and I think the proportions would stand for wider trims. I went with these ones because I couldn't find any fringe longer than 2" or velvet ribbon wider than 1.5", and I wanted to maintain the proportions of the narrow and wide ribbons. That being said, I rather like how it turned out, except that the 3/8" ribbon was difficult to manipulate over the fringe header. Practically, I find the current fringe length very practical to wear

Friday, August 5, 2022

Boemio Cloak, c.1580-1640

With most of my early modern events at the hottest time of the year, I've so far avoided making any garment heavier than a wool waistcoat or two. But, after several rainy musters and a chilly faire in early May, I've concluded that some warmer garments are advisable.

I decided to try the Modern Maker's drafting methods this time. For a versatile, wearable garment, I chose the Bohemio: a short, full cloak with standing collar and contrasting lining. It was also one of the few cloak patterns in the book explicitly described as being worn by women.
 
One very full cloak.
 
The personal measuring tapes were a bit time-consuming to make, but fun in their own way. They definitely made the drafting process go smoothly, as each point was simple a matter of measuring to the designated symbol (and sometimes adding/subtracting like Roman numerals). At least on this loose garment, I didn't have to do any alterations after drafting--the cloak is a comfortable length and perfectly fitted at the shoulders and neck.
 
Custom measuring tapes...in abbreviated Spanish.


I wanted a proper piece of outerwear, so I chose a heavily fulled wool broadcloth for the exterior. My regular suppliers were out of the really interesting shades and I had my heart set on Lincoln green, so I opted for an emerald green melton wool from the Dorr Mill Store. For the lining, I selected a bright "weld" yellow mid-weight linen from Fabric-store.com.
 
 
A full circle & then some.

I consulted Patterns of Fashion IV for information about extent short cloaks, and while it mentions green wool among the known cloak materials, and both dyed linen and yellow linings, I do not have any specific evidence for the combination of a green wool exterior with a yellow linen lining (much less one of this particular style). That being said, the material and colors are at least plausible and I like the them together, especially with the contrasting front panel.

I got it into my head that I wanted to sew the whole cloak by hand, which wasn't as bad as it might seem. The main body was four parts (two backs, two fronts), with a two-piece collar. All of those pieces were also lined. I used a double row of running stitches to join the seams, based on an original 18th century cloak that I may have started copying just before this project. Neither book had detailed instructions for lining the garment, so I ended up using the Tudor Tailor's method of sewing the lining separately, turning the raw edges and then slip-stitching the two layers together along the top and sides. The collar (two wool layers) was made up separately and attached to the wool cloak, with its raw edges hidden under the linen lining. The fulled wool was heavy enough that I had to miter the corners to get them laying neatly. Following Quin's advice, I hemmed the two layers separately-- or rather, I hemmed the linen, and left the wool with a raw cut edge, which is a perk of broadcloth. This saved me approximately 3 lifetimes worth of pressing heavy wool, and was definitely the right decision.
 
I get the tiniest stitches working on linen.

Double row of running stitches in black silk.

The Modern Maker instructions do not mention or show any fastener on this cloak. I thought to add one, but have been pleasantly surprised by how much it is not needed. The fabric is well-balanced front and back, so that the cloak stays on whether I'm walking or standing still (with the revers turned back or not). I haven't tried running or anything, but it doesn't have the tendency of my more modern cloaks to slither off at the slightest movement. It also weighs a ton, so I'm glad it's hanging from the shoulders and not a clasp at the throat.

Tuesday, February 1, 2022

Original: Embroidered Child's Coat, c.1860

Still in a coat/outerwear mood, and February is a good time for cute things:

Child's Wool Coat with Silk Embroidery, c.1860. The Met.


Tuesday, December 28, 2021

Coat, 16th century

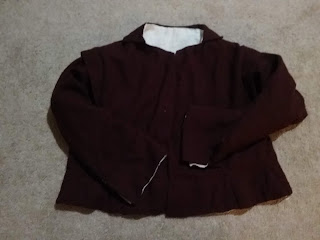
 As usual, I found myself scrambling to complete a garment for one of my very few events this year (the Goode's Company muster), but never did finish the last few steps. 

This time, it was a mid/late 16th century woman's coat or waistcoat, patterned from the advance chapter of The Typical Tudor which I received last autumn for having pre-ordered the book. I'm still eagerly awaiting the final product (not in the least so I can start on my next kirtle with more confidence), so it was nice to get a useful sneak-peak. The outer material is a pale blue (twilled) wool stuff from Burnley & Trowbridge, whence came also the fastening hooks; the lining is mid-weight linen from fabrics-store.com (left-over pieces in both white and natural). I did the major internal seams by machine due to the time crunch, but finished the sleeve gussets and all the edges by hand.

A coat.

I intentionally tried to draft this coat with extra wearing ease in the upper arms/shoulder and upper chest, which has been a problem with my earlier outerwear from this period (a waistcoat). The mock-up seemed to suit, but I'm not entirely happy with the fit of the final garment. The gussets in the sleeve elbow were annoying to insert, but less so than I feared. I'm also not entirely convinced of their utility in this instance, but the pictorial evidence shows awkward little elbow gussets, so I sewed them. The skirt's extra volume is contained in three box pleats set into the side and back seams at the waist: these looked weird in the instructions, but came together quite easily. They reminded me of the pleats on the 1790s robe I once made.


Tiny, tiny stitches!

One aspect of this project that I am pleased with is the hand-stitching. All along the hem and openings (wrists, neck, front), the wool and linen are joined with tiny whip or running stitches. I am rather pleased with how small and even the stitching ended up.


Wednesday, December 1, 2021

Original: Cream Wool Coat with Chenille Braidwork

Wool cloak with silk trim, 1851. The Met.


It's a good thing I don't reenact the early 1850s, so I would very much need to replicate this cloak.

Friday, October 1, 2021

Original: Green Silk Pelisse, 1828

 Did I select this one just for the color?

Silk Pelisse, English, c.1828 in LACMA.


Mostly. I also like the scalloped trim. I wonder whether the two silks faded the same, or if they originally had more (or less) contrast...

Monday, December 21, 2020

Muffs and Furs (1850s)

Someone was asking about fur muffs this time last year, so I started compiling a few references on the subject. I was rather intrigued by the 'rules' for which furs are appropriate to which garments and the varying fashions for different colors and kinds.

Muffs. Learning to Think (1856)


The Great Exhibition (1851) catalog has a list of different furs and their uses, which I found rather interesting in its categorization. 

In a similar vein, Learning to Think (1856) has a short question series (almost a catechism) covering muffs, tippets, etc., and the animals from which they are derived: genet, sable, otter, chincilla, and marten. 

Opera cloak of velvet trimmed with chinchilla.
Graham's Magazine, 1856.

Graham's Magazine says of the furs favored in 1856:
Furs do not enter into trimmings this season so much as was anticipated, but instead we have an imitation of Russian sable, which is used pretty extensively for trimming cloaks. We have nothing new in this department--the sable is still the fur par excellence; the shapes are in no wise different from last year, and we must confess they are pretty enough to be retained for another season. The large cap is pointed in the back, and full over the arm, thus preventing any ungraceful drag which might result from the absence of this very important little gusset. They are almost universally furnished with a small collar, which gives them a much more finished appearance. The small cape and its diminutive, the victorine, sweep round the shoulders and fall in long and square tabs in front, ending in three or four tails. The muffs are worn, we are pleased to say, as small as last year. The cuffs are of the same as last year, reaching almost to the elbow. There is another style of cape, circular shape, with arm holes, very convenient for holding a muff. The Russian sable, the scarcest and consequently the dearest fur we have, is, we understand, smuggled into this country, its exportation being prohibited by the Rus government. A small muff of this fur costs four hundred dollars and the entire set consisting of cape, cuffs, and muff is worth $1,400 or $1,500. Next in importance comes the Hudson Bay sable, its price ranging from $200 to $700 the set, its value increasing as its color darkens. Then we have mink, a beautiful fur almost rivalling the sable, and next, "fallen from its high estate", comes ermine, now only a fourth rate fur, of which in the good old times kings had the monopoly. Then again we have chinchilla, fitch squirrel, stone marten, minever; and if our ladies can't be suited, no matter how diverse their tastes may be, it must be the result of the bewildering variety they have to choose from.

A very important department in fur establishments is that devoted to children. There are some furs dedicated to their exclusive use, such as minever and chinchilla, and others which they use in common with their elders, as ermine and the mixed white and gray squirrel. They have entire sets, capes, cuffs, and muffs, and of all sizes suitable for children of every age, provided that the "juvenile world" must form a very considerable item in business calculations. The price for a set of minever is thirty dollars and for ermine from twenty five to forty.


Braided velvet muff with ermine trim.
Godey's, 1856.


There's a lengthy explanation of the winter 1857-1858 fashions for furs in Godey's:
There has never been a season when furs wore so universally worn. The reduction in price, consequent upon the late crisis, and the auction sales of the holidays, have done much to bring this about. A full suit of furs is a cape, or victorine, with cuffs, and muff. Many dispense with the muff, however, and some of those who have full capes with cuffs also. Half capes are most suitable for short figures, or for young girls. Victorines of mink and sable are usually manufactured of more choice and costly skins, so that the value is not greatly lessened. Cloaks of a circular shape, with "arm-holes," to use an inelegant but in this place completely expressive phrase, are in some instances adopted. They have a collar of the same, and are very warm and deep. Russian sables are of course still above the common purse; but some elegantly marked Hudson's Bay have been brought to market the present season. Mink is the next in favor and in price. Ermine is not so much a favorite as for a few winters past, as the prevailing tone of all street dress has been decidedly dark. Muffs are worn still very small, and ornamented with rich lining, cords, and tassels, or a simple bow of velvet, or other costly ribbon. Cuffs rather deep. Sable and mink are used to some extent in trimming velvet cloaks and coin de fero jackets; but plush has a very good effect in open cloaks and dressing- gowns. Ermine is the only fur suited for evening, and is still greatly used for full-dress wraps. Of the less costly and favorite furs, stone marten, Siberian squirrel, and fitch are in demand. Siberian squirrel is the most suitable for children and school-girls; though some excellent imitations of ermine are also seen in tippets, etc., intended for the juveniles.
--Godey'sFebruary 1858 


Small muff of ermine.
Godey's, January 1858


The popularity of furs has apparently increased by the following year, with dark furs continuing to be favored:
Furs are at the height of favor, and were never more universally worn. Ermine bands are used for trimming opera-cloaks, or sorties du bal; dark fur, and sable, and mink for velvet cloaks, etc., intended for the street. A Victorine, or cape with lappets, or a round cloak, with cuffs and a small muff, are considered a full set. The Victorines are usually quite deep, coming half way to the waist behind—the cape to the waist and below it. The cloaks are as deep as ordinary talmas, and, with the capes, have a collar. The muffs are still quite small. Furs are lined usually with quilted silk, and ornamented by rich cords and tassels. Sable, Hudson's Bay, and mink are the favorites among the expensive furs—Siberian squirrel, and a mixture of the gray and white fur in stripes, are among the loss expensive ones.
--Godey's, January 1859


Furs. Godey's, December 1855. (Page 486)


***

For those interpreters unwilling to don furs, muffs also sometimes appear in other materials--these are mostly knit or crochet, or occasionally velvet. There are also knit and crochet patterns "in imitation" of certain fur garments. 

The Winchester Fancy Needle Instructor (1846) has two knit and one crochet muff, meant to resemble chinchilla, sable, or ermine.  

Gems of Knitting and Crochet (1847) gives instructions for a "ermine or chincilla" muff knit in brioche stitch.

A variegated knit muff is given in the Ladies' Work-table Book (1850).

In December 1857, Peterson's gives instructions for a knit muff lined with silk and stuffed with fine wool or horsehair.

The Ladies Complete Guide to Needlework (1859) features two knit muffs, one in imitation sable.

A crocheted child's muff appears in Peterson's in 1864.

A crocheted "ermine" pelerine and cuffs appear in The Lady's Friend (1865), along with a girl's knit muff and a child's muff knit in imitation chincilla. (Peterson's also published the last.)


Child's muff knit as imitation chinchilla.
Peterson's, April 1865.


Thursday, December 12, 2019

Quilted Silk Hood

Silk hood.

From Anna Bauersmith's quilted hood pattern. It only took three years for me to get started, after which it went together very quickly. The hand-quilting took a single weekend event, and the pieces went together in only a few more hours work. Using a machine it could go even faster.


Quilted pieces.

I used a silk exterior, polished cotton to line, and a single layer of wool quilt batting inside. The garment is hand-quilted, using one of the sample designs included in the pattern. The ties are self-fabric, with a rolled hem. Trimmed with white rabbit fur, to match my winter cuffs. I considered adding a narrow trim along the bavolet, but didn't like how it detracted from the quilting (I rather like how it turned out there).

Fur was mentioned as a trim option in the pattern, but my searches didn't reveal many antique examples to use as inspiration. I did find a written reference to a silk hood with chinchilla fur.

I found this hood comfortable to wear, and it kept the water off without crushing my hair. It was a little less warm than previous hoods I've made, as it didn't sit so close to the face. All in all, I am very satisfied with it.

Sunday, December 2, 2018

Quilted Hood, Pink Coral Print

Black quilted wool hood, faced with calico containing a red all-over coral motif on a pink background.

Fourth hood. This one also has machine quilting perpendicular to the brim, and has the black wool exterior. The lining is the pink coral Old Sturbridge print that I used on my apron (dubbed by Elise the "brain" fabric). The ties match their respective fabric, and the outer wool is folded over the raw edges. The unique feature of this hood is a double layer of cotton batting instead of wool inside. It's less puffy as a result, but the back folds fall more gracefully.

I like the aesthetic of the black wool with a bright cotton lining.

Saturday, December 1, 2018

Quilted Hood, Plaid & Paisley

Wine/blue/purple plaid quilted wool hood, faced and bound with calico (green and pink paisley stripe).
Paisley & Plaid!


Third hood. This time with quilted perpendicular to the brim--and also a plaid wool outer fabric and busy striped lining. Yes, that is the quilted petticoat fabric used in the lining, and the shawl twill wool for the exterior. The inner ties are narrow-hemmed calico (the green paisely stripe).  As noted in the shawl post, I didn't like the bulk that hemming the wool ties produced; instead, I used a torn edge, which appears stable. This would have been a good place for cotton ties on the outside, but I thought the overall effect was too busy.

Friday, November 30, 2018

Quilted Hood, Gold and Maroon Floral Foulard

Black quilted wool hood, faced with calico (a gold floral foulard on maroon background).
Yes, there are pins.
No, they are not in the finished hood.
I needed to get the picture taken while the light lasted.

Second hood. It also has a black wool exterior, wool batting and calico lining. The lining fabric has a small gold floral motif in a foulard pattern on a maroon background. This time, I used the outer wool fabric for the back ties, and the lining cotton for the interior ones; the interior ties are double-folded and stitched as in the instructions, but I used a narrow hem and the selvage to reduce the bulk on the wool ties.

This hood's unique points are that it is quilted (by machine, in lines parallel to the brim), and the edges are finished by folding the outer material over the lining. Having done both that and a bias binding, I think the bias binding is marginally easier. Folding over the fabric works alright when hemming by hand, but I do not recommend trying it on a machine as you can't ease the fabric.

Wednesday, November 28, 2018

Tufted Hood, Leafy

Black wool hood with white tufts, faced, bound and with ties made of orange calico (leaf motif on narrow striped ground).
Tufted Hood
I made some warm hoods for my co-workers; most are from Liz Clark's tufted hood sunbonnet variation, as mentioned in my "Dressing for Winter" post.  I tried to make each a little bit different.

This first one sticks most closely to the tufted hood project: it has a black wool exterior, and is lined and bound with orange calico (the "Leaf Duo"from Moda, which I previously used on a sunbonnet). I used wool batting for the wadding, and the layers are tied with white wool yarn. The front and back ties are both of narrow-hemmed calico.

After making three of these I realized the wool batting too thick for a project of this size (and drape). In the future, I should split the batting, or use a thinner one.

Tuesday, November 27, 2018

Fringed Shawl

Fringed Wool Shawl, 1850s reproduction outerwear
A Nice Plaid Wool Twill.

Catching up (again) on blogging my recent projects. With the wet/cool weather firmly established, warm outerwear is in order. 

First off: a simple fringed shawl, based on Liz Clark's instructions. I appreciate the neat finish of the fringe, and how it doesn't add any extra bulk or lumpiness to the finished garment--on another project, I found that this fabric is just thick enough to make awkwardly bulky hems. That being said, the single layer is pleasantly warm while being fairly light (it's slightly heavier than my tropical-weight wool yardage, but not truly a mid-weight). The twill fabric fringes about as easily as the plain-woven wools I've used before, and seems no more inclined to ravel once fringed. The shawl is square, 1.5 yards on the side (including fringe), making a capacious cover when folded diagonally.

Friday, November 16, 2018

Dressing for Winter

It's that time of year again.

Good winter event safety and warm clothing advice from millinery genius Anna Worden Bauersmith. See also her articles on clothing layers, and how Victorians kept warm in different situations.

Suggestions for children's and infants' warm clothing from Liz Clark. She also has relevant garment projects: a shawl, and a sunbonnet that can be made as a tufted hood.

Colleen Formby's sontag pattern also makes for a warm knitted garment. Virginia Mescher wrote a simple muffatee pattern, also knit. [I compiled a list of warm clothing projects at one point, but not all the links are currently active].

Need 1850s/1860s project inspiration? A quilted petticoata sontagfur cuffswinter hood and red riding hoodtufted hoods, and a girl's hood.

Thursday, November 8, 2018

Book Review: Regency Women's Dress

Cover art for Regency Women's Dress by Cassidy Percoco

Regency Women's Dress: Techniques and Patterns 1800-1830 by Cassidy Percoco.

"Dress" is not limited to dresses: this book contains patterns for two chemises, two sets of stays, and three outer-garments (two spencers and a morning robe), as well as nineteen dresses. The earliest date on any garment is c.1795, the latest c.1827.  The narrow scope and large number of examples allow for greater specification than in many books of this type. The "type" being books diagramming the construction of garment artifacts, such as Janet Arnold's Patterns of Fashion series or Jill Salen's Corsets: Historical Patterns and Techniques.

The book starts with a three-page overview of fashion changes through the ~30 years in question; I liked that the table of contents employed sketches of each garment, making a nice fashion timeline for comparison, as well as a visual reference. Each garment featured in this book in an original from the late 18th/early 19th century, with full citation.  All the garments are held in American collections (mostly in New York, or else Old Sturbridge Village in Massachusetts).  Knowing the whereabouts of each garment is useful, in that looking up additional images of the garments online is almost required in order to make any of them.

I really love the scaled pattern diagrams of each garment (two pages), the inclusion of contemporary images and fashion plates (most of one page per garment), and the description of how the garment is assembled (also most of a page). Each garment also gets a colored photograph, and a pencil sketch. The problem I'm having with making any of these garments is the lack of comprehensive images: the line drawings are front-view-only, as worn, and the photograph is always a detail shot. While this is great for seeing the fabric (and occasionally the interior), not seeing the whole thing is really hard when you're trying to actually construct something. There's a ~3" tall line-drawing of each finished garment, shown from the front only as it is worn, but that's like trying to sew from the image on the back of pattern envelop (with no back view included).  The assembly information is descriptive rather than instructive--which makes perfect sense, but also makes internal and back views more necessary, for figuring out which seams should cross over which others, etc. Particularly for things like figuring out how to fasten the bib-front dresses (pins? buttons? additional ties?), there is simply not enough information included in the written instructions, and not enough back or internal views of the finished garment (photograph or sketch) to answer the question.*

The format begs for comparison to the Patterns of Fashion books: I think that Regency Women's Dress makes a nice addition to this genre for its narrow temporal focus, and inclusion of multiple garment types. I also like the color photographs of garment detail and the use of contemporary illustrations for context; but I think that the lack of detailed whole-garment sketches makes this book harder to use than Patterns of Fashion

Stars: 3**

Accuracy: Very high. All original garments, with some useful context.

Difficulty: Advanced. Additional sources or a lot of assembly know-how will be required to make the garments (above the usual 'scale and fit' skills).

Strongest Impression: Potentially a nice all-in-one reference for Regency/Empire styles, including undergarments, dresses, and some outerwear. However, there isn't quite enough construction information (and/or detailed images) to make the garments without consulting additional sources. A good reference for costume designers, and almost an amazing one for reconstruction sewing.

*For the other garment I've tried so far, a chemise, an internal photograph of the sleeve seams would have make construction infinitely easier. The written description of joining the sleeve to the main garment was almost impossible to follow: the sleeve is encased in the two-layer strap, and that is then sewn to the front/back pieces.  How, then, is the sleeve attached to the front/back without leaving a weak raw edge or a lumpy transition to the felling?  A photograph would have solved this instantly: instead, I spent a lot of time trying to find photographs of similar pieces, and finally ended up sewing several half seams, tacking down other pieces, and going back to finish seams out of order. Even so, there's a slight lump where the sleeve seam allowance transitions from being faced to being felled.

**I revised this down to three stars after attempting a further three garments from this book. Between scaling issues on the stays, a lack of fastener information on the bib-front dress, and sorely needed construction explanations on both gowns, this is simply not an easy book to use. You really need additional sources (or, ideally, a picture or sketch of the interior and back view of the garment) to actually make most of the garments I've attempted.

Wednesday, August 8, 2018

Waistcoat, 16th Century

Blog backlog continues, because the universe conspires to ensure last-minute event sewing, but doesn't always allow time for photographing the results.

My Tudor kit, such as it is, is largely comprised of light-weight linen (being primarily used in August). Thus, my first June event fell on a cool, damp weekend, which saw me sewing a single wool garment by campfire-light, as the rain closed in.*

Tudor Tailor 16th Century Woman's Waistcoat
Waistcoat. It's actually a burgundy color.

The waistcoat pattern was drafted from The Tudor Tailor. I opted to include the wings, and the used the straight collar/cuffs. The material is a dark red wool from Pendleton, with a full lining in linen.  I used black size 2 hooks for the fastenings, inspired by the Amsterdam examples.

*I proceeded to wear the said garment next day (pinned close for lack of hooks), while helping start a new fire in the said rain.  A month and a half later, I finally managed to sew on the 12 hooks.

Friday, November 13, 2015

Girl's Wool Hood, 1850s/60s

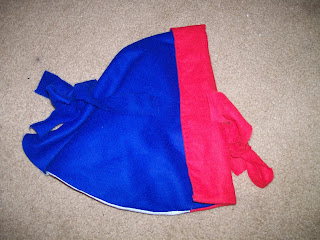
Today's Fort project: cutting out hoods for winter wear.  I even got one finished:

Girl's wool hood, 1850s-1860s, from Sewing Academy "Quick Tufted Hood" project


The pattern is Liz Clark's Quick Tufted Hood (instructions and the sunbonnet pattern it's adapted from).  The first one I made has no batting, just wool with cotton lining and a wool contrast facing, so I skipped the tying step.  It works on this small of a garment, but a larger hood would probably benefit from the added stability tufts or quilting.

Monday, November 2, 2015

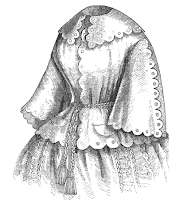
When to Wear a Jacket (1858)

Over or morning jacket, Godey's, October 1857
Over or Morning Jacket, Godey's, October 1857
Hints on Jackets--When to Wear Them
by Mrs. Damas

Few things that we wear are, in my opinion, more comfortable than a jacket. There are various sorts, morning and evening-jackets, for young and old; but what I would first wish to call attention to is a comfortable jacket, one that can be worn at any time, the first thing in the morning, and the last thing at night. Mothers of families would do well to have such a one. It is a common practice with many to draw on a shawl; and, as this is generally done in a hurry, it rarely covers the chest, and requires one arm to hold it on. The jackets I now speak of are within reach even of the poor. The skirt of an old gown, washed, will make a very good one; and to a poor woman it would be a very charitable gift, not to mention the great comfort of it. There can be no difficulty in deciding which looks best, an old shawl put on in a hurry, or a tidy-looking loose jacket, even if made of an inferior material. For the bedroom or house, a washing material should be chosen. If colored flannel is too expensive, a thin wadding put in between the lining and outside is warm and comfortable. Brown calico is sufficiently good and warm for lining, should that be preferred to wadding; but for invalids, wadding is lighter. These jackets are by no means intended to fit the figure, but merely to sit easy and comfortable. To invalids, they are a great comfort to slip on if they have occasion to go into a cold room, or to wear under a shawl. A girdle or ribbon may be tied round the waist where additional warmth is required. Many ladies, as the winter comes, on give presents of warm petticoats, which are certainly a comfort. But still a substitute is wanted for the woman's thin cotton body at top; and what better substitute could be offered than a warm jacket? For children nothing can be so good as a jacket. It leaves their arms free, which is of great importance to them. Indeed, to obtain this freedom, they frequently throw off a cape or shawl, and thus expose the chest and neck, both of which require to be kept warm. Many persons have only one fire to sit by, in which case, should there be four or six in the room, it is almost impossible for one or two not to feel cold. Let those that do slip on a jacket, and they will then feel as warm as those near the fire. I by no means advocate wrapping up too much; but when occasion requires a little extra warmth, I think that all who know the comfort of it would say that nothing can surpass the jacket.

-Godey's Lady's Book, September 1858  (page 268)