Showing posts with label draping. Show all posts

Sunday, December 29, 2019

Black Ground Calico Dress

Final adjustments are underway, but here's another of my autumn projects for the annual 12-Days-of-Christmas-Blog-Backlog-Reduction-Blitz. It's a mid-19th century reproduction dress (mid 1850s to early 1860s), with gathered bodice and bishop sleeves.

My camera gets weird about dark ground
fabrics; in person, it's quite cute.

Sleeve close-up, showing the colors better.


Tuesday, August 22, 2017

Dotted Swiss Basque, c.1855-1856

"A simple white dress of spotted muslin has been made up the skirt trimmed with three deep flounces with a border of pale blue ribbon set on in a vandyked pattern. The corsage is high with a low inside body and has a basque as well as revers or bretelles of the muslin drooping very low on the shoulders. These the basque and the three frills which form the sleeves are trimmed with ribbon to correspond with the skirt below which is a fall of Honiton or Valenciennes lace. A blue sash ribbon with bow and flowing ends." -Godey's, June 1856
Mine isn't nearly so fancy, but I like the elaborate details that went into this "simple" dress. Also, it documents the use of swiss dot in basques.

This thread at the Sewing Academy inspired me to make a sheer, white basque for summer Fort wear. For reference, the first two photogaphs on the conversation are these:

Attributed to "Albert Bisbee, OH, 1850s"
Posted at Jessica Dean By Design

"A Brazillian Woman and Her Baby, 1855"
From The Wikimedia Commons

The basques are both quite sheer, and the top one shows separate 'bodice' and 'skirt' portions on either side of a self-fabric waistband.

My white basque.

As darting the material seemed untenable, I opted for a waist-band on mine as well: it allowed me to control the bodice fullness with a series of small pleats.  The 'skirt' portion was drafted off my velvet basque, and flares a bit more when worn than it appears above. It is, however, a bit scantier than I would like. The lace along the sleeve, neck, and skirt edges is from Fine French Laces, and is based on the finishing shown in Looking for the Mail Packet. Per that painting, I left my basque unlined, and wear it over the detached lining that I use with my yellow sheer dress.

Monday, May 1, 2017

Brown print yoked dress, 1850s

I could use another washable dress for dirty work at the fort, and haven't made an adult-sized yoke dress before. This should fit the bill nicely:

Brown cotton yoked dress for 1850s wear
It really shouldn't show the dirt.

Full yoked bodice, bishop sleeves, and gauged skirt (all self-drafted). Fastens at center front with hooks and eyes, and at the wrist with shell buttons. The print is the brown floral from Marcus Fabrics' "historical stripes" line; lined with white muslin, scrap fabric facing.

Sunday, August 7, 2016

Tudor Ensemble

Today I dressed 16th century for the first time, in order to accompany Elise to the local Ren Faire. Though originally aiming for the early-mid century (late in the reign Henry VIII), I ended up making a few basics from The Tudor Tailor.  It turned out that Elizabeth I was holding court, so the lack of specificity served me well.

16th century smock and kirtle
Smock and kirtle.  
In addition to the smock previously described, I made a side-lacing kirtle with gored skirt.  The material is a brown linen-cotton blend (mea culpa) that I picked up at Hancock's a few years back.  The skirt is all hand-sewn, as are the eyelets and bodice finishing, though I did use a machine on some of the internal bodice seams to save time.  The bodice is lined with linen, and its front is interlined with canvas and more linen.  After wearing it once, I determined that some boning is needed along the eyelets to keep them from collapsing in an unsightly manner.  Otherwise, I was pleased to find that the canvas provided sufficient support.
Headrail, worn with 16th century attire.

The head covering I chose was the headrail, a square yard of hemmed linen; it worked incredibly well to keep my hair up and out of the way.  The hairstyle was two braids crossed around and over the head; the rail was folded and pinned over the hair. The Tudor Tailor explains how to do this, with illustrations. What surprised me most was that the rail--with one hairpin, two straight pins, and two linen strips--kept all of my hair up for twelve hours without needing adjustment.

Rounding out the ensemble, though un-pictured, are a pair of knee-length linen bias-cut hose (blue, of course), a small drawstring purse worn inside the kirtle, and a rough pair of leather turn-shoes.  I consulted Grew, de Neergaard, and Mitford's Shoes and Pattens for background on the latter, but as it's latest finds date from c.1450, it's at least a half-century out of date for this project. Pratt and Woolley's Shoes (VAM) was more helpful, as it includes two shoes from the 16th century, though both are men's.  It's noted that women's shoes follow similar, though less ostentatious, lines.  Even with the leather soles glued on to the sewn cloth ones (yes, that's why they're no pictures, it was rushed and very amateurish), the shoes held up all day, and even resisted the rain until the tail end of the event.  I didn't finish my garters in time, but two strips of torn linen tied in garter knots sufficed.

This outfit is still very much a work in progress.  Before it's next outing, I intend to add sleeves to the kirtle (laced at the shoulder), bones the side opening, and more eyelets. There will also be proper shoes, an apron, and hopefully a gown to over the kirtle.  I'm thinking green...

Saturday, December 5, 2015

Velvet Basque or Jacket, late 1850s

Inspired by this image, courtesy of Jessamyn:

19th century photo of woman in velvet jacket with deep lace trim

This very long basque--or highly fitted jacket--appears to be made of velvet, based on the way the light hits it.  The color photographed dark (making white and blue unlikely candidates) and the lace is almost certainly black.

The waist-to-floor distance in the image is approximately 1/3 basque material, 1/3 lace and 1/3 plain skirt; with the 18" lace I had, preserving these proportions would give a dress almost 10" longer than I can wear.  To compensate, I decreased the top "tier" (ie, shortened the basque's below-the-waist length), which should give a visually balanced look while allowing me to walk.

I made mine up in black Manchester (cotton) velvet from Wm. Booth, Draper. After consulting with the lovely denizens of the Sewing Academy, I opted to flat-line the black velvet, and bind the edges with black silk; for now I skipped the front buttons, but may add covered buttons of black-silk in the future. Black silk was also used to line the open sleeves. I opted to not include the lace on the sleeve ends, as I didn't want to cut my piece of lace.

To start, I took a fitted bodice toile, and lengthened it to the desired basque distance.  Darts were let out below the waist, and the extended seams were curved outward, to accommodate skirt volume. The excellent Mrs. Repp fit this rough mock-up to me, making the pattern.  Sleeve was self-draped, cut with minimal fullness through the upper arm, but curving out toward the wrist into a large "pagoda" shape.

Following Miss Leslie's advice, the piping is done in the black silk rather than the velvet:
"Never use satin to cover cord. It ravels too much. Velvet and satin should be corded with substantial silk. If you cannot match the exact shade, let it be darker rather than lighter." -The Behavior Book, page 82
And voila:
Black velvet basque/jacket with silk binding and lace edge.

After the Nisqually and Steilacoom Christmas events, I'll probably re-cut the center front to straighten the line below the waist (got wonky when I took in the waist). and will experiment with decorative button placement.

Tuesday, May 5, 2015

Semi-sheer print dress c. 1865

And now, the final installment of the '65 dress adventure (which included two research posts and was aided by original images from members of the SA).

Reproduction 1865 semi-sheer en tablier dress.
Please excuse the wrinkles; the dress was worn three days in a row and then traveled halfway across the country.
Elements specific to 1865 include:
  • Coat sleeves (open, shirred)
  • Gored skirt, longer and fuller towards the back
  • En Tablier decoration on upper skirt
  • Waistband, slightly elevated
1865 Semi-sheer dress, front view.
Front
Neck ruffle on semi-sheer dress.
Shoulder and neck ruffle
Open shirred coat sleeve.
Sleeve
Upper skirt piece.
En tablier upper
Gored en tablier skirt.
Skirt, side view
The narrow, self-fabric ruffle along the "collar" is seen on some sheer dresses. The bodice and sleeve are self-draped (shirred sleeve design from The Dressmaker's Guide). Gore layout and pocket based on an 1866-1867 dress in Janet Arnold's Patterns of Fashion II; the gore-cutting method is from an 1875 diagram reprinted in the same book--originally from How to Dress Well on 1- a Day, if I recall correctly).  The en tablier piece is my own design, attempting to copy the originals linked previously, particularly this one.

And here's the dress as worn, complete with undersleeves, silk belt, mourning badges, and shawl:
Semi-sheer 1865 dress, worn.
Outside Union Station, Springfield, Ill

Friday, April 24, 2015

Black Plaid Cotton Dress, early-mid 1860s

Partial follow-up from the 1865 dress research post and redux: Mom's dress.

Black plaid shirting dress.
Bias waistband/cuff and pleated skirt details.


I decided to opt for a relatively plain and conservative approach to this dress, various reasons of persona, fit, and the wearer's comfort.

Classic elements of the period:
  • Bishop sleeves
  • Pleated bodice with jewel neckline
  • Manipulating the plaid fabric for self-trim (waistband and cuffs)
  • Piped neck and armsythe
  • Skirts balanced at the waist; faced hem 
 Stylish elements for 1865:
  • Small "stand up" white collar and narrow white cuffs (to be added)
  • Waistband at the elevated 'fashionable waist'
  • Skirts set fuller at the back than at the front; worn over petticoats set fuller to the back than the front (with a small tournure, or "dress improver" to help simulate the elongated cage of '65)
The skirt is knife-pleated (admittedly unusual for a cotton in the early '60s) to emphasize the plaid and to mimic the fashion for pleats in gored skirts, which are apparently ubiquitous by '65.  Gauging is falling out of favor, but pleating a non-gored cotton skirt is still sort of iffy, as far as I can tell.  The good news is that I can easily re-set the skirt with gauging for future re-use.

The front closure uses hooks and eyes.  One side pocket, taken from the design for a '66-'67 dress in Janet Arnold's Patterns of Fashion II.  Bodice and sleeve custom-draped.

Thursday, April 16, 2015

1865 Dress Research, Part II: Skirts and Skirt Support

More thoughts and sources since the first iteration.

Pictures provided by K. Krewer at the Sewing Academy got me thinking along the lines of layering the skirt (the striped silk in my first research post also had the "en tablier" front, but with a back bow instead of the puffs in Mrs. Krewer's example).  It's a cool effect, and one I'd like to try if I can make the fabric (metaphorically) stretch.

"The petticoat is ornamented with the same lace as the train, sometimes in flounces, sometimes in puffings or bouffons of tulle, sometimes en tablier, that is, down either side."
-Description of Court Dress from The Habits of Good Society, 1865

(In this context, the "petticoat" is meant to be seen... because Court Dress.)

The same term 'en tablier' is used in 1864 (in the February issue of Harper's New Monthly Magazine) to describe a morning costume with a contrasting front panel.
En tablier dress, Frank Leslie's, August 1865.
From Frank Leslie's Ladies' Magazine and Gazette of Fashion, August 1865 
"Dress of black silk, trimmed en tablier with a wide band of violet silk."

The French, however, seem to actually mean 'apron-shaped' instead of  'open/contrast panel' when they use it:
White taffeta en tablier dress from La Moniteur de la Mode, 1864.
La Moniteur de la Mode, December 1864
"La jupe de taffetas blanc forme bien la traîne, elle est ornée d une haute dentelle s'arrondissant derrière en habit-traine et en tablier plus court devant."

For the less high-fashion minded, here's what Peterson's had to say about dresses in February 1865:
Fashion description from Peterson's, February 1865.
Summary: High waists, waistbands, gored skirts, and narrow sleeves.

As for what's going on under those skirts (forgive the expression):
Crinoline description from Peterson's, February 1865.
Peterson's, February 1865
Crinoline description from Peterson's, May 1865.
Peterson's, May 1865
Elliptical covered crinoline, Der Bazar, March 1865
Der Bazar, March 1865
Footprint of elliptical covered crinoline, Der Bazar, March 1865
Footprint of the above hoop (Der Bazar, March 1865)
Gored petticoats to support gored skirts, and the crinoline shape itself is morphing along similar lines (fuller in back than front; less "bell" and more "conical"/"pyramidal" in shape, with an egg-shaped footprint instead of a round one).  As I'm not about to make two new crinolines for one event, I'm working on some gored and/or full-backed petticoats (with a small 'tournure'/'dress improver') for use with with my existing cages, to simulate the full-back look.  My 1865 persona is apparently an economically-minded woman who already has a perfectly serviceable cage, and is being cautious about this new 'fad' in skirt shape, while trying not to look too out-dated.  

Thursday, January 15, 2015

Regency/Empire Stays, Part I

Picking up from last year, I'm finally making up the 1820s stays from Period Costumes for Stage and Screen. According to the notes, the original on which the pattern is based was made of double layers of cotton and linen.  It was also, very frustratingly, in almost my exact dimensions--but the schematic had been slightly sized-down for the book. :(

Step 1: Resize the book diagram.  The length, underbust circumference, and waist measurement are close enough to leave as is (for the first draft), but I definitely needed more space in the hip and bust. As a rough approximation, I took the difference between my measurements and the pattern pieces, divided by 4 (there being 2 gores per side at both bust and hip), and increased each individual gore by the resulting value.  To increase the gore, I slashed it down the middle, and pivoted the two edges out until the additional space was accommodated.
Pattern pieces and wooden busk for 1820s stays.
Front, Side, and Back Pieces (with wooden busk).  Not pictured: triangular gores and shoulder strap.

Slashed and expanded gores for corset.
Slashed gore on right, expanded version on left

Step 2: Make the muslin.  This was made in 1 layer, except for the front (which needed two layers to form the front busk pocket).  Since I often need extra length over the bust, I used two different sized gores on the initial fitting: both were expanded to the width I expected would be necessary, but on one side, I lengthened the gores by an inch.  Featherweight boning was basted along the boning lines, where double layers weren't available to make channels, and eyelet tapes was basted along the back for trial fitting.
Eyelet tape damaged after lacing corset mock-up.
Exhibit A: In which I remember why I don't use eyelet tape.

Step 2A: Fiddle with the fit.

This got very frustrating, very fast.  (Lacing up a corset from behind, while wearing it, is enough to put anyone in a sour mood--I'll look into longer laces to expedite the process in the future). The obvious first problem was that the back hip wasn't full enough, while the front/side was a little too full.  So, I pinched out the excess in the side gore and slit the lower part of the back panel.  In draft 2.0, this new, third gusset was shifted to the side-back seam, as I prefer sewing gussets between panels.

The bust was a whole 'nother mess.  The main problem, I discovered (thanks to some help from the Oregon Regency Society's stays fitting advice) is that I was trying to adjust the bust before determining the strap length.  Need to reverse the order there.  In any case, even the lengthen gores were still 1/2" too short--and they also needed to taper slightly towards the top for a close fit.  Also, they were too far forward: all the extra room was going to the front, with none to handle side fullness. Frustrated with the re-drafting, I finally draped the needed cup-shape (lower half only) and expanded the triangular front panel so that the side seam falls to the outside of the bust (instead of awkwardly over it).  This was accomplished by measuring from the center front to the side bust along the underbust line, and then re-sloping the front panel through that point.  To get a better gore shape, I superimposed the draped 'cup' over half of the new front piece, and pinched out fabric until it lay flat within the boundary of the front piece.  I traced along the pinched out portion to get two darts (the difference between the needed amount of fabric and the portion supplied by the main body piece).
Revised front panel for 1820s stays, with stitching lines marked.
New, expanded front panel, with marks for busk placement, trapunto corded quilting, and bust gores.
Cup and gore sizing.
Draped "cup" and resulting gores.  The remainder of the "cup" material will be provided by the sloped front piece.
Adding seam allowances to the new bust gores, I cut out new front and back sections (the side piece was alright), added the back hip gore (starting with the basic shape used on the other two), took in the side hip gores by the amount pinched out, and set in the new bust gores.  Most importantly, I fastened the straps, using string to make the front adjustable  for fitting.
Front of Regency stays mock-up.
Mock-up 2.0, front
Side view of early 19th century stays (mock-up).
Mock-up 2.0, side
Fitting Success!  Selfie not included.

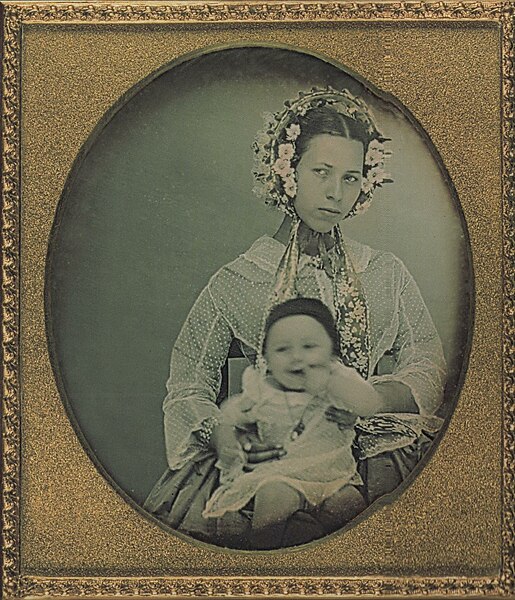
And for some uplifting inspiration, here's a beautifully embroidered corset, circa 1820-1839 from the Met.  Next time, I just may have to try using single bust gores.  With embroidered birds.
Embroidered 1820s/1830s stays from The Met.