Showing posts with label millinery. Show all posts

Sunday, December 1, 2024

Original: Black Crepe Bonnet, c.1880s

Bonnet, 1880s, from LACMA.
 

I selected this bonnet because I like how the crepe photographed, with its diagonal stripes coming through clearly. The bonnet's plain aesthetic is suited to the purported use as a mourning garment, which is further supported by the extensive (exclusive) use of black crepe as a material.

Tuesday, May 30, 2023

Soft Crown Straw Bonnet, 1858

From Frank Leslie's New Family Magazine, October 1858:

WILDE'S HAT--This pretty hat is in a style which is just now very fashionable; the groundwork is of fine white Belgian straw surrounded with a border of plaid velvet with a cap crown also of plaid velvet separated into puffings by narrow bands of velvet edged with lace. Encircling the crown is a row of rich Chantilly lace, which nearly covers the straw front, the points just touching the velvet border. Very wide strings barred with velvet, side ruche and bandeaus of small mixed blossoms completes this handsome October bonnet. 


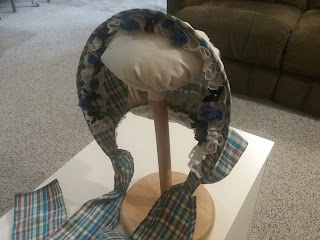
Plaid silk velvet not being an option, I decided to use a silk tafetta for the crown, binding, and ties. I also changed the color palette to be more spring-like, with white lace and white velvet ribbon. The front flowers are not visible, so I chose to use a mixture of blue cornflowers and violets for the "bandeau of small mixed blossoms." I omitted the lace from the edges of velvet ribbon because I couldn't get the scale to look right. The picture seems to suggest a sort of double-layer curtain, but as this is not confirmed in the description, I decided to keep it a simple single layer.


Back view.

The pattern is based off of one of the Timely Tresses round '50s bonnets (possibly the smaller cutting line on the Ada Gay). The brim is machine sewn from hemp braid. The rest of the bonnet is hand-sewn. The ties are narrow-hemmed strips of the same taffeta used for the crown, binding, facing, and bavolet, with both curtain and crown lined in cotton net for extra body; I believe this fabric came from Portland's Fabric Depot. The lace overlay and frill are both cotton levers lace from Fine French Laces.

From the front. The flowers aren't so dark as they appear.


Thursday, September 1, 2022

Original: Fancy Plait Straw Bonnet, c.1855

Bonnet, c.1855. From The Met.

 I've been looking for straw hat ornaments in situ, and this fancy-plait bonnet is one of the better examples. "Better" in the sense that I could see myself attempting to copy at least some of the brim elements, especially if I can get a higher resolution image...

Monday, August 29, 2022

Straw Hat, Rustic Plait

I really needed a lightweight sunshade for Faire, and decided to sew another straw hat. The inspiration for this piece was a particular painting (more on that anon), in which a peasant woman in a market scene wears a wide-brimmed straw hat with no appreciable crown. The hat instead looks like a very shallow basket turned upside down.
 
Top view of the hat.

The hat I made is fully hand-sewn from 20 yards of (commercially-plaited) straw in a 4-strand whole-straw rustic plait. It was sewn freehand, though I blocked the crown flat repeatedly during the early stages of sewing. The sewing process took about 34 event-hours, during which this hat was my main project.

I had intended to block the whole hat over a large, shallow dough bowl of the desired shape, but found that the plait tended to curve downwards naturally as I sewed it. In fact, all of the shaping after the first seven rounds (which were blocked flat until the hat got bigger than a dinner plate) came from the natural curvature of the straw as I tried to sew it as flat as possible. I'm tempted to use it for rougher working impressions at the Fort, since I can document the idea of a flat, home-made, straw hat as a harvest-time sunshade in the 1850s--and 'make a flat hat without a block' is precisely what I was doing here.


Side view showing the epic shape.

Despite the shape, I found that the straw tends to cling to my hair/coif, and will generally stay put. It's not up to really brisk walks, wind gusts, or bending over to drive tent stakes, but I managed to wear it a whole weekend without any fasteners. I'm tempted to add some woven tapes to the underside (probably to tie under my hair), but the hat does work as is. The whole-straw is heaver than the last hat I made, but lighter than any other reproduction hats I've handled (or any material).

I do not have documentation for the origins of rustic plait. My spreadsheet of Victorian sources does not include any citations which mention rustic as being new or name a date of origin; these same sources claim that whole-straw plaits originated in the 16th century, while split and double plaits were more modern inventions.

*I had remembered this painting as a Bruegel, though I can't find the exact image online, and will need to borrow the book I saw it in to confirm. In my search, I did come across other depictions of straw hats which aren't wholly dissimilar.

Sloping hats from Bruegel's Charitas (1559)

Most of Bruegel's peasants, however, favor straw hats like those above, almost conical except for a small, flat crown. The Corn Harvest shows two women wearing wider, flatter versions of the conical hat, one being distinctly straw-colored and the other black.

Wide hats in Bruegel's The Corn Harvest (1565)

Aertsen's paintings, in contrast, show deeper crowns on the wide-brim straw hats worn by many of the women:

The Vegetable Seller (1567) by Pieter Aertsen


Wednesday, August 10, 2022

Plain Coif and Forehead Cloth


Plain coif and forehead cloth.


More faire-related wardrobe additions. Having decked one coif and forehead cloth in lace and (begun) embroidering the other, I found myself without any fitted headgear appropriate to my lowly social station. That is, it's too hot to wear a respectable late Elizabethan ensemble, so I need a plain coif  to go with my kirtle/smock/apron combo. I could just tie a rail over my hair...but coifs are more fun.

I used a light-weight white linen for both, with bleached 1/4" linen ties on the forehead cloth and a linen cord for the coif.

Wednesday, May 26, 2021

Morning Cap, 1856

 Revisiting the 1856 cap pattern from Parisier Damenkleider Magazin


This time, I made the cap from a light-weight cotton batiste. It's more opaque than the lawn I used before, and also has more body. It's still light and airy, but sits a little more crisply.

Thursday, February 11, 2021

1858 Morning Cap of Spotted Muslin


 The London and Paris Ladies' Magazine of Fashion, January 1858.


I found this one while looking for dotted muslin sleeve designs a few years ago, and noted it for its simplicity, but never made it because the shape is so unprepossessing. The description of this cap is pretty sparse: "Second do. [morning cap] of dotted muslin, trimmed with scarlet roses and ribbons of the same colour." Fortunately, the structure itself looks fairly self-explanatory: a round flat crown, edged in a ruffle of varying width.


It honestly doesn't look any better made up.


But I needed a quick cap for an online event, and decided to give it a try. It turns out those graduated ruffles are just the thing for ~1859 maximum-width side-braids. It's almost as though really wide side hair is the prevalent look of the time...


Cap doing its floaty thing.


I estimated the proportions from the picture the picture (1 ruffle "header" towards the crown = 1 unit: rest of ruffle is 1 unit at the center top, 3 units at center back, cap is 4 units visible diameter or ~6 units including the part covered by the ruffle). I initially used millinery wire to make a base for the crown, shaping it into loop around the back of the head. However, I really didn't like the way this made the crown either poof up like a mob cap or pull weirdly taut. So, the wire was not used in the final version. Instead, I just hemmed the circular crown, gathered the ruffle 1" from the sloped side, and basted it around.  I figured that using the straight edge on the outside would give a neater finish. 

I cut the ruffle as a single ~60" width of fabric, 5" deep at the center back join, 4" at the sides and 3" at the center front. This included 1" for waste after scalloping both sides on the pinking machine, though the actual waste was closer to 1/2".  To fit my head properly, I ended up enlarging the crown to 8"-9" diameter (it's a little taller than it is wide), though 


I was skeptical of the roses at first.


I used two velvet roses out my stash (originally from Timely Tresses) and the ribbons are two 18" long and 1.5" wide strips of remnant silk with pinked edges. Looking at the image again, I think I could have gone for slightly bigger and wider ribbons to better match the hints of a bow in the picture. However, I actually like how these fit over my hair on the sides. I tacked them in asymmetric 2-loop bows with trailing ends--one side has distinctly longer tails, the other more generous loops. The illustration doesn't show both sides, but wanted to go for the 'asymmetric but balanced' feel of other period headdresses.

Two straight pins at the upper back kept the cap neatly on my hair, but also fashionably far back on the head.

Wednesday, January 13, 2021

Straw Ornaments, c.1850-1870

"Many [straw bonnets] are trimmed entirely with a fancy ornament in straw. A row of straw rosettes ornaments the front and a thick cord with tassels à l'Imperatrice is twisted round the crown."

    --Frank Leslie's 1859


So, I finally started playing around with the rest of my straw-work tools. Which may have lead to trying to copy some of the mid-19th century straw hat ornaments in the VAM. As one does.


Not a bad, until I compare them with the originals...


It's been an educational first attempt. Observations in no particular order:
  • Identifying the different techniques on the originals was much easier than I feared.
  • The actual tools and techniques are pretty straightforward. Most of the beauty and interest comes from combining many techniques to make intricate, precise decorations.
  • Wrapped beads are THE WORST. It's exactly like making thread-covered buttons with no control over the tension, and despite being straightforward and technically easy, I hate it.
  • I need a lot more practice on most of these techniques to get the repetition right.
  • Downloading the pictures allows for much closer views than the "zoom in" function in the web browser.
  • Relatedly, I'm pretty sure the straw-thread "petals" should actually be a three-end ring plait. Also smaller, and seven in number instead of six. I seriously counted them three times.
  • Also the watch-spring rosette should have small flower-shaped straw sequins with beads at the center, not quilled rolls.
  • Most of my favorite designs include at least some die-cut straws, nearly all of them too fiddly to cut out by hand. No idea where to source a 1/4" flower-shaped punch, so it'll be an adventure.
  • I also need to source a straw spinner or figure out how to hack my spindles for straw thread. The hand-twisted versions are just too slow and rough, and I'm not sure how long my source for pre-made will be available. I really like using it, so I need a reliable source for it, especially if I want to start trying the fun lace-work "fancy braids" for hatbands and trims.

And of course, I couldn't resist trying my hand at the best part of everyone's favorite bonnet veil


Prototype bees!

The bees on the VAM veil are two toned: they have a black-and-yellow striped body, with yellow die-cut straw wings, black straw thread outlines, and black glass bead eyes (with a clear bead between). The yellow stripes on the body appear to be smooth and whole, over a more complicated black underlayer. Some of them appear to have black antenna and/or legs, but that might just be the net design fooling my eye. There are also multiple un-dyed straw bees in the technique book I'm using (Swiss Straw Work by Veronica Main), which are implied to be examples in a Swiss museum. They aren't broken down as a project, or even given close-up images, but they follow the VAM bees' two-layer wings and bead eyes. The bodies on these bees are also more clearly textured as knotted straw thread. 

I experimented with two body techniques: a straw thread figure-8 (left and center) and thread wrapped around a whole straw (right). I'm not entirely satisfied with either: the figure-8 is more fun, but it's a little too flat, while the wrapped straw is just a bit too narrow (and also was deceptively difficult to neaten up). I dyed the colorful bee with turmeric (a period receipt) and with RIT dye (not period, because period black dyes are on a whole other level). I have a lot of dyed straw left over, so I plan to keep tweaking the construction until I get a design I like. 

These will probably find their way into my straw-plaiting program on Saturday (time permitting), so please drop in with any questions or comments.

Sunday, January 10, 2021

Plaited Straw Hat

Handsewn straw hat
Hat of indeterminate vintage

It's a completely hand-plaited, hand-sewn hat. Shaped free-hand. The plait is 7-strand "Dunstable" (except not really, because it's quarter-split rye instead of whole straws, but I used the "over 1, under 2" plait). There's about 12 yards of plait in in, and on the order of 40-50 hours work. 

The year is a bit open-ended. I had intended it to have a very shallow crown, similar to one I saw in a Bruegel painting (almost flat, but very slightly convex--suffice to say, that attempt got rapidly out of hand). And while most of my sources do point to 16th century for early examples of plaited straw hats in Europe, they seem to have picked up more in England in the 17th century. However, the splits are a more recent innovation, supposedly dating to the early 18th century, but rapidly multiplying in form and use from the early 19th.  I could use it for working-class, rural 19th century summer-wear, though what little documentation I've found for such humble items suggests a flatter shape would be more likely.

I'll be talking about this project (and a ton of research done along the way), this Saturday at the Fort Nisqually virtual program.

Saturday, December 26, 2020

Blackwork Coif Update

Compared to August, I haven't gotten much work done on this coif, but it seems to fly along as I'm actually working on it. Except for filling in the leaves, which is just annoying and never seem to space neatly. I do like the running stitches and diamonds on the acorns, though (and even the chain-stitch buds are pretty ok). 

A flat 16th century tulip-shaped coif with two rows of embroidered oak leaves and acorns.
Slowly progressing on the embroidery.

My goal for this project is to wear it to the 2021 Goode's Company Christmas Revel, plague-permitting. Wishing for any events before that honestly feels a little too close to tempting fate. Appropriately, I've mostly been working on it during our monthly book-club (virtual) meetings.

Tuesday, August 25, 2020

Embroidered Coif, Design Test

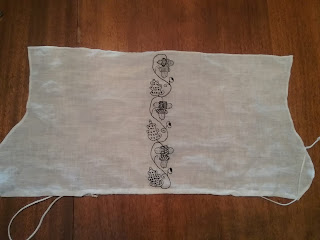
Rectangular piece of flat linen that has been cut and hemmed with curves along the two short sides. Three repeated motifs make an embroidered  stripe down the center. Each motif is an S-shaped vine connecting an oak leave to a cluster of three acorns. The leaves and acorns are sparsely filled in with spaced stitches in lattices, lines, and alternating X and O shapes.
One column down, "2(/2) and 6" to go.

And the coif embroidery commences. The garment itself is based on original coifs dated c.1590-1620 in Patterns of Fashion 4 (it's specifically this coif, though the hair-dressing was less wrong in the version with lace).

The design I selected is an oak-leaf and acorn motif from A Schole-House For the Needle (1624, some designs as early as 1540s). The book only gives the figures themselves, leaving it to the embroiderer to determine stitches and fill effects. I therefore consulted  Elizabethan Stitches by Jacqui Carey for insight into the stitches and how to apply them. While full of lovely examples, and very detailed analysis, all of the original coifs in the book were covered in polychrome embroidery, many with metallic accents. This has given me a lot of ideas about the next coif I hope to attempt--using the wider braided stitches for the vine-like pattern elements and dense infilling of the motifs--but it isn't the single-color, more delicate blackwork effect I want for this project.

The aesthetic I'm looking at is more like this coif and matching forehead cloth in the Met, where the lines are fairly narrow, and the infilling is pretty open (quite suitable for differentiating space in monochromatic floss):
A linen coif displayed on a head form. Coif fits closely around the top, back, and sides of the head; it is decorated all over in an embroidered botanical design.
Late 16th century blackwork coif in The Met.
Looking closely at the coif, the lines seem to be done in a stitch with some width to it, making almost a row of connected dots rather than a long line (possibly a chain or coral stitch, as opposed to a stem, Holbein or backstitch); on the close view of the forehead cloth, it rather looks like a chain stitch. The coifs and forehead cloths on Elizabethancostume.net mention stemstitch, backstitch, and chainstitch among the techniques, though the images are too small to determine which stitches are used where. The amazing squirrel smock, however, does have close up images showing its embroidered motifs are outlined in a stem stitch, with no infill. In contrast, the polychrome coifs in Elizabethan Stitches use wider plaited stitches for most vine-like elements, with chain stitch among the many filling options.
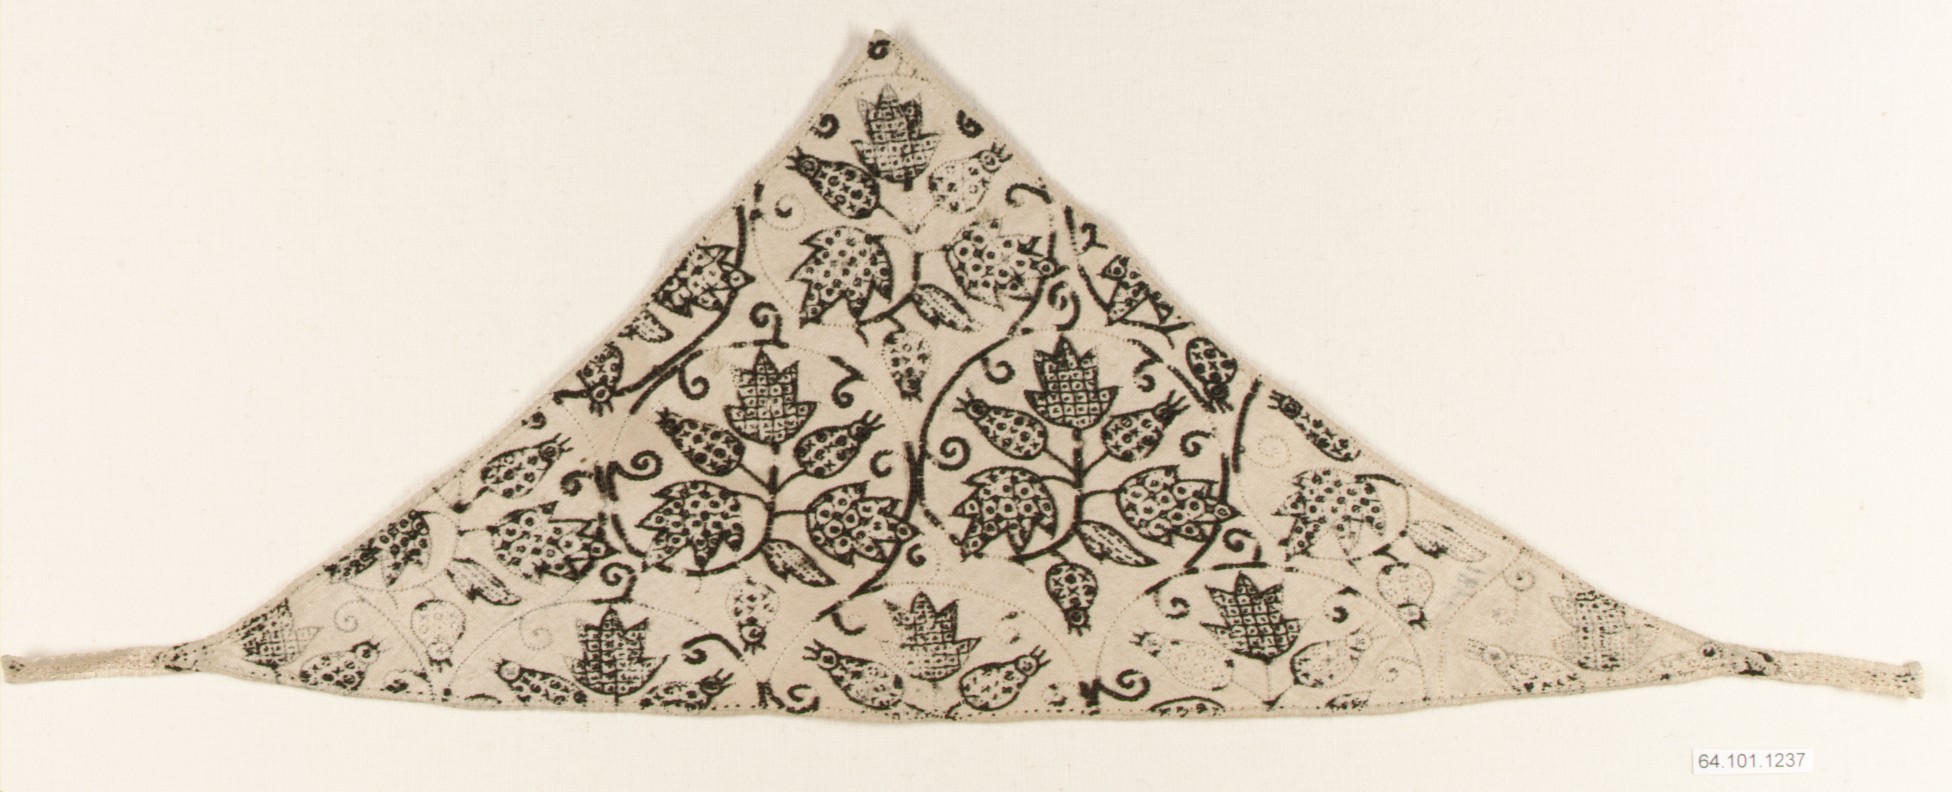
A matching forehead cloth, with good close-up images of the stitching.

In addition to the possibly-chain-stitched outline, the Met coif uses a variety of open filling patterns. The largest leaf motifs have square or diamond grids of a narrow stitch, with dots in the voids (and on the nodes of the diamonds); the fruit/flower element has alternating Xs and Os; and the smallest leaves have rows of parallel dotted lines (suggesting a running or half backstitch).

I decided to copy the squirrel smock and use a stem stitch for the vines and outlines. I borrowed the Met coif's alternating 'noughts & crosses' on the oak leaves, with its broken line pattern on the acorns to suggest the lines on a real one. For the acorns caps, I initially tried infilling the whole cap with a detached buttonhole stitch (from Elizabeth Stitches), but even on such a small area, the effect was too dark. I decided against using a herringbone or other dense space-filling stitch for the same reason. The second method I tried was using spaced Xs in reference to the crosshatched texture of an acorn cap. This worked a bit better, but didn't quite capture the true look of an acorn, while also not affording as much contrast as I would like between the caps and the other parts of the design. At that point, I decided to attempt a diamond grid, like the Met coif (but set closer and thus without the dots). I expected a backstitch to get too messy (it's not my best), and so made each diagonal a whole stitch (tacked at the intersections so the floats won't catch as easily). As far as I know, this is my own invention, but it gives neat, reasonably strong straight lines with minimal waste of silk on the verso, so I think it's in the spirit of the 16th-17th century at least. The buds or immature acorns have chainstitch infilling.

Blackwork embroidery of two vine motives with acorns and oak leaves, and two real acorns for comparison.
Another thing I learned: changing stitches until you get one
you like is apparently a-ok in this sort of work.

The fabric is IL020 (3.5 oz handkerchief weight linen) from Fabric-store.com; the thread is Soie d'Alger seven-strand silk floss from Needle In A Haystack. Even the single strand I'm using looks too heavy up close on the linen, so I'm tempted to try my next overly ambitious embroidery project on the IC64 'luxury' mid-weight. It's fine, but a bit denser, and should make up very nicely perhaps in colored floss with that gold lace...

Tuesday, August 11, 2020

A Very Good Idea

  1. One linen coif.
  2. Five skeins of embroidery silk.
  3. A Schole-House for the Needle filled with early 17th century designs.
  4. A lot of free time.
A plain linen coif next to an open book of embroidery patterns, with several skeins of silk. An iron and a large pincushion in the background.
Not sure how this is going to turn out, to be honest.

Wednesday, July 1, 2020

Original: First Empire Hat, c.1811

Hat, French, c.1811. From the Met.

This hat is perfect. I love the contrasting colors, the helmet shape with tiny brim, the plume-like fabric rosettes, and especially that chin-strap. It's trying so hard to be a military hat, and makes me want to assemble a Regency/Empire-themed marching band. I very much want to see hats like this appear in more Jane Austen adaptations: it's just too much, and I love it.


Thursday, December 12, 2019

Quilted Silk Hood

Silk hood.

From Anna Bauersmith's quilted hood pattern. It only took three years for me to get started, after which it went together very quickly. The hand-quilting took a single weekend event, and the pieces went together in only a few more hours work. Using a machine it could go even faster.


Quilted pieces.

I used a silk exterior, polished cotton to line, and a single layer of wool quilt batting inside. The garment is hand-quilted, using one of the sample designs included in the pattern. The ties are self-fabric, with a rolled hem. Trimmed with white rabbit fur, to match my winter cuffs. I considered adding a narrow trim along the bavolet, but didn't like how it detracted from the quilting (I rather like how it turned out there).

Fur was mentioned as a trim option in the pattern, but my searches didn't reveal many antique examples to use as inspiration. I did find a written reference to a silk hood with chinchilla fur.

I found this hood comfortable to wear, and it kept the water off without crushing my hair. It was a little less warm than previous hoods I've made, as it didn't sit so close to the face. All in all, I am very satisfied with it.

Friday, August 30, 2019

Straw Plaiting Kit

Blue wavy-printed fabric case with a red wool felt needle page and three brown print pockets. One pocket contains a pair of scissors (secured with a purple ribbon through the handle loops), the other two contain two styles of straw splitter. Beside the case is a rounded board with straw plait wrapped around it.
Tools!

I'm rather pleased with my new straw-plaiting equipment. The metal (and wood) quarter-splitters were made by one of the Fort's blacksmith. I sewed the tool roll; the design is my own, inspired by various sewing rolls (and toiletry rolls, and work pockets, and rolled cases for surgical instruments). I'm actually proudest of the wooden spool thing, since I sawed it to size, and rounded the corners with a draw-knife--it's quite fun, and using the shave-horse looks cool when one is in skirts.

Wednesday, August 21, 2019

Wimple Wednesday: Turban Cap, 1790s

After 4.5 months, the whole 'hand sew a new cap every week' business has finally gotten ahead of me. In order to keep up with my other projects, I'm going to start aiming for alternate Wednesdays on the millinery projects.

Part of the reason I missed last week was the 300+ inches of hemming on this 1790s 'turban cap'. The design is from The American Duchess Guide to 18th Century Dressmaking; it's a speculative reconstruction based on the turbans featured in Elizabeth Vigee Le Brun's portraiture.

The author, wearing over loose hair a white linen cap, which has long ties wrapped around it to simulate a turban.
The cap has promise. The hair needs a lot more curl.
And maybe some hair powder...
The outer portion of the cap (including the ties) is 2.5 oz sheer linen, the inner band and lining are 5.3 oz mid-weight.

Wednesday, August 7, 2019

Wimple Wednesday: Elizabethan Hood With Bongrace

Back (once more) to the late 16th century. Cheating ever-so-slightly with a more structured indoor/outdoor headcovering: a hood. The brim is wired buckram, interlined with flannel (in place of the domette), covered in fine black wool, and lined with a scrap of white linen. The back bongrace is pinned up on the top-center of the brim. Design from The Tudor Tailor

The author, in slight profile, wearing a hood. The headdress has an upsidedown U shaped brim (black on the outside, white within), while a trailing black bongrace is pinned up behind.
Still working out the hairstyle. I'm leaning towards the
high back coil, but the coronet braids should have worked...

Wednesday, July 31, 2019

Wimple Wednesday: Early 1770s Ruffled Cap

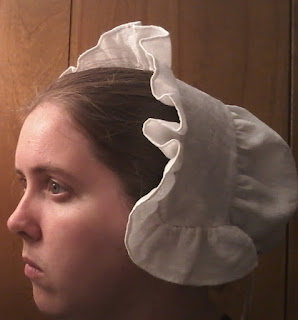
Pattern from The American Duchess Guide to 18th Century Dress. There it's made up in organdy with lace; mine's of sheer linen (from Fabric-store.com, again), and is all hand sewn, as usual. Please excuse my uncooperative hair.

The author, in profile, with a ruffled cap of white linen over the back of her dressed hair.
It's a neat little cap, but my selfie skills, alas, cannot do it justice.


Wednesday, July 24, 2019

Wimple Wednesday: Late 16th Century Coif and Forehead Cloth

Time-warping out of order again. I managed to lose my one-piece coif while re-sizing it, and never got a picture of it worn with the forehead cloth.

Third time's the charm.

The coif pattern is a custom-sized version of the Patterns of Fashion 4 16th/17th century coifs that I used before. The forehead cloth is based on two examples in the Met; both forehead cloths from the last quarter of the 16th century. They are triangular pieces of linen, each 14.5" x 16.5", one of which has short ties on the two corners adjacent to the hypotenuse. Zoomed in, the grain of the cloth indicates that these were cut as half-squares, the long edge falling on the bias.

Coif and forehead cloth.

The linen is, yet again, 3.5 oz lightweight from Fabric-store.com, the lace is from The Tudor Tailor Etsy store, and the ties are (bleached) 1/4" linen tapes from Burnley and Trowbridge.

Wednesday, July 17, 2019

Wimple Wednesday: 1749 Cap

The author, wesring a white linen cap reaching just below the ears, the front and  side edges finished with a 2 inch ruffle of the same linen.
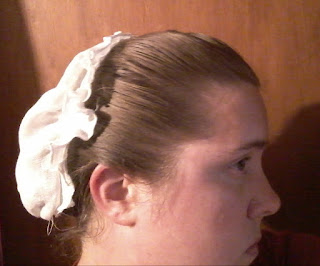
Hair has to be dressed high on the back of the head to fit this one.
Even though I scaled up the caul, as usual.

This cute little ruffled cap is based on styles from the 1740s/1750s, and appears in The American Duchess Guide to 18th Century Dress. Mine is made of 5.3 oz mid-weight linen from Fabric-store.com, and about a million tiny hem stitches. Seriously. Each piece is hemmed along all sides, then gathered over fine linen cords and stitched down. The back drawstring is the linen cord from Burnley & Trowbridge