Showing posts with label novelties. Show all posts

Sunday, April 24, 2016

Fancy Fair

Yesterday was Fort Nisqually's annual Sewing to Sowing event.  Here are a few of this items I made for our "fancy fair":

1) Finished two more beaded bracelets to display.


2) Rolled and strawberry pincushions for the donation table, and some pen-wipers (designs from The American Girl's Book The Girl's Own Book).
Rolled and strawberry pincushions, pen-wipers.

3) More brick pincushions, ditto.
Brick pincushions.


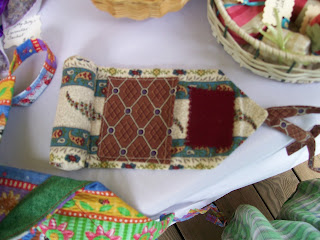
4) A small housewife/sewing roll, ditto:
Sewing roll or housewife.

Sewing roll or housewife, open.


5) For outgoing Event Coordinator Chris, a sewing bag.
Sewing Bag, 1840s design.
The print is from Barbara Brackman's "Alice's Scrapbag" line;
fabric and cotton satin ribbon from Fabric Depot.

Sunday, March 27, 2016

A Brick Pincushion

From "The American Girl's Book" by Eliza Leslie (1831; 16th edition 1854).
Brick Pin Cushion, from Miss Leslie's "The American Girl's Book" (1831/1854)

Step 1: Procure a brick.  It should be clean and new; I took a used brick and washed off the surface dirt.  Miss Leslie would certainly not approve.

Step 2: Cut a piece of "coarse linen or strong domestic cotton" large enough to cover the brick.

Brick and 100% cotton for the base fabric.

Step 3:  Fold the fabric over the brick, neatly, and stitch it down.
Fabric folded and pinned over brick for pincushion base.

Step 4: Cut a bag of coarse linen 2" larger* than the top of the brick.  For a thicker pin cushion, cut the bag a little larger still.
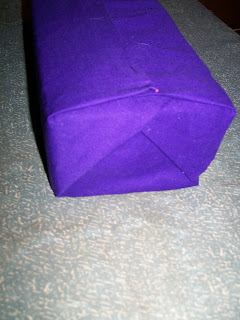
Covered brick and upper pincushion bag.

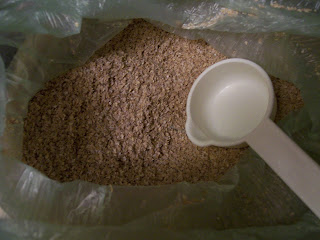
Step 5: Stuff the bag with bran.  Like, a lot--until no more bran will fit, even when pushed down with a spoon.  It took approximately 1 lb. of wheat bran to fill a bag cut 2" longer on each side than a standard brick.
Wheat bran for stuffing the bag.

Covered brick and cushion stuffed with bran..

Step 6: Attach the bran bag to the brick.  It should have a "good shape" with the sides of the cushion sloping down to the brick.  I don't think I quite managed it.
Brick pincushion assembled.
It looks like a loaf of bread.
Step 7: Attach a piece of baize to the bottom of the brick. [Baize, according to Textiles in America is a heavy, felted wool with a raised nap on both sides; it's the fabric used on pool tables.]  Not having any on hand, I used some wool felt scraps from my stash.  This appears to be a cushioning layer between the brick and whatever surface the pincushion is placed on, so I expect different material could serve (a couple of layers of wool fabric, maybe even a thin batting).  I glued the felt into place, though it could also be sewn to the base fabric.

Wool felt attached to the bottom of the brick.

Step 8: Cover the pincushion in "velvet, silk, or cloth" with a "binding of narrow ribbon or galloon" over the seam.  Two colors may be used to cover the top and bottom portions of the pincushion.

Brick pincushion, from The American Girl's Book by Eliza Leslie (1831/1854)

The book illustration showed no seams or binding, just a shadow between the brick and cushion areas (which seems the only logical place for the ribbon).  Unlike step 3, the instructions don't suggest a method for covering, so I just sort of made it up, wrapping the pincushion form like a present, and folding/pinching out the excess fabric.  It resulted in some ugly curved seams at the rounded edges.  Next time, I think I'd make the cover in two parts, folded square around the base, and smoothed over the sloping top, with the ribbon covering the seam where they meet.

Comparing mine to the book image, I see two main differences.  First, the brick used appears flatter and to have a more square footprint.  Perhaps some sort of cobble or small paving stone would give a shape closer to the sketch.  Second, the cushion appears outsized in my version: I now think the "2 inches" difference was meant to be added to the total measurement of the bag, rather than to each side. 

Sunday, January 24, 2016

Needle Book

Reproduction Victorian beaded needlebook.

This lovely gift from Nancy is too adorable not to share. From The Ladies' Hand Book of Fancy and Ornamental Work.  

Sunday, August 30, 2015

Sewing Kit

As a more portable alternative to my work basket, I made up a little rolled sewing kit from Anna Worden Bauersmith's Fanciful Utility. The materials are all reproduction prints out of my quilting stash, plus a few scraps of wool flannel and a little roving to stuff the pincushion.  The box walls and lid are pasteboard, which was left-over from making a hat box. Except for the linings, it's all hand-sewn, which took far less time than expected.

Rolled box sewing case from Fanciful Utility, open

Rolled box sewing case from Fanciful Utility, tied closed

So far, it's very convenient little case: small enough for easy packing and transport, but still equipped with the requisite pins, needles, scissors, thread, thimble, and wax that are so useful to have on hand.  In it's first 18 hours at a reenactment, this case has aided in the alteration of three dresses and two coats.

Thursday, September 11, 2014

Flag Needlebook in Berlin Work, part II

Step 1: Berlin Work.  Based on the originals discussed in part I, I made the flag 42 stitches long x 28 stitches tall.  Each stripe is 2 rows of cross stitch, the blue field is 17 x 14.  I opted to do the stars as single cross-stitches, and went with a simple grid of 32 stars.  I actually meant to do a 33-star flag, on the presumption that my 1860s unionist persona was on a patriotic kick during the spring of 1861, but realized too late that I did the rows as 6/7/6/7/6 instead of 7/6/7/6/7.  So, I now have an 1858-59 style flag.  Go Minnesota! (Sorry, Oregon.)
Cross stitched American flag with 32 stars.

Step 2: Making the cover.  I used a scrap of my 'candy-cane' silk to back the berlin-work, sewing around the flag motif on three sides (fabric right-sides-together) and turning the seams to the inside.  The double thickness of canvas and silk is fairly sturdy, but I decided to stiffen it further by adding a piece of pasteboard between the fabric layers.

To make the back, I covered another piece of pasteboard with blue (tropical weight) wool.  I experimented with using an unsupported back--either flannel or the suiting weight, but decided I didn't like the floppy back with the solid front cover.

Step 3: Pages. The two "pages" are each made from red wool flannel, cut smaller than the cover and edged in white or blue berlin wool (blanket-stitching edge).

Step 4: Assembly.  Both covers were finished (raw edges folded in and closed with a running stitch), and then joined with whip-stitches along the formerly-raw edges.    The "pages were laid inside the open cover, and fastened with small stitches.  Silk ribbon was added to the opening edge to make a closure; additional ribbon was laid over the spine to hide the assembly sewing.  More ribbons on the spine for decoration.


Needle book of an 1858-9 American Flag.
Needle-Book Front Cover

Wool flannel pages in flag needle book.
Inside View

Solid blue back cover of flag needle book.
Back Cover
Excepting the star miscount, I'm largely satisfied with this project.  Next time, I think I'll stick with one flannel page, as this material was fairly bulky, and two pieces folded in half is a bit fluffier than I would like.  Alternatively, I could effect a sleeker appearance by using silk for the back cover.  

Wednesday, June 18, 2014

New Berlin Work Project-- A Flag Needlebook (Research Post)

First, from the New Hampshire Historical Society [1963.062.02] (c. 1861-1863)

Observations:
Worked in tent stitch (the Lady's Self-Instructor in Millinery and Mantua-making... (1853), states that Berlin patterns are always given in tent stitch, but may be worked in cross stitch).

Stitching dimensions: 39 sts tall, approximately 46 sts wide, blue square is 21 x 23 sts.  According to the LS-I, Berlinwork should be done on either 18-count or 10-count canvas--which would give the total dimensions 3.9" x 4.6" when done in the latter, or about 2.2" x  2.6" in the former. The museum gives the case dimensions as 3" x 3.9", which indicates a canvas size of 12-13 stitches per inch.  Apparently, the LS-I isn't definitive for 19th century canvas sizes...

13 "stars" in a grid pattern 3/2/3/2/3, with solid blue border of 2 sts on the sides and 3 rows top & bottom; stars made up of 5 sts in a + shape.

Inside cover appears to be a white silk with woven design.  Red, white and blue 'pages' have a matte finish, and are likely (wool) flannel--the recommended material for needlebook pages in both The American Girl's Book and The Girl's Own Book.  The pages are different sizes and have pinked edges.  The museum gives the material as "textile, wool, silk".

Ribbons in red white and blue adorn the spine.  These will be silk; the upper white loops appear to be the same width as 6 stitched rows, making the ribbon about 1/2" wide (varies with canvas size); the red ribbon at the lower bow looks even narrower.  

The large leaf of blue flannel forms the the back cover, which would explain why it's larger than the other two leaves (same size as the front cover), and why there's a strip of blue along the left-hand edge in the top picture.  A red decoration (embroidery? applied trim?) follows the top and bottom edges of the back.

It is not clear whether the canvas in the front cover has a solid support underneath it.  Looking at the worn places, it seems like the white silk backing is visible through the canvas, though it could be a white paper/paste board in between the two.  From my reading, it seems more typical to make the covers of needlebooks out of pasteboard, with a decorative fabric covering rather than just using the fabric alone.  That being said, my berlinwork cardcase does very well with only silk-backed canvas.     

Second: 35-star needle book (c.1863-1865)

Total size: 26 sts x 50 sts; blue section 14 sts x 20 sts.  Possibly worked in tent or cross stitch (hard to tell).  Stars worked as single cross-stitches in five rows of seven (one-stitch blue boundary between stars; two rows/columns solid blue border).  Each stripe is two rows of stitching.  Dark blue ribbon on binding.  No view of pages or back cover (if present).


Thursday, June 5, 2014

On-Line Patterns for Clothing (American Civil War/ Mid-Victorian)

Getting into this hobby as a broke high school student, and again as a broke grad student (and now continuing as a broke un/underemployed former student), I've spent a fair amount of time hunting for free patterns and resources on-line.  What follows is a mixture of modern instructions from very generous, reputable persons and original patterns from the 19th century (these are not always easy to work with, especially for a beginner).  Since I mostly do 1855-1865 women's clothing...most of the links are for women's clothing of the 1850s and 1860s.

Useful for New Reenactors

The VERY FIRST Thing to Read Before Making/Buying Women's Clothing:
Your Best Bet Wardrobe by Elizabeth Stewart Clark

General Advice on All Things (but especially non-military clothing for men, women and children)
The Compendium The Sewing Academy Forums
Atlantic Guard Soldiers' Aid Society Links (Go for the first person worksheets, stay for the widespread advice)


Patterns & Instructions (& Some Advice) 

Hats and Bonnets
Cost-effective Headwear for All Seasons (advice thread)
Original Soft Bonnet/Hood Patterns On-Line (with my commentary)
Romantic History Hood Pattern (printable, modern instructions)
1861 Knit Hood (Original pattern with modern commentary)

Hair-styling
My Hair Tutorials
Video: Basic Hair (with some alterations to the side-styling, this will get you through much of the 1850s and early 1860s)
Hair Advice (Thread)
Later Victorian Hairdressing (Beautiful step-by-step pictures, but about 15 years post-ACW)
Video: Rag Curls

Chemise Patterns
Mrs. Clark's Chemise Pattern
1860 Chemise Pattern

Drawers Patterns
Draft Your Own Drawers
1863 Drawers Diagram

Corset Patterns
Stays in The Workwoman's Guide (1838/40) [page 80-81, diagram page 327]
"Practical Instructions in Say-Making" in Godey's (1857) [diagram and instructions pages 165-6]
1868 Corset Diagram (Patent)
1869 Corset Pattern

Skirt Support Instructions
A Covered Cage
Cage Crinoline
Another Cage Crinoline (Thread)
Corded Petticoat (Thread)

Petticoat Instructions (Do not wear a hoop without a petticoat--it will look bad)
A Petticoat

Note on skirt supports: Hoops appear in European high society in 1856, and spread quickly--by 1857-8 they're already on the westward trails & America's Pacific coast.  By the early '60's hoops are ubiquitous.  If you're doing pre-'56 events (or are doing 1856, but aren't the Empress Eugenie), use a corded petticoat.  If you're in the 1860s, use a hoop, or select a non-hoop impression (nurse, servant, cook).  Keep hoops away from open fires.

Dress (Bodice) Patterns
Original 1859 Bodice Patterns
Bodice with 3-Piece Back and Coat Sleeves ('60's)
Mrs. Clark's Fitting Instructions
1857 Bodice

Dress (Skirt) Instructions
Gauging a Skirt (No Pattern Needed)

Undersleeves
Undersleeve Instructions

Collars & Cuffs
Draft a Simple Collar (Thread)

Outerwear & Warm Layers
Easy Shawl Instructions
Original Mantle & Cloak Patterns
Original Jacket & Mantle Patterns
1855 Mantle
A Knitted Sontag (and more knitted items for keeping warm)
1859 Winter Cloak

Accessories
Swiss Waist (patterned from an original)
A Basic Apron
1850 Crochet Reticule
Analysis & Dscriptions of Period Hair-Nets

Shoes
Yes.  There are period sources for home-made shoes (ie Every Lady Her Own Shoemaker 1856), but you'll want to buy this item.  See Robert Land Historic Shoes and Fugawee to train your eye, then either save up for the good stuff, or search e-bay & second-hand shops for something passable.  I've heard paddock boots are a possible alternative, depending on your situation.  Things to look for in 'period-passable' shoes: leather upper, low/no heel, fastens with side or front laces or side elastic panel ("congress gaitor"), and square or rounded toe (not pointy).  Speed laces should be removed if possible.
1850 Lady's Slipper (All the fancy work slipper patterns I've seen either have a two-piece upper like this one--a trapezoidal toe-piece with a straight band around the heal, or else a single-piece upper shaped like a bottom-heavy V).

Nightclothes
1859 Nightcap
1859 Nightgown Drawings

Baggage
Pouche Pompadour (elegant travelling bag)
Travelling Bag
Re: Period Baskets (read this before buying a basket; Mrs. Mescher's other articles are as interesting as they are diverse
Toilette Sachets


Looking for something to work on at events?  Antique Pattern Library

New period seamstresses looking for an easier start should buy The Dressmaker's Guide.  I've heard good things about the Truly Victorian patterns, and Past Patterns.  Kayfig patterns are meticulously researched; I've made up their wrapper pattern and found it charming (also, the instructions are a comb-bound book, the first half of which is an illustrated tutorial of period construction techniques). If you pick up Simplicity patterns during the $2 sales, look for the Martha McCain or Kay Gnagley ones--the shapes are good, but the scaling is weird and the instructions aren't always period-appropriate.  I've used several simplicity patterns, but I wouldn't recommend them for a first dress unless you have good spacial sense & really can't afford a more straightforward pattern.

Good luck, and always make a test muslin!

Tuesday, May 27, 2014

Work Basket in Silk and Berlin-work, part 2

"The bottom, which is circular, should be twelve inches in diameter, and covered with light-blue silk.  The side should be five-inches high...This side should be sewed to pasteboard, and lined with silk.  The bag is to be made of light-blue silk; the handles to be cord.  Where the bag is sewed on to the side, there should be a quilling of blue ribbon."

Though good with color, material, and dimension, the instructions are somewhat lacking in method.  I suppose it's time to 'make in the usual fashion'.  What follows is my best attempt to make the pieces look like the picture.

First off, I cut out a lining piece to back the embroidery.  Dividing workbaskets seems to be a common practice (based on Miss Leslie's & Miss Beecher's opinions, along with others I don't recall by name), so I attached pockets to the right side of the lining.  Being short of silk, I decided to do the interior in white linen.  The scissor pockets are in leather, with a loop of silk ribbon to hold a thimble.
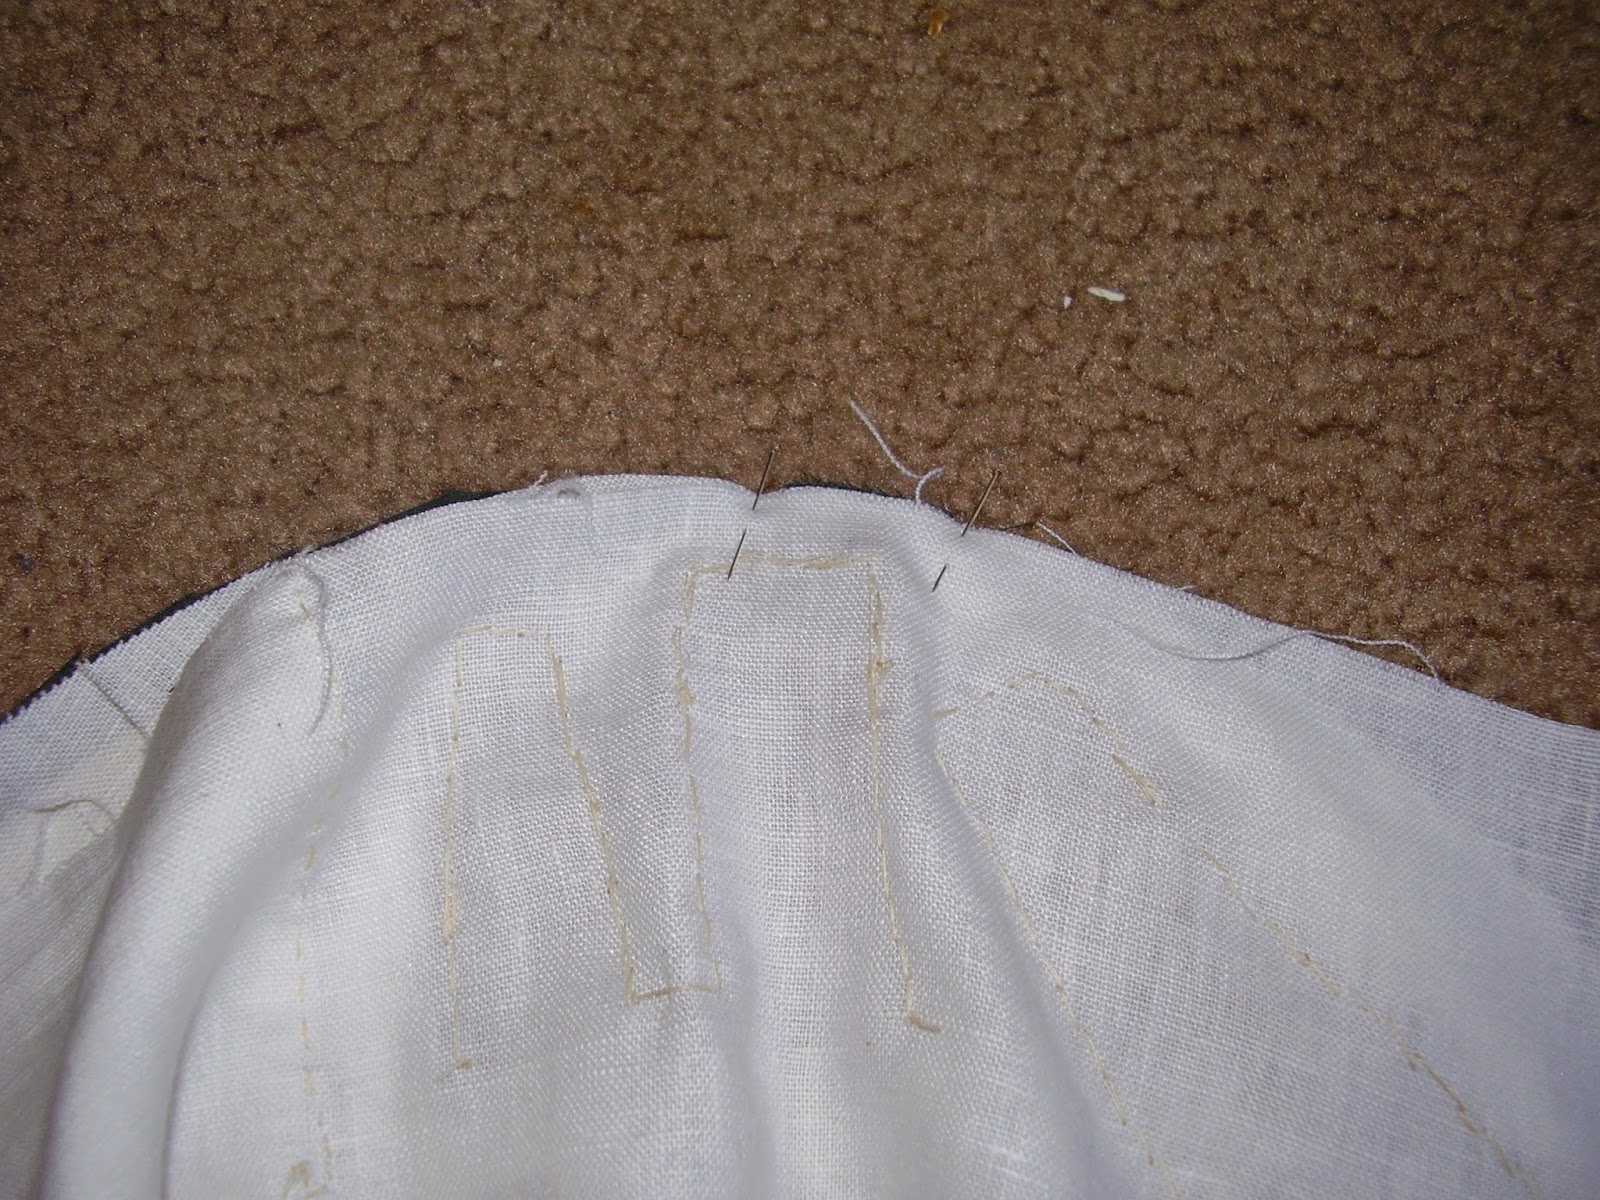
Lining with scissor pockets and thimble loop; Berlin work exterior.Sheers, buttonhole scissors, and embroidery scissors with leather pockets.Pockets in workbasket lining.


(The angle of the largest scissor pocket was altered after this picture was taken; when arranged vertically, the angled pocket didn't suit).

I measured the worked side and divided by pi to get a bottom diameter of 11 1/8", which I then cut out of pasteboard.  The instructions didn't specify a pasteboard bottom, just sides, but I thought the added structure and stability would be useful.  Using this a as template, but adding seam allowances, I cut the silk and linen lining.  I also cut a rectangular piece of pasteboard for the sides, using the worked area of the canvas as a guide.
All fabric cut fabric for workbasket.


With those six pieces to hand, I started actually constructing the basket.

First, the bottom was assembled; right sides out, I attached the bottom silk and lining to the pasteboard circle, using a small amount of bookbinding glue* to keep them in place.
Base of workbasket: silk, pasteboard, linen.
Next, I pinned the linen side lining to the bottom circle (right sides of the two lining pieces together):
Lining pinned to bottom of work basket. 

The worked canvas went on next, with the right side of it to the right side of the silk.  I then proceeded to back stitch along the edge of the Berlin-work, catching all four layers of fabric (canvas, silk, bottom linen, side linen), while stitching as close to the pasteboard as possible. 
Canvas pinned to bottom of work basket.Stitching canvas to work basket bottom.

I started at the center and worked towards the side-seam (not yet made), so that any sizing discrepancies could be adjusted at the seam.  Happily, this only involved the linen lining being a hair too large, and was easily fixed by taking a larger seam allowance on the side seam.

Once the side pieces were closed and fully attached to the bottom, I turned the canvas sides up, forming the basket:
Inside-out work basket.Right-side-out workbasket.
Next, I checked the size of the pasteboard side, and trimmed it for a better fit.  I then glued it into a circular shape (using strips of paper with more bookbinding glue), and allowed it to dry overnight.  The pasteboard was then placed between the side and lining, and the fabric pinned tight over it.
Interior of work basket.
Now the top needs to be added.  From the magazine picture, the silk "bag" portion doubles the height of the 'sides', indicating that it should extend some 5" above the bag.  With seam allowances and a channel for the ribbon-drawstring, I decided to cut the silk 7" wide (length= bag circumference, 35" around + seam allowances).  I cut it in two piece, to fit on the fabric available, and to make the drawstring opening easier, and finished one long side of each piece with a 1/2" channel.

Work basket base with handles, silk upper pieces.


These were then joined (run & fell) at the sides, into a tube; the piece was then back-stitched to the canvas side. The cord handles  were basted to the canvas before the silk was joined, concealing the ends in the seam.  I meant to finish the inside edge by folding over the linen lining, but discovered after attaching it that I neglected to add a turning allowance.  Cotton twill tape was applied over the inside join instead (as this necessitated an additional 36" of concealed hand sewing on a 3D object, I would definitely use the 'turn-over' method if I ever repeat this project).

The cord handle was made using 3/2 perl cotton, following the instructions in Tassel Making for Beginners by Enid Taylor.  From the illustration, I figured on a cord 12" long for each handle.  After some experimentation, I ended up cutting 6 1-yard lengths of cotton to make each cord, which ended up closer to 14" each.
Handmade cord handles for work basket.


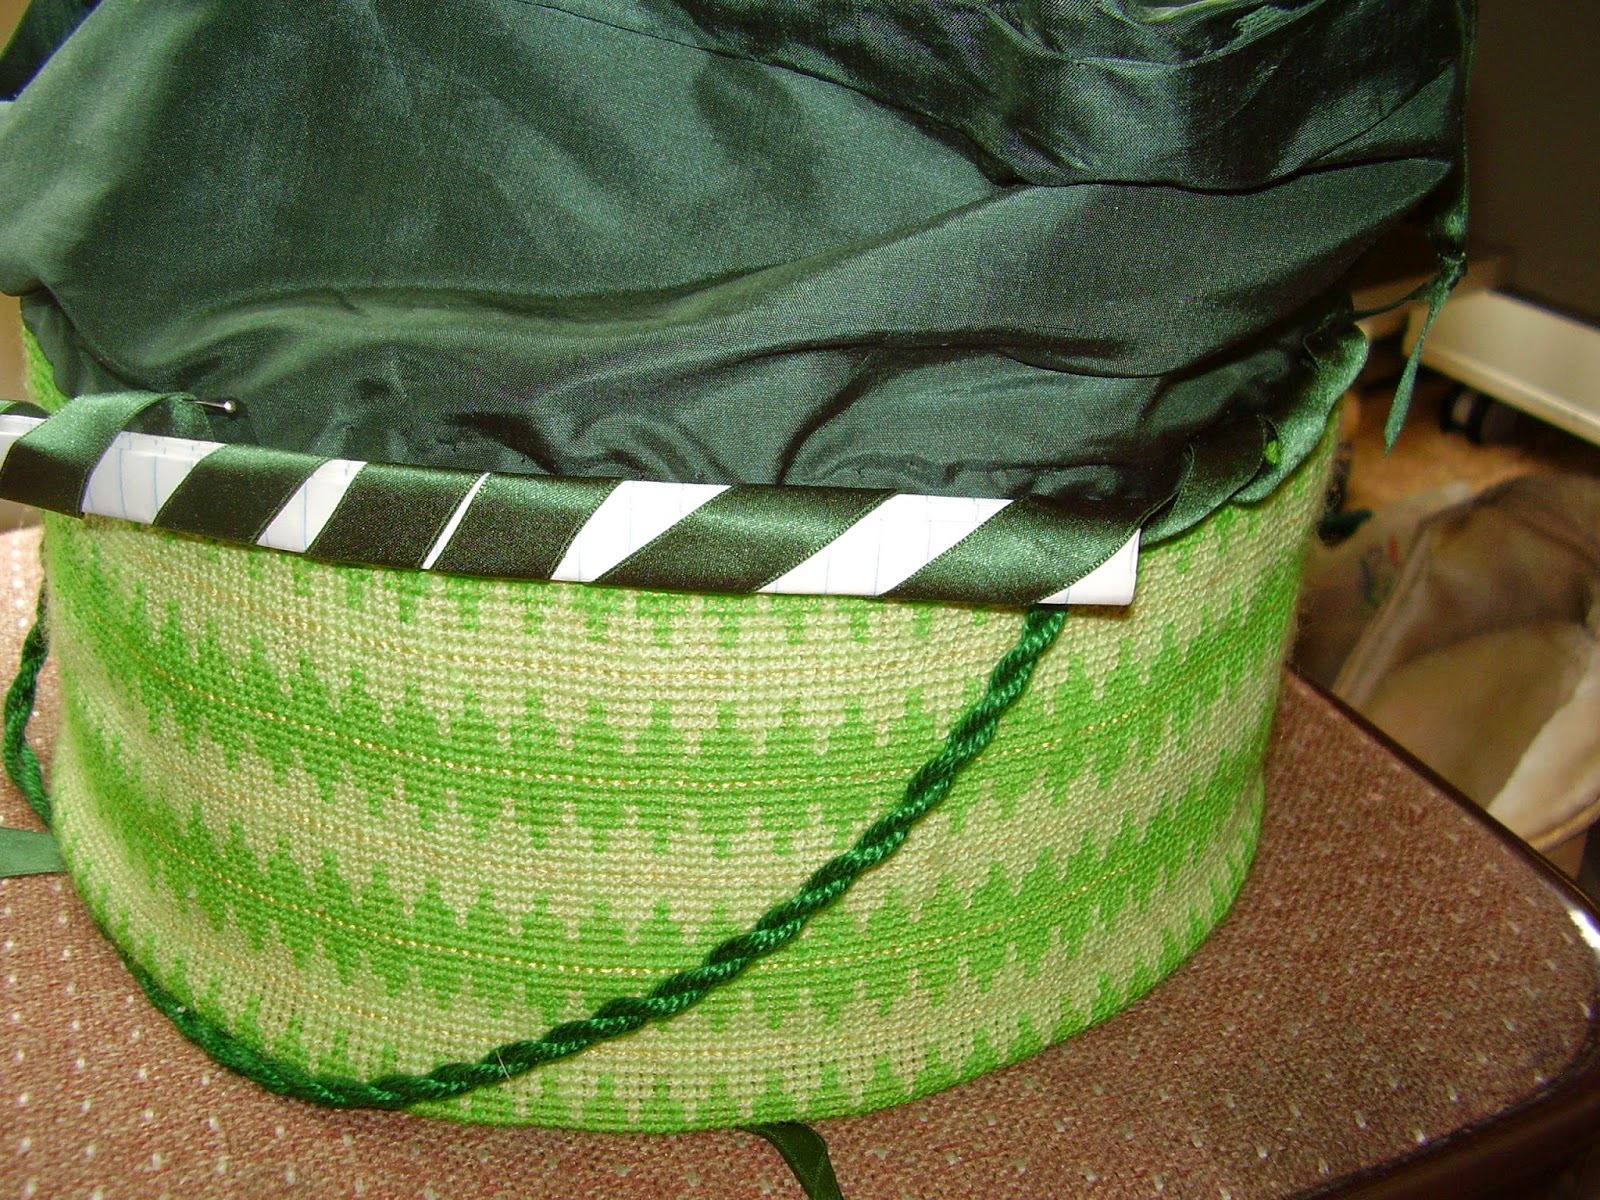
The last piece is the decorative ribbon at the basket/bag join.  I used a running stitch to gather ('quill') 2 yards of 1/2" wide silk satin ribbon (using a very fine needle, because satin snags easily).  This was then tacked down on the outside of the basket, following the join.  Unfortunately, I didn't like the effect, and so removed the gathered ribbon, ironed it flat, and attempted to knife pleat it instead.  At this point, I re-discovered that--unlike taffeta or lace--satin doesn't hold a fold nicely.  So, I took that off, and attempted a rouleau, following Miss Leslie's instructions in the Lady's House Book (1850).  The ribbon is wrapped around a piece of paper in a spiral shape, and then tacked down to the surface.  The paper is removed, leaving a roll of ribbon.
Silk ribbon rouleau on side join of work basket.


It's not the neatest job, but it's neater than the other attempts, and it eases the otherwise-abrupt transition between the Berlin-work and the dark silk.  To conceal the ends of the rouleau, I added a small constructed bow done in the same ribbon (for balance, a second bow was placed at the opposite end of the basket):
Pieces for constructed silk ribbon bow.
Bow on work basket.


Voila:

Completed 1861 pattern work basket.

Finished work basket from 1861 Peterson's instructions.

Interior, with my 'period' sewing supplies for living history:

Work basket stocked with period tools.

Thimble, scissors and pin cushion.


Supply notes: Green embroidery in DMC "medici" wool, colors 8567 and 8904; yellow silk is soie crystal brand; worked over 10-count Penelope cloth, all from Nordic Needle.

Green satin ribbon from Nancy's Sewing Basket, in two widths (1/4" for the drawstring, 1" for the decoration).  The green silk for the upper portion originally came from S.R. Harris, aka the Disneyland of Fabric stores.  White linen from Our Fabric Stash; leather recycled from a thrift store jacket.

Perl cotton for the cords came from The Weaving Works (left over from a weaving project, as it happens).

*Other types of glue would probably work; this is just what I had, and it convenient is meant for attaching fabric to cardboard without showing through.

Thursday, January 23, 2014

Work Basket in Silk and Berlin-work

Another design from Peterson's 1861 novelties.  I've been stitching away at the Berlin work since last summer, and am slowly making progress:


Wool cross stitch (Berlin-work) on Penelope canvas, in a home-made frame.


The original pattern calls for two shades of blue, with yellow silk accents, and finished with sky-blue silk and ribbons.  As my stash had some unclaimed green silk (no blue, alas), I decided to work it in two shades of green instead (keeping the yellow accents).

This is a decent-sized basket: the lower circumference is 35" (all hand stitched, 6" wide, in wool on cotton "penelope" canvas), with paste-board behind the Berlin-work to provide structure.  Silk-covered pasteboard makes the bottom, and the upper portion is unsupported silk, which closes with a ribbon drawstring.  Two cords form handles, which attach to the lower "structured" portion.

The embroidery frame is home-made, based on instructions from The Ladies' Self-Instructor in Millinery and Mantua-Making, Embroidery and Applique, Canvas-work, Knitting, Netting, and Crochet-work (1853).

There will be more pictures, as events warrant.

Thursday, January 16, 2014

Girdle Pocket #1

The Girdle Pocket by Mrs. Jane Weaver (Peterson's Magazine, February 1861)

I like little bits of fancy work out of the old magazines.  They're cute, they don't require 6 yards of specially-ordered material, you can work on them anywhere, and you don't have to alter them when your dress size changes.  

Really, they're just wonderful.

The girdle here referenced is a decorative belt (possibly the shaped outer garment known as a "Swiss waist" or "Medici belt"), not to be confused with the 20th-century undergarment.  The only other picture I've seen of one was a suspended pocket on a cute little waist with brettels. Similar "waist pouches" will appear in the September issue; they are "suspended the waistband by a chain and hook, and sometimes by a cord", and elaborately decorated in "gold, silver, and jet" or coordinated to the dress's trimming.

The description indicates that the pocket should hold a portmonnaie (which I will be making just as soon as I can find an accurate 2.5" frame) and handkerchief.  In the meantime, it should nicely contain my Berlin-work card holder.  I picked this pattern over the waist pouch one, both because it has more complete instructions, and because I realized that most of the materials were already in my stash--mostly because the three colors of velveteen I had lying about were the three colors of velvet called for, and it's fun to see how the original color schemes match up.

Girdle pocket pattern, fabric for project.

Needed:
1/4 yard sky-blue silk (more like a 7" by 16" piece)
Small bits of red, green, and black velvet (I used cotton velveteen: non-synthetic velvet is hard to find)
Gold cord and thread (I don't know why I have this)
Black glass seed bead (96 small 1/16", 14 larger 1/8")
Half yard of velvet ribbon (using scrap velveteen, see above)
Pasteboard (recycled a box lid)
Lining material (fiber not stated; using linen or silk from the stash)

The Process, Day 1:

First off, I traced out the individual applique shapes onto pattern paper.  Cutting out the small, fiddly bits proved the more difficult piece of the undertaking.*
Tracing the 1861 pattern.

I then traced the overall pocket shape onto the pasteboard; in addition to providing structure for the finished item, these served as templates for cutting the silk background.
Cutting the silk from a cardboard pattern.

Having no blue silk to hand, I decided to dye a white remnant from the stash.   As it was a small amount, I used locally-available RIT royal blue instead of ordering a silk-specific dye. (The wonderful Sewing Academy board, once again, offered a wealth of tips, particularly in this thread: http://thesewingacademy.org/index.php?topic=3338.0).  I used about a quarter of the bag of dye in 3/4 c. water and 3/4 c. vinegar, and let my test pieces "bake" in a warm oven for 40 minutes...giving a ridiculously deep blue.  After extensive rinsing, it was still almost black in color.  I'd heard that silk and RIT tended to be a bit lackluster, so I'd expected that hours would be needed for such a hue, if it was even possible. As I was aiming for more of a "sky blue", I diluted the dye bath by half again with water, and tried a ten-minute piece.  Perfect!  The trickiest bit was probably getting the wet silk to drip dry without clinging to itself and making permanent creases (note to self: another excellent reason to avoid ever getting silk wet).
Silk in the blue dye bath.Dying supplies and silk fabric.


While the silk was drying, I started on the center bit with the crossed gold threads over a green background. Each overlapping gold thread gets a small black bead on it, and the four symmetrically arranged 'stars' mean that it needs to make a fairly straight grid or it will look sloppy.  I've been having trouble with the tension, and think that on the next side I'll start securing the beads from the start, working from the middle, to keep the crossing threads aligned (instead of tacking down the crossed threads, and putting the beads on later).  The instruction aren't clear on the matter, but I interpreted the "border" on the center piece as a thread edge around the "crossed" section, with a small gap of unembellished green fabric, and then the wider gold cord/braid at the edge of the green section.  That seems consistent with the 'thin line = thread', 'voided line = braid' convention; the white space between the two could be either the blue silk background or the green velvet/een of the center piece (both are represented as unshaded white).  In all other instances, the gold cord abuts the edge of the appliques, so I am taking it thus, rather than ending the green at the narrower thread border.
Green velveteen applique with gold embroidery in progress.

Progress status: Silk is cut and dyed, patterns are traced and cut, and the green center piece is in progress.

Dyed blue silk pieces and applique center for girdle pocket.
At the next update, I hope to have the crossed background and small beads done, and possibly the four central "stars" as well (I think they look more like flowers, personally).  The next step will be attaching the green center to the silk (through the beads on the stars/flowers), and cording the edges (I intend to couch the cords, securing the edges of the green at the same time); I then get to repeat the cording with the other appliques.  The final step will be making up the pocket and adding the gold tassel decorations.  Victorians? Subtlety? What ever do you mean?

*This may have something to do with my scissors.  Having a good sense of proportion, my apartment contains four pairs of scissors and a rotary cutter devoted to specific fabric/thread purposes, a bolt-cutter for metal, and one pair scissors for everything else.  The latter may have come off the worse in a wire-related incident a few years back (hence the bolt-cutters).