Showing posts with label chemise. Show all posts

Sunday, March 16, 2025

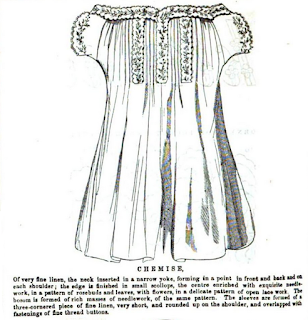
Chemise Embroidery Designs, 1856-1860

 Looking through some old notes, I found these embroidery patterns for chemises (bands, yokes, and sleeves) from the late 1850s. I don't recall planning an embroidered chemise at that time, though it is certainly nice to dream.


Chemise Band embroidery from Peterson's, June 1859.

And yokes from the February and August 1859 issues of Peterson's:
And September of '57:

Many chemise band, yoke, and/or sleeve embroidery patterns from Godey's 1856-1857:


A nice simple embroidery design from The Hesperian, May 1859

Arthur's Home Magazine (1860) has three designs for chemises with embroidered components in their (with the embroidery described, though no patterns are not given). I'm including these because they give some interesting ways the embroidered segments can be used (aside from the obvious 'band or yoke across the top, sleeves at the sides').
 

Saturday, April 2, 2022

Original: Chemise c.1850

I still need to remake most of my 1850s underthings, and decided some inspiration was in order.

American or European chemise, c.1850. The Met.

Even at the highest magnification, I can't tell what technique is used on the decorative infill. My first thought it wavy braid (as on the chemise in my own collection), though the completely contained circles would be a pain to make in that technique, which leads me to suspect tatting or crochet. However, I can't clearly see any of the stitches to make a determination. I'm certainly not copying this garment, though, so for now it can remain a mystery.
 

Wednesday, November 7, 2018

Another Regency chemise

Made a new regency chemise, this time based on a c.1800-1820 original in the Albany Institute of History and Art, featured in Regency Women's Dress. The Albany Institute does not appear to have digitalized the original (or any undergarments), but their collections database has some very fun shoes, hair-work pieces, and a few dresses.

Linen chemise/shift/smock in 1800-1820 regency/empire/neoclassical style.
New linen chemise, style c.1800-1820.
The material is a light-weight linen from Fabric-Store.com (IL-020, I believe). It's entirely hand-sewn, with all the seams felled (having learned my lesson about linen raveling along unfinished seams). I adjusted the front width and sleeve depth to my measurements--the sleeves were a necessary change, but I ended up taking in a lot at the front sides after having expanded them.  As I found out last time I tried to made a regency chemise, I run into trouble getting a garment that sits securely at the neckline but is also cut generously enough over the bust. With the Victorian chemises I've made, the extra material is simply gathered into the yoke or band; with the Tudor shifts, I just cut the shoulders to fit and then flare the front sides out as needed.  Here, I ended up cutting the bust wide enough, then fiddling with the strap placement and pinning in the excess material at the sides. It's not perfect--the front neckline still gaps slightly and the straps are sitting further out on the shoulder than they probably should be--but it's an improvement over my first regency shift, and quite comfortable.

I'm going to put my thoughts on the pattern in a separate book review. 

In other news, linen is still a pleasure to hand-sew, and I routinely hit 14-16 sts on all the seams this time.

Tuesday, September 2, 2014

Pattern Review: HMP-400, Historic Moments Cloth Doll Pattern

As I can only wear one historic outfit at a time, I decided to make a clothing demonstration assistant.

Meet Nelly:
1850s/60s style cloth doll from HMP-400 pattern.


She's made from Mrs. Clark's "Great Aunt Maude's Cloth Lady Doll" pattern.  Her first outfit, above, consists of the chemise, corset, drawers, apron and high-necked dress (all from the pattern), with an additional apron of my own design, and a sunbonnet based on Mrs. Clark's free sunbonnet pattern (as drawn from memory, scaled down to fit a 15" doll).

Undergarments:
HMP-400 cloth doll with undergarments.

Accessories:
HMP-400 cloth doll with undergarments.


I've been enjoying making doll clothing so far.  The small pieces let me use up scraps from my other projects (this will be great with the wools and silks that aren't appropriate for my quilting activities), and they items go together really quickly.  All of Nelly's clothing has been handsewn--so far--and working on them has been a great opportunity to practice my hand-sewing in a low-stress way; doll clothing also makes for a very portable period project, and gives a great sense of accomplishment as it gets finished very quickly.  The downside to the small garments, in my opinion, is making the tiny eyelets.  Miniature piping is the other tricky bit.  For easier sewing, many of the instructions call for decorative buttons with functional hook-and-eye closures, instead of functional buttons with tiny button-holes.

The doll herself and the undergarments are made exactly as given in the instructions (save that I added a functional button and loop on the petticoat).  I think I made my seam-allowances too small on the corset, as it turned out a little loose.  It would also have benefited from some ironing during production (which it would have had, were I not sewing it in the car on my way to an event...). For the dress, I made some changes to the basic high-neckline bodice pattern.  It's gathered, rather than darted, but I didn't get the bulk down quite enough, making for a front that 'poofs' a bit above the waist.  The bishop and cap sleeve options were both among the given variants (there's also a pagoda sleeve, a puff sleeve, a bias sleeve, and with the wrapper, a coat sleeve).

What You Get With This Pattern: 

  • 39-page instruction booklet
  • 2 sheets of pattern pieces--done on writing-weight paper, not tissue--with pieces to create one doll and twenty garments/accessories, plus variations.  The dress pattern includes 3 bodice options and 5-6 sleeves to play with.

Rating: 5 stars
Difficulty: Varies from easy to intermediate
Accuracy: The shapes and methods are all good for the mid-19th century, based on my knowledge of women's clothing.  No pictures of original dolls are included, though the author provides some background information.
General Impression: A very complete pattern for a doll and her wardrobe: there are dress variations, underclothes, nightwear, and accessories included (no bonnets, per se, though there are two caps and a hood).  The clothes are all (almost entirely) pre-fit to the doll, making this pattern the easiest introduction to mid-century clothing that I've seen.

Saturday, July 26, 2014

Book Review: The Dressmaker's Guide by Elizabeth Stewart Clark


A good seven/eight years after I started reading at her website, I finally got a copy of Mrs. Clark's "The Dressmaker's Guide".  I hadn't done so at first, as I was 1) at college, with little spending money, and thus 2) on hiatus from the hobby.  By time I got back into the swing of things, I felt confident on the basics, and didn't think I'd have much to learn from this particular source.

This turned out to be--very much--not true.

The book is divided into twelve chapters, detailing how to drape or draft and then make up each of the layers* which goes into women's wardrobes c. 1840-65.  The first three chapters cover preparation for sewing and context for one's living history: a year-by-year timeline of events, approaches to progressive reenactment and documentation of research, a timeline of dress styles, and a 50-page tutorial of stitches and fabric terms.  Chapters 4-11 go through each garment or element, discussing how to fit it, what materials to use, and how to make it.  Chapter 12 is a quick-reference appendix, with three "croquis" in different body types (instructions are given in chapter 2 for using these paper dolls to plan your outfits and play with styles).

For a preview of style and content, the free women's patterns found at the Compendium are mostly taken from the book (except for the sunbonnet, shawl, and apron).  The chemise chapter, for instance, includes the personally-drafted banded chemise found at the Compendium, as well as instructions for a gored chemise, and a discussions of the different fabric choices.  Similarly, the basic drawers and petticoat are given free on-line, but the book offers additional design choices, including decorative tucks and whitework insertions, and instructions for corded and quilted/wadded petticoats.  If you can follow the directions given on-line, you'll have no trouble with the book's instructions.  Additional book content includes a whole chapter on draping a personal corset pattern, cage crinoline instructions, a self-drafted sleeve pattern with 8 different variations, and a chapter on personal accessories.

What I found most valuable were the bodice and sleeve drafting instructions.  Several variants were included for each, with the time period when each is popular, and instructions for personalized fitting. To get an idea of the breadth of the bodice chapter, take the "Having a Fit" article, then add sketches of each step for the draping, advice for fitting commercial patterns, and instructions for creating 6 different bodice variations from the basic pattern (high or low, gathered or darted, V-necks or rounded, and some beautiful pleated/shirred "fan fronts").  The sleeve portion follows, and I'm excited to experiment with some of the variations shown.

I expect this book will prove valuable to sewing enthusiasts of all skill levels.  Despite extensive reading on the subject, I was surprised by new elements like the diagonal tucks.  At the same time, all the basics are present.  A person with no experience in mid-19th century women's clothing could go through every step from selecting an impression to finishing a completed ensemble with the instructions given here.  It may take a while, by the information is all given in a clear manner which should be accessible for beginners.  Additional help is available through the author's website, or at the attached forum.

Looking for downsides, the main things which come to mind are the overall size: there are 100 pages of information before any garment instructions show up.  This is possibly overwhelming, but also provides interesting background information and useful techniques.  The instructions can at times 'run-on' in my opinion (separate tables for calculating yardage for each type of petticoat, for instance, instead of just adding or subtracting from the basic plan), but this may be useful to those not mathematically-inclined or who need to take some things in 'baby-steps'.  Erring on the side of more information and simpler explanations isn't a bad thing.  For those that need visual instructions, there are nice sketches included with most of the techniques, but no photographic images of garments or steps.  I liked the drawings as given; your mileage may vary. The table of contents gives page numbers for the chapters, but the one thing I would change about this book is adding a topical index,*** so you can look up "coat sleeve" or "petticoat: whitework" and go directly to the page.

Score: 5 Stars
Difficulty: Absolute beginner & up.  Basic sewing skills are useful, but not strictly necessary.
Accuracy: No original garments are presented, but the variations and techniques are all very accurate as far as I can tell.  Read Janet Arnold if you want details of original garments, this is more a summary of the the period and its aesthetics.
Strongest Impressions: This is a book to reference.  It's not meant to be the end of your research, but the beginning.  Find an original for inspiration, then use the sketches and instructions in here to reproduce the elements you like.  The introductions and instructions in chapters 1-3 are a good basis for making one's first forays into historic clothing--and will put you miles ahead of the non-fitted, ready-mades found at most reenactments.  Should I even become an eccentric millionaire (half-way there!), I would be giving these out like Bibles.

*On further reflection, stockings & garters, shoes, gloves, and millinery are not included as topics.  All trunk garments from the chemise outward are covered, however.**
**Ok, not aprons.  But you should be able to figure one out from the all the techniques given.
***Edited to add (11/28/14) that a printable index is now available here. Rumor has it that future editions will include an index.

Thursday, June 5, 2014

On-Line Patterns for Clothing (American Civil War/ Mid-Victorian)

Getting into this hobby as a broke high school student, and again as a broke grad student (and now continuing as a broke un/underemployed former student), I've spent a fair amount of time hunting for free patterns and resources on-line.  What follows is a mixture of modern instructions from very generous, reputable persons and original patterns from the 19th century (these are not always easy to work with, especially for a beginner).  Since I mostly do 1855-1865 women's clothing...most of the links are for women's clothing of the 1850s and 1860s.

Useful for New Reenactors

The VERY FIRST Thing to Read Before Making/Buying Women's Clothing:
Your Best Bet Wardrobe by Elizabeth Stewart Clark

General Advice on All Things (but especially non-military clothing for men, women and children)
The Compendium The Sewing Academy Forums
Atlantic Guard Soldiers' Aid Society Links (Go for the first person worksheets, stay for the widespread advice)


Patterns & Instructions (& Some Advice) 

Hats and Bonnets
Cost-effective Headwear for All Seasons (advice thread)
Original Soft Bonnet/Hood Patterns On-Line (with my commentary)
Romantic History Hood Pattern (printable, modern instructions)
1861 Knit Hood (Original pattern with modern commentary)

Hair-styling
My Hair Tutorials
Video: Basic Hair (with some alterations to the side-styling, this will get you through much of the 1850s and early 1860s)
Hair Advice (Thread)
Later Victorian Hairdressing (Beautiful step-by-step pictures, but about 15 years post-ACW)
Video: Rag Curls

Chemise Patterns
Mrs. Clark's Chemise Pattern
1860 Chemise Pattern

Drawers Patterns
Draft Your Own Drawers
1863 Drawers Diagram

Corset Patterns
Stays in The Workwoman's Guide (1838/40) [page 80-81, diagram page 327]
"Practical Instructions in Say-Making" in Godey's (1857) [diagram and instructions pages 165-6]
1868 Corset Diagram (Patent)
1869 Corset Pattern

Skirt Support Instructions
A Covered Cage
Cage Crinoline
Another Cage Crinoline (Thread)
Corded Petticoat (Thread)

Petticoat Instructions (Do not wear a hoop without a petticoat--it will look bad)
A Petticoat

Note on skirt supports: Hoops appear in European high society in 1856, and spread quickly--by 1857-8 they're already on the westward trails & America's Pacific coast.  By the early '60's hoops are ubiquitous.  If you're doing pre-'56 events (or are doing 1856, but aren't the Empress Eugenie), use a corded petticoat.  If you're in the 1860s, use a hoop, or select a non-hoop impression (nurse, servant, cook).  Keep hoops away from open fires.

Dress (Bodice) Patterns
Original 1859 Bodice Patterns
Bodice with 3-Piece Back and Coat Sleeves ('60's)
Mrs. Clark's Fitting Instructions
1857 Bodice

Dress (Skirt) Instructions
Gauging a Skirt (No Pattern Needed)

Undersleeves
Undersleeve Instructions

Collars & Cuffs
Draft a Simple Collar (Thread)

Outerwear & Warm Layers
Easy Shawl Instructions
Original Mantle & Cloak Patterns
Original Jacket & Mantle Patterns
1855 Mantle
A Knitted Sontag (and more knitted items for keeping warm)
1859 Winter Cloak

Accessories
Swiss Waist (patterned from an original)
A Basic Apron
1850 Crochet Reticule
Analysis & Dscriptions of Period Hair-Nets

Shoes
Yes.  There are period sources for home-made shoes (ie Every Lady Her Own Shoemaker 1856), but you'll want to buy this item.  See Robert Land Historic Shoes and Fugawee to train your eye, then either save up for the good stuff, or search e-bay & second-hand shops for something passable.  I've heard paddock boots are a possible alternative, depending on your situation.  Things to look for in 'period-passable' shoes: leather upper, low/no heel, fastens with side or front laces or side elastic panel ("congress gaitor"), and square or rounded toe (not pointy).  Speed laces should be removed if possible.
1850 Lady's Slipper (All the fancy work slipper patterns I've seen either have a two-piece upper like this one--a trapezoidal toe-piece with a straight band around the heal, or else a single-piece upper shaped like a bottom-heavy V).

Nightclothes
1859 Nightcap
1859 Nightgown Drawings

Baggage
Pouche Pompadour (elegant travelling bag)
Travelling Bag
Re: Period Baskets (read this before buying a basket; Mrs. Mescher's other articles are as interesting as they are diverse
Toilette Sachets


Looking for something to work on at events?  Antique Pattern Library

New period seamstresses looking for an easier start should buy The Dressmaker's Guide.  I've heard good things about the Truly Victorian patterns, and Past Patterns.  Kayfig patterns are meticulously researched; I've made up their wrapper pattern and found it charming (also, the instructions are a comb-bound book, the first half of which is an illustrated tutorial of period construction techniques). If you pick up Simplicity patterns during the $2 sales, look for the Martha McCain or Kay Gnagley ones--the shapes are good, but the scaling is weird and the instructions aren't always period-appropriate.  I've used several simplicity patterns, but I wouldn't recommend them for a first dress unless you have good spacial sense & really can't afford a more straightforward pattern.

Good luck, and always make a test muslin!

Wednesday, January 22, 2014

Regency Chemise

New era, new undergarments.  I like to have these made-up before embarking on a gown, both for more accurate fitting, and for sewing practice.

My internet search for originals led me to some interesting places like this, and this.  All hail history enthusiasts on Pinterest. In general, here's what I've discovered of chemises circa 1800-1820:

1) They are white.  This tallies with my mid-Victorian reading/experience, in that un-dyed underthings are easier to clean (boil them!), and don't show-through the garments so easily.  They also don't crock/run.
2) They are linen, or occasionally cotton.  Which is to say, they are washable fabrics. 
3) The necklines may be square or gathered; in either case, they are fairly wide.
4) Short sleeves.  The sleeve-less garments are more often labelled as 'petticoats'.  Many of the sleeves are short and square, though the odd short and gathered sleeve does appear (as well as one long-sleeved garment).

All told, they have a great deal in common with the Victorian chemises I usually work with (the angle of the sleeves with the neckline is the main visual difference).

Most useful are these diagrams of original chemises from the Ohio Historical Society.

For my first Regency chemise, I'm using cotton (because that's what I have on hand). I will be keeping an eye out for a deal on white linen for version 2.0.

First, sketched out the pieces by hand, just to get a feel for them.  I then compared the original's dimensions with my own measurement, and decided that the overall length and widths would suit without alterations.  The sleeves need to be a bit wider, so I'm scaling those up.

First I cut out two large rectangles and two triangular gussets for the body of the chemise. Next, there's the two smaller rectangles for the sleeves, and four more triangles to make the under-sleeve gussets (actually eight, to make them all double layered).  Finally, a long rectangular neckband and small "reinforcement" rectangles (for the underarm) are cut from the scraps:
Pieces for regency chemise.
Chemise cut pieces, in approximate relative locations.

I start be piecing together the under-sleeve gussets and the front/back pieces:
Triangular underarm gusset for Empire chemise.
First seam: underarm gussets attached to front/back


From there, I attach the lower gussets.  I'm machine felling these long seams (which feels like a mortal sin...):

Felling seams on a sewing machine.Gusset and gore for early 19th century chemise.


Now, I just sew the sides shut along both gussets. Next up is the sleeves.  I hemmed one long edge of each sleeve, then sewed and felled them along the undersleeve gussets (extending to the neckline):
Hemmed sleeves for Regency chemise or shift.
 Attaching sleeve to Regency chemise.

Inside-out view of sleeve and gusset on Regency chemise.


I debated attaching the sleeves before the long gussets (the underarm gussets definitely needed to go first), but decided on doing the long sides first, as they looked trickiest.  I cut all the gussets along the diagonals of rectangles/squares (per the diagrams and/or my best interpretations thereof), so the long gussets actually require some tweaking as they are attached--the hypotenuse of the right triangles is towards the back side, and is longer than the straightedge sewn to the front panel.

I made some changes to the chemise finishing.  Despite contrary measurements, the upper edge ended up way too wide, so I took in pleats at the top center (front and back) to make things fit better.  In doing this, I skipped the small placket & button at the center front of the original.

Then attach the neck-band, and hem the bottom to desired length:
Sewing the upper band to the chemise.
 Close-up of chemise upper band.


Voila:

Completed Regency chemise.

Lessons learned for next time: 1) Front and back pieces can be cut 4" narrower and 3" shorter,  2) Long gussets may work better in two right triangles back-to-back (as with the underarm gussets), 3) Try the neckband on the bias for easier cornering.  I ended up omitting the side reinforcement pieces, as there was considerable bulk in the side seams near the gusset points already (just from the felling).


Note: home sewing machines are definitely post-period. Hand-sew for maximum accuracy.  That being said, this is an undergarment.  Anyone who can tell it's machine sewn 1) shouldn't be judging, and 2) is in kicking-range.


Friday, January 17, 2014

Tatting for an 1850s/60s Chemise

Inspired by this lovely chemise, which was brought to my attention by the Sewing Academy, I decided yet another on-going project was in order.  Specifically, it rekindled my desire to make a nice set of mid-century underpinnings with hand-tatted accents, because a) very fun underwear is fun, b) the handmade trim gives me something small, yet period to work on a events, and c) one of these days I'm going to want a pretty set of underwear for clothing demos.

I like the lacy effect of the simple tatted edge here, and additionally like that it doesn't require button hole stitch filler (which I find a bit trying to get right), or excessive purls (which look great new, but quickly get bedraggled in my novice hands) as many of the more elaborate period trims do.

Between the pictures above, and the "Fancy Tatting for a Chemise Band" (Godey's, July 1864, reprinted in Virginia Mesher's excellent Flitting Fingers) I decided on rings of 12 double-stitches, joined at the 3rd and 9th stitch [2 ds, join, 6 ds, 1 purl, 2 ds, close ring and repeat].

I did short samples in both size 20(?) and size 30 cotton:


Tatting shuttle with two sizes of thread for chemise trim.


And decided that the larger thread looks more like the inspiration (or, at least, the ring sizes are of closer scale, with the number of stitches I decided to use).

And we're off:

Tatting shuttle with trim in progress.

The neckline of one chemise will probably take about 50" of tatted trim; if I decide to do the sleeves, that'll be closer to two yards.  (Expect some very triumphant pictures by this time next year.)