Showing posts with label Fort Steilacoom. Show all posts

Monday, June 2, 2025

Revisiting Tea Cakes (1855)

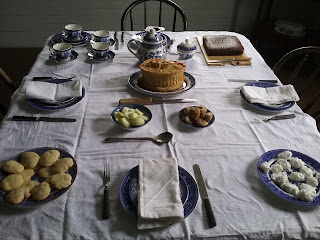
Needed something sweet for Steilacoom, so I decided to revisit the tea cake receipt from Cookery, Rational, Practical and Economical (1855). This time I tried increasing the spices to 2 tsp cinnamon and 1 tsp allspice, the combination of which made for more flavorful cakes. I like that this recipe is already on a small scale (8 flour, 5.5 oz sugar, 4 oz butter, 1 egg; makes 2 pans of cookies), though I had forgotten just how dry the dough is. It takes a lot of hand kneading to get all the dry ingredients worked in, and ends up making a rather grainy dough as a result. The cakes were a bit dense (as usual for this kind of biscuit/cake/cookie), but are perfectly serviceable for serving with tea.

Small tea cakes flavored with cinnamon and allspice.

Being pressed for time, I tried just shaping these cakes with my hands (roll into small balls and flatten rather than rolling out a sheet and cutting them). It worked tolerably well, and made 3 dozen ~1.5" diameter cakes. I do think the texture could be improved by letting the dough chill overnight and then rolling them out, which is what I will plan to try next time.

Saturday, June 29, 2024

Tea Cakes (1840)

Tea Cakes.

 Tried a new receipt last time I was at Steilacoom: tea cakes from Economical Cookery. It's one of those very terse receipts, but not so different from Beeton's dessert biscuits, or most of the other cookie-like things I've tried before:

TEA CAKE. Two cups of sugar, 1 cup of butter, 1 cup of milk, half a teaspoonful of pearlash, flour enough to make it stiff enough to roll out; add carraway seed or spice. 
I actually made a full batch this time, and even got to use the specified leavener, and I had some pearlash on hand. Huzzah for home-brew supply shops.

Two ingredients do not have specified quantities: flour and spice. I ended up using 3 cups of flour, then working in another 1-1.5 cups flour as I was preparing to roll it out. I found this still a still a bit too sticky to do so, but being pressed for time, I chose to roll it into balls rather than rolling out and cutting. Next time I try this recipe, I think I would start with 4.5 or 5 cups flour, plus some for rolling. I'd also be tempted to chill the dough overnight before rolling it out--the sticky consistency of the dough reminded me of how my modern cutout cookie dough looks before it is allowed to rest. 

For the spice I estimated about 1/2 tsp nutmeg and 1/4 tsp cloves. I found this adequately flavorful; my guests' initial feedback was positive, though there was one vote that it could have a bit more spice. Next time I might increase each by 1/4 tsp and see how that goes.

One batch made two very full pans of cakes; in less of a hurry, I'd probably divide it into 3 pans since they do spread out a bit. I baked them at 350F for about 10-12 minutes per pan; this saw the edges starting to darken noticeably while the centers were barely done, but I think that had more to do with the shape of the cakes than not.

Overall, this was a fairly easy and straightforward recipe, and I think it fits well into the tea cake/dessert biscuit niche.

Wednesday, November 22, 2023

HFF 6.22: Remember, Remember

Detail from an 1850s painting with a woman's hands gesturing over a table of food.

The Challenge: Remember, Remember. It may not be November 5, but try cooking a dish from minimal instructions. Or try a dish that would be easy to memorize. 

The Recipe: Cucumbers "en salade" from Eliza Acton's Modern Cookery for Private Families.

TOMATAS EN SALADE
These are now often served in England in the American fashion merely sliced and dressed like cucumbers with salt pepper oil and vinegar.

The Date/Year and Region: 1845 (4th edition), London
 
How Did You Make It: I peeled and sliced two cucumbers, added a small splash of vinegar, drizzle of olive oil (aka "salad oil"), and a dash each of salt and pepper.
 
Time to Complete: Not more than five minutes.
 
Total Cost: Home-grown cucumbers, and only a token amount of pantry staples, so I don't have a cost estimate.
 
How Successful Was It?: Tasted like fresh cucumber with a hint of vinegar. I think a little more olive oil and salt wouldn't go amiss, since I didn't really notice them changing the flavor, but overall this was a refreshing dish, and simple to make. I will definitely use it again, especially in late summer when I have a surplus of cucumbers and tomatoes.

How Accurate Is It? I used a modern variety of cucumber, since I couldn't find heirloom cucumber starts for my garden, but otherwise I think I followed the recipe. Or description.


Cucumbers left center, in front of Quin's standing pie.


[I technically made it ahead of the challenge window, because I had a event for which I needed an easy-to-transport savory dish in early November and also needed to use the last two cucumbers from my summer garden while they were still fresh. I nearly made this with the last of my tomatoes as well, but they were just a little too soft when I went to prepare them. By coincidence, this was actually on November 5.]


Sunday, November 5, 2023

HFF 6.18: Cake


Detail from an 1850s painting with a woman's hands gesturing over a table of food.

The Challenge: Cake. Make a cake or cakes!

The Recipe: Very fine cocoa-nut macaroons from Eliza Acton's Modern Cookery for Private Families.

VERY FINE COCOA NUT MACAROONS
Rasp a fresh cocoa nut, spread it on a dish or tin, and let it dry gradually for a couple of days, if it can be done conveniently; add to it double its weight of fine sifted sugar, and the whites of eight eggs beaten to a solid froth (see page 543), to the pound. Roll the mixture into small balls, place them on a buttered tin, and bake them in a very gentle oven about twenty minutes. Move them from the tin while they are warm and store them in a very dry canister as soon as they are cold.
Cocoa nut, 1/2 lb; sugar, 1 lb; whites of eggs, 8; very gentle oven 20 minutes.

This is in the cakes chapter, so I think it counts.

The Date/Year and Region: 1845 (4th edition), London
 
How Did You Make It: 1/4 Scale. This recipe is really nice for that. The ratios work out neatly to 1 oz coconut and 2 oz sugar per egg white. 
 
I beat two egg whites to stiff peaks, and then added the 2oz coconut and 4 oz granulated sugar. I used a pre-heated (but turned off) oven as the "very gentle oven" and baked them 20 minutes, then a further 10 minutes since the were still sticky (though at this point the oven was quite cool so any future cooking times will likely be less than the aggregate 30 minutes here).
 
Time to Complete: Ten minutes prep, plus baking time.
 
Total Cost: About $1 at this scale.
 
How Successful Was It?: Tasted fine, though they were still a little under-cooked in the centers. Will definitely try again (and remember how to persuade my oven into actually holding at 180F, which seems the better way to cook meringues). It's very similar to Beeton's meringue recipe, with the coconut providing a nice flavor variation.

How Accurate Is It? Modern shortcuts (pre-shredded coconut and electric mixer) made this a quick and easy recipe. Without those, it would be much more labor intensive.


Wednesday, July 5, 2023

HFF: 6.11 Picnic


Detail from an 1850s painting with a woman's hands gesturing over a table of food.


The Challenge: Picnic. Make picnic food or a dish that's easy to eat outside.

The Recipe: Blackberry Pie from The Young Housekeeper's Friend
 
I took this to the July 4 reenacting event (held on July 2), so I'm counting it as a picnic food.
 
The Date/Year and Region: 1846, Boston

How Did You Make It: After reading all the contradictory instructions on pastry, I started with the "good common pie crust" of flour and butter, omitting the lard, salt, and saleratus discussed in the general paste instructions. The proportions given made no sense (1 heaping handful of flour per pie, 2 large spoons of butter for 3 pies), so I tweaked them to 2 heaping handfuls of flour for 1 double-crust pie, 4 tablespoons of butter, and 1/4 cup of water to help form the paste with the flour and half the butter. The rest of the butter was cut small and rolled into the crust in two layers.

Before starting on the paste, I buttered the pie tin, washed 2 pints of blackberries, and pre-heated the oven to 400F. Once I had the paste made, I cut out the top crust, set it aside, and re-rolled the scraps to make the bottom crust. I placed the bottom crust in position, added the pint of berries, sprinkled it all over with 5 large spoonfuls (soup-spoons) of granulated sugar, then swiped around the edges of the crust with water, and sprinkled both fruit and crust-edge with flour. Per the instructions, I tried to keep the berries level with the top of the tin. I laid the top crust in position, pinched it at the sides, and cut off the small bits of excess crust (while also patching one small hole). I pricked the initials "US" into the top crust with a fork, then baked it at 400F for 45 or 50 minutes.
 
Time to Complete: About 20 minutes to prepare and 45-50 minutes to bake.
 
Total Cost: $6 for blackberries, all else on hand

How Successful Was It?: Tasty enough. The crust wasn't oozing butter like my puff paste usually does, and I'm working on not overworking the pastry.

How Accurate Is It? I'm actually feeling pretty good about this one. The crust had a lot of guesswork, but for once this was the result of having lots of different options made explicit in the text (lard versus butter versus both, saleratus or not, etc.). I did try the trick explained in the text for using water and flour to seal the crust (which worked in the oven--no berry juice bubbled out--even if it ended up leaking juice in transit). Other advice I used from the general pastry instructions included using off-cuts of paste for a bottom crust (but not a top crust), and keeping the pastry itself much thinner than the fruit layer. I also had a replica tin to bake it in.

Blackberry Pie

Tuesday, July 4, 2023

Independence Day, Washington Territory

Reading through the earliest newspapers in Washington Territory offers a glimpse into how July 4 was celebrated in the territory during the 1850s.

1852: No newspaper existed in "North Oregon" on July 4, but the first issue of The Columbian in September reprinted an "Oration delivered by D. R. Bigelow at the celebration of the Fourth of July in this city [Olympia]."


1853: The July 9 issue of The Columbian included an article outlining the "Proceedings of the Fourth" in Olympia, which included a sunrise gun salute; a choir performing "America",  "The Star-Spangled Banner", and "Hail Columbia" at the Methodist church; prayers; a reading of the Declaration of Independence; a procession; and an outdoor meal in an arbor by the capitol.

1854: The Pioneer and Democrat described flags flying throughout Olympia, and gun salutes made at dawn, noon, and dusk. However, as the holiday fell on a Sunday, no major events were planned and the day was spent "quietly" and with "utmost propriety." The paper does report that a private group took a pleasure cruise on two ships, and held a ball and supper in the evening.

1855: Per the Pioneer and Democrat, a large party from Olympia gathered at Issac Wood's farm, where they were greeted by a flag flying overhead. A nearby clearing was equipped with seating for 150 people and a speakers' stand for the speeches. Starting at noon, there was a procession led by a band; the reading of the Declaration; an oration; and a large meal with "beef, mutton, roast pig, turkey, chicken, venison, and every vegetable in season," followed by toasts and more speeches.

1856: The July 11 issue of the Pioneer and Democrat reported that the Fourth was observed with a boat trip and picnic, an evening ball, and multiple gun salutes, as well as numerous flags.

1857: There was no coverage in the Pioneer and Democrat. Other museum volunteers claim that no public festivities were held on account of the political situation at the end of the Puget Sound Wars.

1858: Again, the Fourth fell on a Sunday, and was observed as a "quiet Sabbath," with the only public celebration being a sermon by Rev. Whitworth of the Presbyterian Church. However, this year, the Pioneer and Democrat reported more events happening around the day itself: Saturday July 3 apparently started the festivities with a minstrel show and midnight gun salute, which were followed by the burning of tar barrels (?) and a dance on the evening of Monday, July 5.

1859: This year saw a much larger assembly in Olympia, estimated at 1200-1500 attendees. There was again the dawn cannon salute, and in the late morning a procession with the Olympia Band and various fraternal orders in attendance. This ended in a  "shady grove adjacent to the capitol building" for an invocation, an oration, a reading of the declaration, and the band playing "The Star-Spangled Banner" and "Hail Columbia." Another gun salute was fired at noon, followed by a reading of Washington's Farewell Address (noted as a new addition to the festivities) and then a free supper including "roast beef, sheep, shoats, pigs, etc. and as for pies, cakes, etc. there was no end to them." The program concluded with a procession back into town. Later that afternoon, some groups sailed on the sound. More gun salutes followed in the evening, which ended with a firework display and a grand ball. 

Monday, July 3, 2023

Hff 6.10: First Fruits


Detail from an 1850s painting with a woman's hands gesturing over a table of food.

The Challenge: First Fruits Make a dish involving fruit in some capacity.

The Recipe: Salad of Mixed Summer Fruits from Eliza Acton's Modern Cookery for Private Families.
 
The Date/Year and Region: 1865, London

How Did You Make It: Washed about a pint each of golden raspberries, red raspberries, and blackberries. Picked mint leaves and arranged them around the plate. Following Francetelli's instructions (except for using a flat plate instead of a deep dish), I started by making a large circle with the golden raspberries, selected the most solid and uniform berries to start, and then filling in the circle. I then repeated this process with a layer of red raspberries making a slightly smaller, then a layer of blackberries, then golden raspberries again, ending with a single red raspberry at the top of the pile. 

The recipe then calls for pouring wine over the lot, or else using Devonshire cream. As my guests mostly don't drink, I opted for the later. Instructions in the same cookbook also call Devonshire cream 'clotted cream', and since I was worried about safe food handling during the 'heat cream for 12 hours' step, I opted to use a purchased clotted cream, which I daubed around the perimeter at intervals.
 
Time to Complete: About 20 minutes.
 
Total Cost: ~$12 fruit, don't recall for the clotted cream (and used very little wine)

How Successful Was It?: I'm fairly pleased with how the berried came together: the color contrast looked well, and they didn't roll all around like the cherries I tried before. The cream was in no condition to pour or spread, and the instructions were not clear on how to apply it, which it why I put it off to the sides. Also, my cooking mentor had compared it to butter, so I wanted to preserve the option to take the fruit with or without the clotted cream. 
 
Berries are berries, which I love. The clotted cream didn't go over well: one guest couldn't handle the texture, while another didn't like the flavor with the fruit (but happily spread it over the Sally Lunn). Personally, I thought that the cream didn't really taste like anything at all. I later poured a sweet moscato wine over the leftover berries (not the cream!) and really enjoyed how the berries and wine went together.

How Accurate Is It? The recipe calls for strawberries, white and red currants, and white or red raspberries. I intentionally substituted blackberries (available in my area) for the currants (not available in my area), but completely forgot the strawberries.As previously noted, I'm not clear on how the cream was to be applied, but in any case, I think I'll stick with the wine version in the future, and opt for 'a plate of fresh fruit' instead of 'fruit salad' when I need a non-alcoholic summer fruit dish.


Monday, February 6, 2023

Revisiting Loaf Cake

Also for yesterday's tea, I once again tried making Elizabeth Loaf Cake from The American Matron: or Practical and Scientific Cookery (1851).

Previously, I made a full batch, using sour dough starter for the fresh yeast. This time, I used active dry yeast proofed in water, and made a half batch:

2 tsp active dry yeast in 1/4 cup (1/2 gill) water 
1.5 lbs flour
10 oz  sugar
10 oz  butter
2 large eggs
12 oz currants (substituted zante currants)
1/2 tsp cloves
1 tsp nutmeg
1 cup milk

I let the yeast proof; mixed the flour, sugar, and spice together; melted the butter; combined the yeast, butter, milk, and (beaten) eggs with the dry ingredients, and finally stirred in the currants. I set the batter/dough to rise for 1 hour, then baked at 325F for 1:45. I used a glass loaf pan lined in parchment paper.


The cake did not come out of the oven looking very pretty. The batter had quite filled the pans, and I really should have divided it into two, as well as giving it a slightly longer rise time. As a single loaf, this cake was dense, and not quite baked through the center. The ends, however, did bake fully and were well-received for both the texture and flavor.

Next time I try this cake, I'll probably divide this same amount of batter between two pans (or 3-4 if making a full batch, though this half-sized filled my largest mixing bowl). This will hopefully help with the baking time issue. Id' also like to see how it goes with a longer rise (2 hours?). Otherwise, the spice proportion and amount of currants worked really well. I'd just like to get it a bit prettier and a little less dense.

Friday, December 30, 2022

Winter Mantle, 1857

Just in time for winter events, I finished my new 1850s mantle, based on a pattern from the December 1857 issue of The Englishwoman's Domestic Magazine.

Winter Mantle. Englishwoman's Domestic Magazine, December 1857.

Per the description, the mantle is made of wool broadcloth, trimmed with velvet ribbon and fringe. Black or brown with matching trim is the preference, though the description also suggests using black trims "with any dark cloth."

I selected a grey broadcloth, which ended up being a few shades lighter than intended. That being said, I think the lighter color is more cheerful than a solid black would have been, and I like how it looks with my mauve hood and knitted comforter.

The buttons and cord fastener don't photograph well against the velvet.

Materials: 

Scant 3 yards grey broadcloth

6 yards of  2" black (cotton) fringe

12 yards 3/8" wide black velvet ribbon

5 yards 1.5" wide black velvet ribbon

8 wood button molds

~6 yards of black beading silk to make the cord fasteners.

Scraps of black silk taffeta and white linen for covering buttons

Scraps of fringe for the 2 tassels

I sketched the 3 pattern pieces--front, back, sleeve--to scale, then made a muslin to test the shoulder and neck fit. The sleeves were delightfully easy, in that there's no underarm seam: just a generous side opening that will easily fit large 1850s pagoda sleeves, and a cape to cover. I sewed the construction seams using a double row of running stitches in grey silk thread, based on the construction notes from an 1780s broadcloth cape in Costume Close Up (which also proved successful on my 16th-17th century cloak). The ribbon and fringe are both attached by small uneven running stitches.

I attempted to make silk tassels out of size FF beading silk, but didn't like how the material behaved; instead, I used the off-cuts of the fringe, sewn tight around the head, to form the two tassels. The finished mantle shows a double line of buttons with cord, which is how I interpreted the fasteners (based on examples like this mantle which uses more elaborate frogging). I considered applying the buttons as a decoration only, and using concealed hooks-and-eyes, but decided to try the buttons and cord loops first. I couldn't find any black cord that I liked, so I used my straw-spinner to twist an 8-strand cord (first twisting two sets of 4-strands, then plying them together). 


Plying cordage.

Compared to the original image, I could have used a darker broadcloth, and I think the proportions would stand for wider trims. I went with these ones because I couldn't find any fringe longer than 2" or velvet ribbon wider than 1.5", and I wanted to maintain the proportions of the narrow and wide ribbons. That being said, I rather like how it turned out, except that the 3/8" ribbon was difficult to manipulate over the fringe header. Practically, I find the current fringe length very practical to wear

Tuesday, December 27, 2022

1855 Warm Undersleeve, Circular Knitting Machine Edition

Revisiting these 1855 knit undersleeves, which I have previously made all the component for (sleeve, ruffles), but never finished due to frustration with the instructions.

Line drawing of a knit sleeve ending in a double layer ruffle of lacey openwork.
Warm Undersleeve.

A few changes to make this project circular knitting machine compatible:

First, brioche stitch isn't happening. I can do a double knit by running two threads, or I can just plain knit it. I decided to make a plain tube this time, since it's my first attempt at doing this pattern on a machine, and also the dress I'm going to wear this with is a nice warm wool in the first place.

The frills, as written, have a bit of a problem: they include decreases (knit 2 together) with no corresponding increases. I tried it as written, and again with yarn-overs to balance out the knit-2-togethers, but only got a closely-set eyelet motif. Helpful fellow volunteer Cynthia identified the original pattern as "Old Shale" and recommended the following variation as producing something more like the illustration (especially if the frill is worked on thicker needles than the sleeve itself):

Row 1: Knit

Row 2: Purl 

Row 3: Knit two together (3x), yarn over & knit 1 (6x), knit two together (3x). Repeat for the whole row

Row 4: Knit

[Per the original instructions, repeat the four rows 5 times (for 20 rows total) in white, then knit all four rows once in a colored yarn.]

If I make the fourth row a "purl", I can knit this in the round on the machine, though at the cost of the the ridged effect between repeats. For all the flaws of the illustrations, I think the stronger horizontal lines are meant to indicate this ridge.

The pattern is a 96 repeat, and the original calls for 90 stitches, but the largest cylinder I have is an 80, so I'll need to repeat the motif in row 3 four times, which will leave 8 stitches left over. I decided to solve this with a partial motif as follows:

1-2. Knit.

3. On the third, k2to 3x, then (yo k1) 6x, k2to 3x; repeat this 4 times, and for the last 8 needles k2to 3x, yo, k1, yo, k1, yo. [On the machine, this look like: starting at the 3 o'clock mark, move the stitch on the second needle to the first, then the stitches on needles 3 & 4 to needle 2, then the stitches on needle 5 & 6 to needle 3. Leaving needle 4 empty, move the stitch from needle 7 to needle 5, leave 6 empty and move the stitch from needle 8 to needle 7; needle 8 is also left empty and needle 9 keeps its stitch in place. Count to the end of the motif, and double up the stitches on needles 13-18 so that there are two stitches each on needles 16-18 (as at the beginning of the motif), while needles 13-15 are temporarily empty. Then move the stitch from needle 12 to needle 15; leave 14 empty; move the stitch from needle  11 to needle 13; leave 12 empty; move the stitch on 10 to 11, leaving 10 empty. Repeat for a total of 4 and half repeats around one circuit.]

4. Knit. 


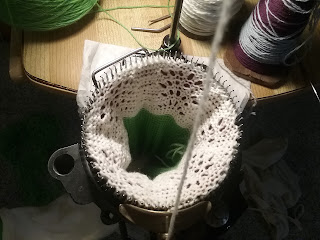
A circular sock knitting machine with a lacy piece of knitting in progress.
Frill on the machine (working the 5th fancy row)


As previously noted, after the 3 plain rows of the header, this four-row figure is repeated 5 times in white, and then once in color, then bound off. Of course, I was halfway through the fourth piece when I realized that the 8 extra stitches could be divided up between the motifs (2 extra plain stitches at the center of the sets of doubles, for instance), which would be a bit more symmetrical than having an extra half-motif.

I set my machine to the loosest possible tension for working this frill, after knitting the sleeve itself on the tension setting one rotation higher/tighter. [I denote it "1L1" in my notes, because the dial reads "1", and it's at the lowest dial position that can read "1"].

For the main sleeve, I set my knitter to "1L2", knit 20, hung the hem, then knit 130 rows, then adjusted the tension down to the its very loosest setting ("1L1") and started on the frill.


White knitted tube with a scalloped effect and eyelets. The piece terminates in a narrow blue border, above which it is attached to bright green waste-yarn worked in plain stockinette.
Frill with waste yarn. It scallops and has eyelets, at least.


After finishing the sleeve with it's frill, I ran some waste yarn, then did a single frills with its 3 rows of header (on 1l2, before adjusting back to 1L1 for the frill), then ran the other sleeve with its built-in frill and the second separate frill.

Blocking the completed frills and sleeves.

Off the machine, I bound the edges of each of the four frill edges, then whipped the separate frills onto the sleeves. I had intended to bind the edges before blocking each component flat, but holiday logistics meant I needed to complete the blocking before I had the chance to binding off more than one edge. I think this actually helped the scallops set better. 

Whipping the active stitches on the frills (the topmost of those 3 plain rows) onto the sleeves was actually the worst part. I could not keep a consistent horizontal line across the sleeve (counting was complicated by the frill covering that part of the sleeve, the lace motif itself made both frill and sleeve pucker into scallops, and attempting to eyeball the frill placement sent it rapidly veering onto diagonals). In the end, I ran a thread of waste yarn along a ruler in an approximately flat line, and stitched over it. For one frill, I removed the waste yarn as I bound the open edge, for the other I transferred the live stitches onto a circular hand-knitting needle to hold them; the waste yarn ended up being marginally easier to handle.

Et voila:

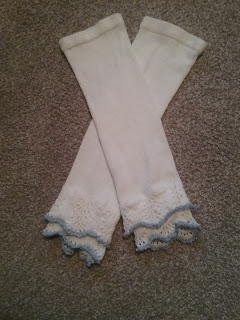
Two white knitted tubes with hung hems at the top edges, terminating in two layers of lacey scalloped frills, each edged with a narrow blue border.
At long last, the finished sleeves.
 
I'm glad these are done, and I like the scallops and the light touch of blue at the edges. If I were to make these again, I'd position the frill more than the indicated 1" up, so that the scallops overlap a little less. I'd also try knitting the sleeve on a smaller cylinder than the frills, so they can be gathered rather than put on straight. Knitting the sleeve on machine and then hand-knitting the scallops (so that the ridged rows happen) would also be an option to explore.

Sunday, December 18, 2022

Ribbed Muffatees c.1845, on CSM

Actually completed a few Christmas presents before the holiday this year, though most of my friends are still on track for New Year's presents. Or Groundhog's Day.

 
I knit these on my circular sock machine, based on these hand-knitting instructions:
Ribbed Muffatees 
No 12 PINS. Cast on each of three pins about twenty four loops, or any number according to the size you intend to make your muffatees, and with the fourth pin pearl four stitches and knit two alternately; every round is the same. They are generally made about five inches long." --The Practical Companion to the Work Table (1845)

The 1844 edition uses the same 4-2 pattern for "Lambs' Wool Muffattees", made to any desired length.

Tranlated to my Autoknitter, I set up a 4-2 mock rib on the 60-cylinder, with the tension set to 5L4. To knit, I made a narrow hem (knit 2 rows, pick up the first and knit the 3rd row together), then cranked 50 rows in the round. I then knit 14 rows flat to make the thumb-gap, and finished with 10 rows in the round. I used the double-pass off-machine bind-off on the top edge.

The material used for these muffatees was Knitpick's "palette" fingering-weight wool, in the currant colorway.

Tuesday, December 13, 2022

Scottish Shortbread, 1845

Also for the recent holiday event, Scottish Shortbread (Excellent) from Eliza Acton's Modern Cookery (London, 1845). 

Shortbread. Not quite excellent.

I made a whole batch: 1 lb (~3.5 cups) all-purpose flour, mixed with 1 oz of orange peel, and 2 oz of granulated sugar. I melted 8 oz of butter and combined it with the dry ingredients, making a dry dough. I baked the shortbread at 350F for 20 minutes. ["Mold it onto tins" was a little weird, so I went with "press the dough into two pie tins."]

The shortbread was alright. It mostly held together, had a decent texture and taste. There was a slightly off aftertaste which I suspect was the peel (instead of homemade, I used a jar of purchased peel, which I don't think I'll do again).

Compared to the last receipt I used, all the cookbooks I found this time specified that the butter should be melted (which made it much easier to incorporate versus cutting in solid butter as for pie-crust), and also called for citron, candied orange peel, and/or caraway seed to flavor and adorn the shortbread. I recall making shortbread with only butter, sugar, and flour (and eggs?), with the orange peel being an optional decoration, so know I'm wondering where I originally found that receipt. I thought it was Beeton's, which I was using a lot when I started out, but her receipt definitely calls for almonds and candied peel, even in the caraway is optional.


Saturday, December 10, 2022

Molasses Gingerbread, 1798

Revisiting this receipt from Amelia Simmon's American Cookery (1798, 2nd ed) which I originally tried in the third season of the Historical Food Fortnightly.

Upside: I finally have pearlash to experiment with. 

Downside: I miscalculated the amount of molasses, and ended up substituting in honey for about half of the volume. I also managed to put in only half the required butter.

Neutral: On my second time making this dish, I finally realized that there's no ginger in the receipt.

Mixed together 2 lb (~7 cups) all-purpose flour, 1 Tbsp cinnamon, and 2 tsp cardamon, cut in 2 oz unsalted butter (should have been 4 oz), then stirred in about a pint of combined molasses and honey, and finally 8 oz of cold water with 4 teaspoons of pearlash dissolved therein. I mixed this into a sticky dough with a stand mixer (which was basically at capacity), then worked the dough by hand to incorporate the last of the dry ingredients. I pressed this dough into a 9"x13" glass sheet-cake pan (buttered), and baked it for 30 minutes at 350F. 

The gingerbread had a perfectly decent texture; the tops were pretty ragged, which made me second-guess whether the dough was too dry. I definitely could taste the honey, which was fine, but just not quite how it's supposed to be.  All in all, this is a perfectly serviceable gingerbread receipt, and relatively quick and easy. 


Friday, November 18, 2022

To Boil Chickens, 1846


A purple transferware plate containing a chicken wing covered in parsley, mashed potatoes, and small pieces of boiled parsnip.
Boiled chicken with drawn butter and parsley.
And potatoes and parsnips.


Tried another approach to boiled chicken, this time from The Young Housekeeper's Friend (Boston, 1846):

To Boil Chickens.---STUFF them with the same as directed for a boiled turkey, or boil them without stuffing if preferred. Skewer them up into a good shape, as when prepared to roast, and boil them one hour. Eat them with drawn butter and cut parsley. It is an improvement to mash the livers and put into the butter. If they can be carefully skimmed, they need no cloth around them.

It's not horribly dissimilar from my last attempt. I did take the receipt's permission to not stuff the bird, and to omit tying a cloth around it. The skewers rather defeated me, though I did manage to tie the drumsticks. I skimmed the fat off the water as indicated, and threw in some marjoram in a nod to the boiled turkey receipt on an earlier page. I also boiled the chicken for 1 hour rather than 2--and it still was soft enough to fall apart when I tried to lift it from the water. I set the chicken in a low oven (325F) to dry while I made up the sauce, which improved it nicely. Salt and pepper were added before serving.

For the sauce, I made drawn butter with parsley per the instructions on the following page:

To Make Drawn Butter.---TAKE a teacup full of butter and rub into it a half a table spoonful of flour, or the starch which is made for puddings, then pour upon it about a teacup full of boiling water, stirring it constantly. Set it upon the coals and let it boil up. If it is suffered to remain boiling it will become oily. Some persons prefer to add two or three spoonfuls of milk. When melted butter is used with boiled fowls, lamb, veal, or fresh fish, it is greatly improved by the addition of parsley. Tie a few sprigs together with a thread, and throw them into boiling water two or three minutes, then take them out, and cut them fine and add to the butter.

I made the mistake of chopping the parsley first, but saved it by use of a tea strainer. The boiling water turned faintly green as a result, but the parsley did not visually change much. Meanwhile, I took 4oz of unsalted butter, rubbed it over 1/2 Tbsp flour, and set it on the stove with 4 oz boiling water. I stirred the butter together, allowing it to come up to a boil once, then stirred in the parsley. I found the sauce greatly improved by a pinch of salt (it was pretty insipid without this addition); I really need to remember to use salted butter in these sorts of things in the first place. I did not mash the chicken liver for inclusion in the butter, because I didn't particularly want to.

Overall, I found this dish perfectly palatable. Compared to the last time I boiled chicken, I was pleasantly surprised at how well it turned out. I think the drying the chicken in the oven really added something to it--though the shorter boiling time may also have played a role. The butter and parsley was quite tasty on the meat and both vegetables (once that salt was added), and the whole cooking process felt less onerous than it seemed like it should. I certainly have a high opinion of boiled chicken than I did after the last receipt.

Saturday, April 2, 2022

Original: Chemise c.1850

I still need to remake most of my 1850s underthings, and decided some inspiration was in order.

American or European chemise, c.1850. The Met.

Even at the highest magnification, I can't tell what technique is used on the decorative infill. My first thought it wavy braid (as on the chemise in my own collection), though the completely contained circles would be a pain to make in that technique, which leads me to suspect tatting or crochet. However, I can't clearly see any of the stitches to make a determination. I'm certainly not copying this garment, though, so for now it can remain a mystery.
 

Monday, October 5, 2020

Wool Hand Balls, 1860

Wool or leather hand ball from The Girl's Own Toy-Maker (1860).

I meant to make these for Fort Steilacoom Christmas last year (not to mention playing "The Elements" at Nisqually). I'm finishing them now in honor of Candlelight Tours, which should have been this weekend, and always have a group of talented volunteers reenacting "children at play" in the nursery.


Five woolen balls, each made of 6 wedges of various colors.
These should work fairly well for "The Elements".


The construction was quite simple and went quickly:
  1. Cut out ~6 eye-shaped pieces of fabric.
  2. Stich right-sides together, leaving a small gap in the last seam.
  3. Stuff with bran (I used bits of wool roving and scrap yarn for some).
  4. Stitch the gap closed from the right side.
The instructions don't actually say how many pieces to use per ball: the illustration shows 14-16 narrow sections, while the pattern given makes a roughly spherical ball in six pieces. I cut pieces about 4" tall and just over 1.5" wide (including seam allowances of ~1/4"), which gave a finished ball 2.5" across.

The resulting balls are a little squat, and I think they might be improved by cutting each wedge slightly narrower and using 8 of them instead of 6. The bran filled ball has a slight weight to it; it's easy to toss, but packs a slight punch if you try to throw it really hard. The wool-stuffed balls are very light, and even my hardest attempt to pitch them doesn't produce much of an effect.

Monday, March 23, 2020

Top 5 Parlor Games

For all of you locked down and sheltering at home with family, here are some of my favorite parlor games. These were a staple amusement for Victorians, particularly during long winter evenings. I've previously posted some popular Christmas games; here are my all-around favorites.

A realistic painting of two dozen adults and children dressed in 1860s clothing, playing a game in a circle outdoors, under a very large tree.
Hunt the Slipper (1860) by Frederick Goodall
Don't play in such large groups just now.

5. The Elements. Players sit or stand in a circle, and toss a small ball or knotted handkerchief. The person throwing the ball names one of the four classical elements (earth, water, air, fire), and the person catching the ball must name an animal appropriate to that element. For "fire", the catcher needs to say nothing. Forfeits are assessed for repeating an animal, naming an inappropriate one, or forgetting to call out an element.

4. Biz. This simple counting game is surprisingly amusing. Players sit in a circle, and count down the row 1, 2, 3, etc. However! The person who gets "4" (or a multiple of 4, or a number with a "4" in it), instead says "biz". The trick is to keep on count, and not say the forbidden numbers or 4, 8, 12, 14, etc. Forty through forty-nine are especially interesting. The game is played with forfeits (for errors and stalling).

3. Barnyard Animals. This is a story-telling game that's fun with kids, and hilarious with adults. Everyone selects an animal, and sits in chairs in a circle, with one person standing in the center.  The standing person starts to tell a story, using the animals as characters. When an animal is named, the corresponding player must stand  up, spin in a circle making the animal's noise, then sit again. At the phrase "all the barnyard animals", everyone stands, spins while making noises, and then scrambles for a new seat. The player without a seat becomes the next story-teller.

[I've found this game in period books as "My Lady's Toilette", with everyone pretending to be shoes and combs and so on, but prefer it with animals, as I learned it with LHS.]

2. I Love My Love With An A. An alphabetical game of wit. The group goes alphabetically around the circle, the first player getting "A", then "B", "C", all through the alphabet. Each player much think of a name, occupation, and trait that starts with that letter. For advanced play, add a flower, a food, and a present. The rulebook recommends skipping Q, X, Y, Z, though intrepid players can power through these tricky letters. You do not have to play with forfeits, but can assign them for forgetting a category, choosing a word with the wrong letter, or stalling too long.

Example rounds:

Person 1: "I love my love with an A for her name is Anna, she is an architect, and she's angelic."
Person 2: "I love my love with a B for his name is Ben, he is a bus-driver, and he's very bashful."
(Full version) Person 3: "I love my love with a C, for their name is Chris, they are a carpenter, and they're very careful. I will feed them carrots, give them a candle, and crown them with chrysanthemums."

1. What is my thought like? My current favorite is a game of wit. It's very popular with middle schoolers and adults alike; I've not tried it with younger children.

The person whose turn it is will think of an object (or concept), and without saying what it is ask the group "What is my thought like?" Each person then makes a comparison. After everyone's committed, the turn-taker will announce their thought, and everyone must explain why their comparison is true. Once everyone has done so, the next person gets a turn to pick the secret thing. You can play the game for forfeits, but I have never done so.

Example round:
Abby: I'm thinking of a thought. What is my thought like?
Ben: I think your thought is like a book.
Claire: I think your thought is like a summer's day.
Danny: I think your thought is like a baby.

Abby: I was thinking of my bunny slippers.
Ben: Abby's bunny slippers are like a book, because they are useful for relaxing at the end of a long day.
Claire: Your slippers are like a summer's day, because they are very comfortable.
Danny: The slippers are like a baby, in that I'd get in trouble for losing them.

The game continues with Ben picking an object, while Abby, Claire, and Danny make similes for it.

***

Honorable Mention: Blindman's Bluff. Not a good social distancing game, but very fun with a small group of close friends, at some point when it's safe to touch eachother again.

The two versions I like are blindman's bluff with a wand and seated blindman's bluff. In both games, one person is blindfolded, and tries to catch another member of the group and guess who they've caught. When played 'with a wand', the whole party holds hands in a circle around the blindfolded person, who uses a long stick to feel around for someone in the circle; the blindfolded player must then guess who it is. "Porco" (an Italian variant) allows the blindfolded player to make animal noises, which must be repeated  by the person being tapped with the stick (giving a clue to their voice). For safety, be sure to hold the stick low--below waist level--to avoid hitting faces.

In seated blindman's bluff, the whole company sits in chairs in a tight circle, and the person guessing has to sit on someone and guess who it is, rather than hitting anyone with a stick.

Sources

The Sociable, or 1001 Home Amusements (1858)
A Week's Delight or Games and Stories for the Parlor and Fireside (1859)
Fireside Games: For Winter Evening Amusement (1859)
Parlour Pastimes for the Young (1859)
Sports and Pastimes for In-Doors and Out (1863)

[Parts of this post previously appeared at my old Civil War blog.]

Thursday, March 19, 2020

Introductions and Modes of Address, Mid-19th Century

[This post originally appeared on February 27, 2015 at my Civil War blog. I'm moving select content here to my main blog.]

Black and white illustration of a woman in a late 1850s open-front wrapper whispering to a lady in a day dress of the same era.
"Allow me to introduce you."

New to first-person conversation?  There's no better place to start than at the beginning. The preferred period method for introductions features a person presenting one friend to another--you meet people largely on the recommendation of your existing acquaintances.  

"Mrs. Jones, have you met my sister, Mrs. Smith?" 

"Mrs. Denny, allow me to present M. Hugo, from Paris." 

"Miss Thomas, may I present Dr. Adams?"

When making an introduction, you always present one person to the other; the higher ranking person is addressed first. To determine precedence in this and most other social situations, some guidelines:
  1. Ladies outrank gentlemen (this is the most important rule)
  2. Married ladies outrank unmarried ladies
  3. Older persons outrank young ones*
  4. Rank your close friends and family lower than strangers
  5. Social status—this is bit nebulous, unless you're dealing with actual aristocrats—but could come up if you're introducing two people of the similar age, gender, marital status, and proximity to yourself, in which case the one of greater social prominence goes first
Dropping in additional information (relationship to you, recent travel abroad, a visitor's hometown) is appropriate. The idea is to get people acquainted with each other, after all, and those details may help start a conversation.  Miss Leslie (The Behavior Book, 1853) writes that it is acceptable for ladies who are travelling alone to introduce themselves to genteel (female) strangers, when there is no one available to make an introduction. Similarly, persons meeting a the house of a mutual friend (according to Charles Day in Hints on Etiquette and the Usages of Society, 1844) may introduce themselves, as the host's invitation indicates that they are both respectable. Another period option is to present a letter of introduction from a mutual associate.

In certain situations (public balls), a designated 'floor manager' or 'master of ceremonies' is delegated to introduce potential partners for the dance only; these introductions are different from normal social introductions and do not allow for future social interaction.

 In any case, make sure to use social titles and surnames, when speaking to adults. Avoid reenactorisms, such as calling a middle-aged woman "Miss Betty"**, or addressing the postmaster as "George"***.  Use of first names, in period writing and address, is limited to family members, children, servants, and some intimate correspondence between friends. The exception is to differentiate between people with the same title and last name, in which case the first name is added for the junior parties.

Example: The Smith family has four daughters and three sons. Both the eldest son and the eldest daughter are married. The middle son and daughters are grown-up, but unmarried. The youngest son and daughter are still children, and not brought into adult society. The family is addressed as:
Mr. Smith (dad)
Mrs. Smith (mom)

Mr. John Smith (eldest son)
Mrs. John Smith (daughter-in-law)
Mr. Robert Smith (younger adult son)
(Master) Michael Smith (child) 

Mrs. Brown (married daughter)
Mr. Brown (son-in-law)
Miss Smith (eldest unmarried daughter)
Miss Deborah Smith (other unmarried adult daughter)
(Miss) Liza Smith (child)

 In public, Mr. Smith refers to his wife as Mrs. Smith; she refers to her husband as Mr. Smith (she may call him "Mr. S",  but her friends would find this inelegant or even affected). What the Smiths call eachother in private is their own business. They address their children by their given names. [Note: Mr. Day's book condemns the practice of calling one's own children Mr._ or Miss_, which means some people did it.]
When Master Smith grows up, he will be styled "Mr. Michael Smith" (unless/until he attains a professional distinction styling him as "Dr.", "Professor", or "Reverend", or assumes a notable military rank). The younger men will continue to use their first names with the last in any situation where multiple "Mr. Smith"s would create ambiguity. Among their male friends, the sons are just called "Smith", dropping the honorific.****

 Similarly, Mrs. Brown uses her husband's first name when more than one Brown is around. When Miss Smith marries, her sister Deborah will stop using her first name and simply be "Miss Smith". When little Liza is old enough to enter society, if any of her older sisters are still unmarried, she'll be styled Miss Elizabeth Smith. If Deborah never marries, she'll continue to hold the title of "Miss Smith"; in that case, Liza could pass right from "Miss Elizabeth Smith" to "Mrs. MarriedLastName" without ever being the sole "Miss Smith".

 Women can attain professional titles, but they are very, very rare. The Rev. Miss Antoinette Brown (later Rev. Mrs. Blackwell) and her future sister-in-law, Dr. Elizabeth Blackwell, are quite exceptional--as is their shared sister-in-law, Lucy Stone.  [In order, they are the first woman ordained by a mainstream protestant sect in America, the first woman to receive a medical degree in America, and the the first prominent woman in America to keep her own name after marriage.]

References
Day, Charles William. Hints on Etiquette and the Usages of SocietyBoston: William Ticknor & Co, 1844. Available here.
Leslie, Eliza. The Behavior Book. Philadelphia: Willis P. Hazard, 1853. Available here.
Thornwell, Emily. The Ladies' Guide to Perfect Gentility. New York: Derny & Jackson, 1856. Available here.
The illustration is from Peterson's Magazine, January 1859 issue.

 *If you're dealing with a venerable spinster and a very young matron, there may be some interplay of rules 2 and 3, where the younger person gives way to the older. There's also an exception for guests of honor being elevated to the top position, but that's event-specific.

 **That's "Miss Betty Thompson" if she's a spinster, with an elder sister who is also a spinster ("Miss Thompson"). The exception is if you can document a local custom appropriate to your impression. The one place I've seen it in the period is in a diary referring to a governess (socially ambiguous position), who appears variously as "Miss Firstname", "Miss Lastname" and "Firstname Lastname".

 ***It's only appropriate if he's your son or brother.

 ****While I'm still gathering information, this particular form of intimate address seems to be used in casual talk between men of equal rank (or towards those of lower rank) who know eachother from adulthood: college friends, coworkers, employers towards upper servants. That is, they know eachother from adult life where first names aren't used, but are on familiar terms. Women don't move in the public sphere in the same way; if they're using a special name for a close friend its her first name.

Thursday, December 26, 2019

HFF 3.26: Obsolete


The Challenge: Obsolete: End the year with a recipe, ingredient or technique that has been superseded by modern practices. I'm opting for a cake raised with only eggs and extensive mixing [no chemical leaveners], and baked in a tin hoop instead of a modern cake pan.

The Recipe: Plum Cake from The Cook and Housewife's Manual

The Date/Year and Region: 1837 [6th ed], Edinburgh/London

How Did You Make It: There are three recipes for plum cake: I went with with #1007, the pound cake variation, as I neglected to procure cream. 

As directed, I started by beating a pound of [unsalted] butter "to a cream", then continued mixing in 5 well-beaten eggs. The original instructions called for 9, but recent reading has suggested that modern eggs are so much larger than pre-20th century varieties, that the amount should be halved. I tried that here, and found the batter somewhat thicker than a modern boxed cake, but still thin enough to not be a dough. I decided to continue without adding additional eggs.  

I then added 11 ounces of sugar [amount not given, so I estimated and made some math errors: the following plum cake recipes call for 1:1 or 2:3 ratios of sugar to flour by weight], 1 1/4 lb flour, 8 oz currants, 2 oz raisins ("a few"), 8 oz candied peel, 2 Tbsp cinnamon and half a large nutmeg (spices "to taste"). The whole time, I continued beating the batter.

I baked the cake in a tin hoop--with double layers of parchment paper on all sides--for 2 hours 15 min at 325F.

The icing is #1006, with four egg whites and a pound of sugar (and 2 tsp orangeflower water to flavor). A single batch (2 egg whites) might do if beaten to sufficient volume. The first batch I made was not enough, but the second was larger and might have  een enough on its own.

Time to Complete: About half an hour to mix up (including leaving the mixer on while I quickly cleaned the oven), and 2 1/4 hours to bake.

Total Cost: Eggs $2, currants ~$4, candied peel made at home from leftover fruit peels throughout the year, other ingredients on hand.

How Successful Was It?: Tasty. A bit on the dense side, as is usual when I make mid-19th century cake recipes. In general, I'd compare it to the other Christmas/12th Night/Ginger Cakes I've made before. The cinnamon, peel, and currants all come through nicely; in the future, I'd probably increase the amount of nutmeg since I didn't taste it through the other flavors. The cake was also less sweet than similar cakes I've made, so I'd probably try increasing the sugar as well.

The bottom of the cake scorched a bit, so I need to remember to put extra paper there in the future: otherwise, the double layer worked perfectly on the sides and top.

How Accurate Is It?: As noted, I tried to adjust the egg proportions to better reflect period egg sizes (whee, further research ideas), and used the hoop rather than a modern pan. I did use an electric oven and mixer. The icing contains pasteurized egg whites. 

Tin hoop, lined with paper, containing cake batter with peel and currants, on a paper-covered cookie pan.
Baking the plum cake.

Cake with white icing on a pink transferware plate.
Ready to serve.

Thursday, December 12, 2019

Quilted Silk Hood

Silk hood.

From Anna Bauersmith's quilted hood pattern. It only took three years for me to get started, after which it went together very quickly. The hand-quilting took a single weekend event, and the pieces went together in only a few more hours work. Using a machine it could go even faster.


Quilted pieces.

I used a silk exterior, polished cotton to line, and a single layer of wool quilt batting inside. The garment is hand-quilted, using one of the sample designs included in the pattern. The ties are self-fabric, with a rolled hem. Trimmed with white rabbit fur, to match my winter cuffs. I considered adding a narrow trim along the bavolet, but didn't like how it detracted from the quilting (I rather like how it turned out there).

Fur was mentioned as a trim option in the pattern, but my searches didn't reveal many antique examples to use as inspiration. I did find a written reference to a silk hood with chinchilla fur.

I found this hood comfortable to wear, and it kept the water off without crushing my hair. It was a little less warm than previous hoods I've made, as it didn't sit so close to the face. All in all, I am very satisfied with it.