Showing posts with label pattern. Show all posts

Friday, April 14, 2023

Pattern Resource from LACMA

This dolman is now on my to-make list,
despite having no 1885 outfit to wear it with.

I love the photographs on  LACMA's online collection, and was pleasantly surprised to find that they have free pattern diagrams available. Undertaking the Making: LACMA Pattern Project has 13 garments with detailed descriptions of the textiles and construction methods, along with line-drawings of the component pieces.

Wednesday, December 19, 2018

Book Review: Patterns of Fashion 1

In honor of Patterns of Fashion 5 being published by the The School of Historical Dress, I offer my belated reviews on the earlier volumes.

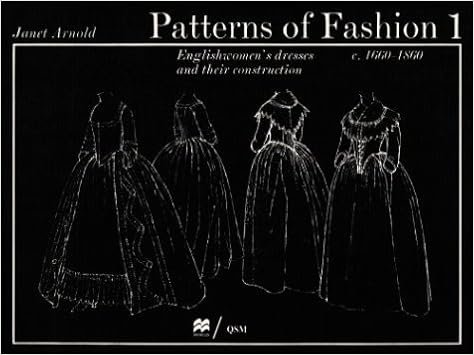
Black background with white line sketches of two historic dresses (front and back) from the 17th to 19th centuries

Patterns of Fashion 1: Englishwomen's Dresses and Their Construction c.1660-1860 by Janet Arnold
(revised edition, 1972)

I really, really like this series.  As far as I can tell, Patterns of Fashion is the ur-example of a book based on measuring original historic dresses, and graphing out the component pieces (see also Corsets: Historical Patterns & TechniquesRegency Women's Dresses).  And I really like that as a way of understanding the actual, historical methods for cutting and constructing of garments.

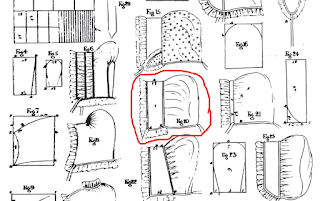
The bulk of the book is sketches of original dresses, with gridded patterns--most garments get a half-page of line drawings showing the garment as worn (front and back, some with additional detail sketches), and a page of 1/8 scale pattern pieces.  There is also a good 18 pages worth of research and discussion on period dressmaking (including contemporary patterns, and depictions of dress-making), a one-page timeline of fashionable dress shapes, two pages of metric conversion information, and two pages of instructions for how to scale up the patterns.

I really appreciate that the pattern pieces are annotated to show connection points, trim lines, the location of pleats, fasteners, etc.  Size and grain position are also given, which is a level of detail I rarely see in costuming books.  The drawings are, in my opinion, very clear and detailed.  The front cover gives a good idea of this, but I think the black-on-white of the interior pages is crisper and clearer than the white-on-black cover. 

The book does give some suggestions for reproducing the garments, but if you are new to historic sewing, additional sources will be needed. The only historic sewing technique covered is cartridge pleating, which comes with instructions/illustrations at the end of the 'scaling up' section. The book list at the end does include recommendations for books on historic sewing.  It is explicitly stated these are diagrams of real garments, made to fit specific people when worn in particular ways; and thus that reproducing  them requires scaling the pattern, fitting it to the intended wearer, knowledge of sewing techniques, and proper undergarments.

The only other caveat I have is that the book has ~50 examples to cover a 200 year period, so if you are looking at only a narrow time frame, you may have few useful garments to choose from (but the information you do get is something you can't find in many other places). For instance, there was only one dress from c.1660, and one more c.1710 (a second dress from that decade appears in the additional notes); looking around 1750, however, has seven different garments including a gown, two jackets, a petticoat, two stomachers, and a pocket.  The period 1730-1830 is particularly well-represented.

Stars: 5

Accuracy: High.  All original garments, with the component pieces graphed out.

Difficulty: Advanced (for reproducing garments). All levels for appreciating garment construction.

Overall Impression: The Patterns of Fashion books are my holy grail for how dresses were historically cut and constructed.  They are very useful for exploring how styles changed over time, and I'd recommend that every costumer or historian interested in western fashion read them. Or, at least, read the ones relevant to you time period.  Even if there's only one or two garments from your particular year range, the cutting information is really interesting, and it's not something that easily found in other sources.

Sunday, August 2, 2015

Cross-post: Victorian Clothing Research and Help for New Reenactors

A group of children, from Der Bazar, 1861
1861 Engraving from Der Bazaar

All self-promotion is purely coincidental. :)

The following are informational posts I've written for my Civil War group's public blog (link conveniently located on the side-bar to your left).


[I've already mention a lot of these resources in this blog, but if helps, here are my round-ups of primary sources available on-line: writings, paintings, and museum collections, as well as some good secondary sources.

Tuesday, June 9, 2015

Plain Cap, early 1860s, research

Working on a cap for a friend who does an ACW nurse impression.  She needs something to cover a a hair 'transition', but also lightweight to avoid heat problems.

A cap, white and plain, seem to be synonymous with "nurse".  Both in fiction and non, descriptions of nurses frequently refer to their white caps (and aprons, and collars and cuffs), and plain dresses.

"While linen collars--white aprons--and a plain white cap--compose their very homely but convenient attire." - The Southern Literary Messenger, 1864 (description of Roman Catholic lay volunteer nurses)

"... she should wear a common dress and linen cap, and be no way remarkable to the eye of the patient..." -Sowing and Reaping, 1867

"Their dress is simple, black, with white collars and undersleeves, and, when in full dress, a Swiss muslin cap."-The Employment of Women, 1863

"She put on the coarsest clothes to be bought for money, a light cap... and went into the largest hospital in Washington as a nurse..." -"The Stolen Bond" in Peterson's Magazine, 1866

"I shall go as a volunteer nurse. In Baltimore the nurses have a uniform, -- a black or brown merino dress, tight sleeves, no hoops, tiny linen collar and cuffs, and a white tarleton cap." Anecdotes, Poetry, and Incidents of the War, 1866

German Protestant "deaconesses" who work as nurses wear "...a gown of blue and a white collar and cap."

"Her dress was plain black from throat to heel, with a skull cap of white, like a Moravian sister." -The Fortnightly Review, 1867

"For her to be a soldier's nurse meant something very different from wearing a white apron, a white cap, sitting by a moaning soldier's bed, looking pretty." -Women's Work in the Civil War, 1867

"He rejoins the army, while she follows as a nurse to 'St. Marc's, a military hospital, and dons a muslin cap and other unbecoming articles of attire, and devotes herself to the saintly work of alleviating human suffering." -The Knickerbocker, 1864

The only color given is white; the materials include linen and fine cottons ("muslin", "tarletan"); the caps are "plain", or even "unbecoming".  Such a ubiquitous but non-decorative article must serve some sort of practical purpose--keeping the hair clean, out of the way, or concealed.  The white cotton/linen ensures easy washing.

A plain linen child's cap, 19th century, in The Met.
Cap, British, 19th century
This linen cap is the plainest original I've found; from the size, however, it's a child's cap.
1850s plain, white cap in The Met.
Cap, American, c. 1850
Of course, searching for cap patterns in the magazine of the '60's can get very trying.  There are plenty of mentions of caps, descriptions of them, and occasionally even an engraving.  Patterns?  Between 1855-1865, I've found three, all night-caps.  The best source I know of for cap patterns is the 1840 Workwoman's Guide, which has pages upon pages of the things, for all possible occasions.  Unfortunately, twenty years have elapsed between the publication of that book and the outbreak of the war, including radical changes in hair-dressing and cap-wearing.

My usual go-to in such cases is the The Ladies' Self-Instructor in Millinery and Mantua-Making (1853).  Though less comprehensive than the WWG, it's closer to my target dates.  Unfortunately, all is has to say about caps is that there are many different styles and you should pick one which suits you.

If pictures are being provided, but not diagrams, then the magazines of the early 1860s are assuming that ladies either already know how to make up caps (and thus only need inspiration) or are hiring someone who does.  The only dissemination of such information that I can find is in earlier sources like the WWG, and an adult woman of the early '60s would be familiar with the styles/techniques therein from childhood...but it's still a bit of a stretch for me. 

One thing that the WWG does mention, though, is that certain patterns might be used to make nightcaps, or day caps for servants/poor persons.  If this holds true to the '60s--and as far as I can tell night caps, servant's day caps, and nurses' caps are functional head-coverings meant to shield/conceal the hair more than adorn it--than those three night-cap pattern are probably my best bet.

Plate 20 from The Workwoman's Guide, showing cap varieties.
(No. 20): "This shape is particularly suitable for day-caps for young
servants, or night-caps for any age or station."
From The Workwoman's Guide. Plate 9; instructions on page 66.
Option 1: Peterson's Magazine, 1859.  A night-cap from their series on home-sewing:
Night cap from Peterson's Magazine, March 1859. Pre-Civil War.
Night-cap. Peterson's, March 1859. Page 242.

Night cap diagram from Peterson's Magazine, March 1859. Pre-Civil War.
Diagram of Night-cap.

Number 2: There's another night cap from Peterson's ('61) that's a bit more "novel" in it's design:
Nightcap from Peterson's Magazine, 1861.

Number 3: An 1859 pattern from the The Young Lady's Book. This one is also made up in two pieces, with a straight front piece (brim) and mailbox-shaped crown.
1859 Nightcap from The Young Lady's Book.
Of the three, I prefer the definition of the first and last pattern; made up plain, I don't think the round crown will look as becoming as it would trimmed.  The batiste remnants available for the project make number three look like the best bet, as it doesn't need to be cut in a single piece. 

Tuesday, December 2, 2014

Book Review: Period Costumes for Stage and Screen, 1800-1909

Book Review Time!

Period Costume for Stage and Screen: Patterns for Women's Dress 1800-1909 by Jean Hunnisett (1991, 2013)

Cover for "Period Costumes for Stage and Screen" by Jean Hunnisett.


This is an interesting costuming reference.  It covers a rather large span of well-documented time including great changes of silhouette and dress construction.  It's one thing to write a single book covering a century or more of medieval costumes, for which there are few surviving garments, no photographs, and only a limited sense of portraiture in extent illustration.  It's another thing entirely to address a century of fashion for which we have copious quantities of original garments from all ages and stations; fashion magazines with illustrations of each month's trendy designs; sewing instructions; photographs; eye-witness descriptions; and cartoon satire of fashionable caprices.

Which is to say, this book has a lot of ground to cover in a field with a great deal of nuanced information available. And it does a good a job of getting through it.

What this book is not, however, is a guide for historic re-creation.

By means of explanation, Period Costumes for Stage and Screen really means the "for stage and screen" part.  And I highly recommend it for anyone attempting to costume a period piece, especially for those who don't do a lot of historic costuming and/or need to get started without an extensive research phase.  Ms. Hunnisett does the research, and gives you accurate shapes on which to base your costumes, with multiple variations for visual diversity among the cast and numerous tips and tricks for getting unfamiliar pieces to look right.  Each section (and there are seven, plus a techniques portion) covers ten to twenty-five years of history, and includes an overview of the period's aesthetics, appropriate undergarments, and various bodice, sleeve (and where appropriate skirt) variations for each.  Patterns taken from original garments include a year or year-range for further specificity.  There are even examples of costume studies from contemporary plays and recommendations for fitting actors who aren't used to historic garments.

I repeat: if you are a theatrical costumer, get this book and keep it close at all times.

If you're an historical seamstress, however, you'll likely have a more mixed experience.

In it's favor, all the garment designs in this volume are taken from extent garments, with the year given (in the 1500-1800 volume many of the designs are based on surviving portraits).  That being said, this is really a breadth book and so you'll find very limited descriptive information on each garment--a few sentences in overview, not a whole page of technical data on each.  The illustrations are line drawings (of originals), with cutting diagrams on a grid, and the occasional fashion plate. Additional research would be needful for making an outfit for a specific year and occasion, but the pattern shapes given should be helpful for figuring out and adapting other original designs.

You will need some drafting/draping and a great deal of fitting experience (or be willing to learn) to use this book effectively.  These aren't graded patterns--they're diagrams.  A photographic tutorial of fitting bodices is included, for those ambitious individuals attempting to teach themselves draping. The sewing/construction technique section primarily consists of modern costuming methods, which may differ from period construction methods, but does cover useful concepts like cartridge pleating. I award full points for explaining that zippers really change the look of things and shouldn't be used.

Score: 4 stars
Accuracy: Very accurate patterns (being taken from originals), but does not teach period sewing techniques.  Good advice for getting the general look of the periods and costuming period pieces, but seamstresses looking to recreate historic garments will want to consult additional sources for their specific projects.
Difficulty: Advanced.  You get the general shapes to work with, but need to know how to fit, draft and sew.
Strongest Impressions: It's not The Dressmakers' Guide, but Period Costumes for Stage and Screen will get you started in a variety of fashion eras, and offers good period shapes for use in drafting your own patterns for the (extended) nineteenth century.

Thursday, June 26, 2014

A Carpet Bag

 I've been meaning to make a carpet bag for sometime--it's an accurate (even iconic) piece of luggage for the mid-century, and can hold a scary amount of items.

Materials:
1 yard of reproduction period carpet
1+ yard of lining material, depending on width (I used linen scraps; I've also heard of canvas and silk linings, and seen some reproductions lined in cotton prints)
1 frame (I used a 16" tubular purse frame, some people use dowels)
5 purse feet
Leather scraps, for bottom, welts, buckle straps, and handles
2 small buckles
A bottom board (I used a double thickness of pasteboard, a thin wood may be preferable).

Materials Sources: 
I got the 16" frame from Bits and Purses on etsy.  The fabric was from a friend who has sources.  I found the feet at Weaving Works (75% off clearance during the moving sale!); the leather and linen were in my stash (previously from S.R. Harris Our Fabric Stash, IIRC), and the pasteboard was from Blick.

The closest thing I could find to an original pattern on-line were these instructions from Scientific American (apparently from 1881).  Also useful were the original carpetbag pictures at The Graceful Lady (scroll to the bottom of the page), and these Sewing Academy threads: carpetbag part suggestions, carpetbag bottom.

The process:
Extrapolating from the size chart in the Sci. Am. instructions (which gave piece sizes for a 15" or 18" frame), I cut out the bag sides and gussets in scrap fabric.  I sewed these together, and pinned the edges over the (open) frame to check the fit.  I tried opening and closing the frame, and--being satisfied with the fit--used the scrap fabric as a pattern for cutting the lining and carpet pieces (two side pieces and two gusset pieces in each material).  If I'd thought ahead, I would have cut the lining sides and bottom together as one long rectangle for easier assembly (this was the recommended procedure from the 19th century instructions).

I wanted a pocket inside the bag, to help keep track of small items, so I put one on one of the side lining pieces before going further.

Next, I sewed the carpet pieces together in a square: side to gusset to side to gusset (to the first side); for reinforcement, a leather 'welt' was stitched over each of the side/gusset seams.  While the weight/structure they provide is nice, the process was tricky, and the extra seam bulk complicated later steps--I'd be tempted to skip this leather next time.  The lining was prepared in the same way, sans welts.  Measuring the opening gave me the bottom dimensions; I cut one piece of leather to this bottom measurement, and one piece of linen to make up the bottom inside lining.  The leather was sewn to the carpet (right to right, on machine), and turned right-side-out.  At this point, the bag was starting to take shape.  The bottom lining was attached to the side/gusset lining in the same manner.

I cut a piece of pasteboard for the bottom foundation, using the dimensions of the leather bottom (shorter by 1/4" on each side). It ended up too big, anyway, so I trimmed it until it fit snugly, and then marked on it the positions for the 5 feet--one in the center, and one in each corner.  I punched small holes on those points, and then glued the pasteboard onto the leather bottom.  When dry, I used an awl to make small holes in the leather at the foot-points, and attached a foot through each (the feet have two prong on them, like brads, which are spread apart to secure the foot).  I tapped each with a mallet, per the instructions, and that seemed to secure it nicely.

Being unsatisfied with the rigidity of the bottom portion, I cut a second piece of pasteboard and glued it over the first.  The double-layer is more satisfactory, but next time I'd like to try a thin piece of wood.

Next, I pinned the bag upper to the open frame, lining up the corners and centering each piece.  I folded the top of each side/gusset over the frame (measuring from the bottom to top along each side, so that the bag is uniform length), and stitched it down by hand.  By using white thread and taking small outside stitches (through the white portion of the weave), the seam is nearly invisible on the outside.

To make the handles, I cut 2 strips of leather 11 1/8" x 1", rounded the edges, then folded in half (lengthwise, right sides out) and stitched along the edge, leaving 1.5" at either end.  I dampened these with water, bent them into half-circle shapes, and let them dry.

To attach each handle, I placed is at the desired location near the top of the bag, and--using a leather needle with black silk thread--topstitched along the rounded end of the handle, through the carpetbag beneath.  I should have done the buckles at this time as well, so that the wrong side of the sewing is hidden by the lining.

The lining was placed inside the bag (right side out), and the top excess folded down between the carpet and the lining material.  This was pined in place, and handsewn close to the frame.


Tubular frame and carpet bag pieces.
Frame and pieces
Leather bottom of carpet bag, with five feet.
Leather bottom with feet
Leather handles for carpet bag.
Shaping the handles
Carpetbag interior, without lining.
Bag interior, with frame, sans lining
Carpetbag exterior.
Bag exterior, before adding handles
Carpetbag interior with bottom board.
Interior, showing bottom board

Completed carpetbag exterior.
Finished carpetbag, exterior
Completed carpetbag interior.
Finished carpetbag, interior


Wednesday, June 18, 2014

New Berlin Work Project-- A Flag Needlebook (Research Post)

First, from the New Hampshire Historical Society [1963.062.02] (c. 1861-1863)

Observations:
Worked in tent stitch (the Lady's Self-Instructor in Millinery and Mantua-making... (1853), states that Berlin patterns are always given in tent stitch, but may be worked in cross stitch).

Stitching dimensions: 39 sts tall, approximately 46 sts wide, blue square is 21 x 23 sts.  According to the LS-I, Berlinwork should be done on either 18-count or 10-count canvas--which would give the total dimensions 3.9" x 4.6" when done in the latter, or about 2.2" x  2.6" in the former. The museum gives the case dimensions as 3" x 3.9", which indicates a canvas size of 12-13 stitches per inch.  Apparently, the LS-I isn't definitive for 19th century canvas sizes...

13 "stars" in a grid pattern 3/2/3/2/3, with solid blue border of 2 sts on the sides and 3 rows top & bottom; stars made up of 5 sts in a + shape.

Inside cover appears to be a white silk with woven design.  Red, white and blue 'pages' have a matte finish, and are likely (wool) flannel--the recommended material for needlebook pages in both The American Girl's Book and The Girl's Own Book.  The pages are different sizes and have pinked edges.  The museum gives the material as "textile, wool, silk".

Ribbons in red white and blue adorn the spine.  These will be silk; the upper white loops appear to be the same width as 6 stitched rows, making the ribbon about 1/2" wide (varies with canvas size); the red ribbon at the lower bow looks even narrower.  

The large leaf of blue flannel forms the the back cover, which would explain why it's larger than the other two leaves (same size as the front cover), and why there's a strip of blue along the left-hand edge in the top picture.  A red decoration (embroidery? applied trim?) follows the top and bottom edges of the back.

It is not clear whether the canvas in the front cover has a solid support underneath it.  Looking at the worn places, it seems like the white silk backing is visible through the canvas, though it could be a white paper/paste board in between the two.  From my reading, it seems more typical to make the covers of needlebooks out of pasteboard, with a decorative fabric covering rather than just using the fabric alone.  That being said, my berlinwork cardcase does very well with only silk-backed canvas.     

Second: 35-star needle book (c.1863-1865)

Total size: 26 sts x 50 sts; blue section 14 sts x 20 sts.  Possibly worked in tent or cross stitch (hard to tell).  Stars worked as single cross-stitches in five rows of seven (one-stitch blue boundary between stars; two rows/columns solid blue border).  Each stripe is two rows of stitching.  Dark blue ribbon on binding.  No view of pages or back cover (if present).


Monday, June 9, 2014

Plaid Sunbonnet III: Putting it all together

Continuing from parts I & II. I did most of the hand-sewing at Living History events (read: Ft. Nisqually), so there's aren't may pictures of the process.  Nonetheless, here's how it went:

First thing, I corded the brim.    The rectangular brim piece was cut with the front on a fold, giving a double layer.   The first cord was paced between these two layers, snugged up against the fold, and held in place with a small running stitch.  The next cord was sandwiched between the layers--snug against the previous row's stitching--and was secured in place with another row of running stitch.  Following some quilting advice, I concealed the thread-ends in the cords, which proved a tidy arrangement.  I opted to do twenty rows of cording over the front brim (the inspiration bonnet only has 11, but seems to have used a thicker cord).  For the second set (5 cords, up from 3 in the original), I ironed the brim flat, and marked a stitching line 3" away from the finished cording. After doing a running stitch along that line, I continued cording as before.

The brim prep complete, I trimmed the side edges even and prepared the other pieces.  A wider running stitch was made along all sides of the crown piece, so as to gather it (one thread was used along the sraight edge, another over the curve, so that the two could be gathered separately).  The curtain was cut with a selvage along the bottom (so it needn't be hemmed), but the short edges both needed to be finished with a small whip stitch and the top needed to be gathered.  The ties were narrow-hemmed along three sides (both long, one short).
Pieces for 19th century corded sunbonnet.
The pieces, ready to be assembled.
First up, I sewed the brim to the crown--the curved side(s) of the crown to the back edge of the brim, parallel to the cording.  I marked the centers of each piece with pins, then sewed then together with a half-back stitch, adjusting the gathers in the crown to fit.  Despite the added fabric in the crown, these pieces fit together smoothly, with less gathering of the crown than expected.  I blame the bias-cut brim.

Next, I tried on the crown/brim piece, and adjusted the back gathers on the crown (on the straight edge), and tied down the gathering thread to keep them in place. Then, the gathered, raw edge of the curtain was pinned & sewn to the raw edge of the brim/crown piece.  Again, a half-backstitch was used.

Lastly, the ties were added.  The raw edge of each tie was folded over twice, then attached to the inside of the brim with small stitches.

Voila:
Completed plaid sunbonnet, for 19th century living history.
Finished Sun Bonnet
  

Thursday, June 5, 2014

On-Line Patterns for Clothing (American Civil War/ Mid-Victorian)

Getting into this hobby as a broke high school student, and again as a broke grad student (and now continuing as a broke un/underemployed former student), I've spent a fair amount of time hunting for free patterns and resources on-line.  What follows is a mixture of modern instructions from very generous, reputable persons and original patterns from the 19th century (these are not always easy to work with, especially for a beginner).  Since I mostly do 1855-1865 women's clothing...most of the links are for women's clothing of the 1850s and 1860s.

Useful for New Reenactors

The VERY FIRST Thing to Read Before Making/Buying Women's Clothing:
Your Best Bet Wardrobe by Elizabeth Stewart Clark

General Advice on All Things (but especially non-military clothing for men, women and children)
The Compendium The Sewing Academy Forums
Atlantic Guard Soldiers' Aid Society Links (Go for the first person worksheets, stay for the widespread advice)


Patterns & Instructions (& Some Advice) 

Hats and Bonnets
Cost-effective Headwear for All Seasons (advice thread)
Original Soft Bonnet/Hood Patterns On-Line (with my commentary)
Romantic History Hood Pattern (printable, modern instructions)
1861 Knit Hood (Original pattern with modern commentary)

Hair-styling
My Hair Tutorials
Video: Basic Hair (with some alterations to the side-styling, this will get you through much of the 1850s and early 1860s)
Hair Advice (Thread)
Later Victorian Hairdressing (Beautiful step-by-step pictures, but about 15 years post-ACW)
Video: Rag Curls

Chemise Patterns
Mrs. Clark's Chemise Pattern
1860 Chemise Pattern

Drawers Patterns
Draft Your Own Drawers
1863 Drawers Diagram

Corset Patterns
Stays in The Workwoman's Guide (1838/40) [page 80-81, diagram page 327]
"Practical Instructions in Say-Making" in Godey's (1857) [diagram and instructions pages 165-6]
1868 Corset Diagram (Patent)
1869 Corset Pattern

Skirt Support Instructions
A Covered Cage
Cage Crinoline
Another Cage Crinoline (Thread)
Corded Petticoat (Thread)

Petticoat Instructions (Do not wear a hoop without a petticoat--it will look bad)
A Petticoat

Note on skirt supports: Hoops appear in European high society in 1856, and spread quickly--by 1857-8 they're already on the westward trails & America's Pacific coast.  By the early '60's hoops are ubiquitous.  If you're doing pre-'56 events (or are doing 1856, but aren't the Empress Eugenie), use a corded petticoat.  If you're in the 1860s, use a hoop, or select a non-hoop impression (nurse, servant, cook).  Keep hoops away from open fires.

Dress (Bodice) Patterns
Original 1859 Bodice Patterns
Bodice with 3-Piece Back and Coat Sleeves ('60's)
Mrs. Clark's Fitting Instructions
1857 Bodice

Dress (Skirt) Instructions
Gauging a Skirt (No Pattern Needed)

Undersleeves
Undersleeve Instructions

Collars & Cuffs
Draft a Simple Collar (Thread)

Outerwear & Warm Layers
Easy Shawl Instructions
Original Mantle & Cloak Patterns
Original Jacket & Mantle Patterns
1855 Mantle
A Knitted Sontag (and more knitted items for keeping warm)
1859 Winter Cloak

Accessories
Swiss Waist (patterned from an original)
A Basic Apron
1850 Crochet Reticule
Analysis & Dscriptions of Period Hair-Nets

Shoes
Yes.  There are period sources for home-made shoes (ie Every Lady Her Own Shoemaker 1856), but you'll want to buy this item.  See Robert Land Historic Shoes and Fugawee to train your eye, then either save up for the good stuff, or search e-bay & second-hand shops for something passable.  I've heard paddock boots are a possible alternative, depending on your situation.  Things to look for in 'period-passable' shoes: leather upper, low/no heel, fastens with side or front laces or side elastic panel ("congress gaitor"), and square or rounded toe (not pointy).  Speed laces should be removed if possible.
1850 Lady's Slipper (All the fancy work slipper patterns I've seen either have a two-piece upper like this one--a trapezoidal toe-piece with a straight band around the heal, or else a single-piece upper shaped like a bottom-heavy V).

Nightclothes
1859 Nightcap
1859 Nightgown Drawings

Baggage
Pouche Pompadour (elegant travelling bag)
Travelling Bag
Re: Period Baskets (read this before buying a basket; Mrs. Mescher's other articles are as interesting as they are diverse
Toilette Sachets


Looking for something to work on at events?  Antique Pattern Library

New period seamstresses looking for an easier start should buy The Dressmaker's Guide.  I've heard good things about the Truly Victorian patterns, and Past Patterns.  Kayfig patterns are meticulously researched; I've made up their wrapper pattern and found it charming (also, the instructions are a comb-bound book, the first half of which is an illustrated tutorial of period construction techniques). If you pick up Simplicity patterns during the $2 sales, look for the Martha McCain or Kay Gnagley ones--the shapes are good, but the scaling is weird and the instructions aren't always period-appropriate.  I've used several simplicity patterns, but I wouldn't recommend them for a first dress unless you have good spacial sense & really can't afford a more straightforward pattern.

Good luck, and always make a test muslin!

Wednesday, April 16, 2014

Plaid Sunbonnet II: Making a Pattern

Picking up from part I, which just got too long.  Here's my actual process:

I decided to cut the sunbonnet in 3 pieces: a brim, crown and curtain.  The inspiration bonnet seems to be a 3-piecer.  To make the brim, I cut a rectangle of scrap fabric: the shorter dimension of the rectangle is about 3 inches longer than the depth of my head (from bun to forehead--always leave room for a period hairstyle), the longer side started around 24".  This piece is draped over the head, with the longer edge framing the face: I measured it to the chin on each side, and then trimmed off excess fabric (leaving 1/2" on each side for seam allowances).

With the brim pattern draped over the head, I made the crown measurements.  Facing a mirror*, imagine a line between the front corners of the brim (under the chin) and measure it's length.  Next, from a point in the middle of the imaginary line, measure upward to the center front of the brim above the forehead.  I cut out a rectangle with these measurements, and then rounded off the top two corners extremely, making one of the short ends of the rectangle almost a semi-circle.  It doesn't have to be perfect, but the sides should be symmetric.
Back "mailbox-shaped" piece of sunbonnet.
The Not-Quite-A-Rectangle Piece
I marked the middle of the brim piece along one of the long edges, and the center of the arc on the crown piece. Then I matched these center marks and basted the two pieces together.  I then trimmed the excess fabric from the bottom of the crown, and tried it on.  The bonnet mock-up fit close to the head, with several inches of fabric projecting over the face (and, at this stage, drooping forward over my eyes).  The bottom of the brim falls just past the chin, as intended, and the crown should fit smoothly to the brim.

To make the curtain, I measured along the lower "neck" edge of the brim/crown assembly.  Next, I measured from my chin to my desired curtain length, a few inches past my shoulder (curtains usually seem to fall between should and elbow length, protecting the neck and the top fo the dress from the sun).  I then cut out the rectangular curtain piece (adding a few inches to the long side for maneuverability; 1-2" should also be added to the short side to allow for hemming).  I then basted the curtain to the bottom of the mock-up, pleating the curtain to fit.

Mock-up of sunbonnet.
Bonnet Mock-up, modeled by the iron
White, grey and purple paid shirting-weight cotton.
The Fabric
The full mock-up is ready to try on.  Now's the time to make any final fitting changes, and decide on any final adjustments: changing curtain length, making a fuller cap, adjusting brim size, etc.  If I were fitting the bonnet with back ties, I'd tack on some ribbon or scrap fabric, and see that it works as intended.

Satisfied with my mock-up, I decided to cut it out.

First up was the brim.  Following the inspiration bonnet, I opted to cut on the bias.  I folded back a corner of the fabric on the 45 degree diagonal until I had space for the pattern piece, then cut it out, with one long edge along the fold.  The brim needs to be in two layers for 'sandwiching' the cords (or slats, etc.), so either two brim pieces need to be cut and sewn together along the front edge, or the piece is needs be cut on a fold. After my adventures cording my first bonnet, I opted to add about a half inch to the sides of the brim (not the face edge); this gives me some leeway for squaring off the sides if the fabric should 'skew' while the cording is sewn.

I next cut the curtain out, using the full 1-yard length of the fabric piece along a selvage edge (thereby avoiding a need to hem).  If the fabric doesn't have a usable selvage, a hem allowance will be needed. Finally, I cut out the crown, adding about 3/4" to each side for a slightly fuller look.  It will be gathered along all the edges down to the pattern size, so that the extra fabric goes into a full crown, rather than making the bonnet too large.

From the scraps, I cut out two small rectangles for ties.  These will be narrow-hemmed by hand.

I'm sewing the whole bonnet by hand this time, so I'll end this entry here and make a third part with the sewing pictures (which could take a while).

First row of cording sewn into sunbonnet brim with running stitch.
Teaser: The first row of cording on the brim


*Obviously the bonnet crown goes at the back of the head; it's hard to measure behind oneself, so I start by measuring the front to get an approximate size or the crown.

Wednesday, January 22, 2014

Regency Chemise

New era, new undergarments.  I like to have these made-up before embarking on a gown, both for more accurate fitting, and for sewing practice.

My internet search for originals led me to some interesting places like this, and this.  All hail history enthusiasts on Pinterest. In general, here's what I've discovered of chemises circa 1800-1820:

1) They are white.  This tallies with my mid-Victorian reading/experience, in that un-dyed underthings are easier to clean (boil them!), and don't show-through the garments so easily.  They also don't crock/run.
2) They are linen, or occasionally cotton.  Which is to say, they are washable fabrics. 
3) The necklines may be square or gathered; in either case, they are fairly wide.
4) Short sleeves.  The sleeve-less garments are more often labelled as 'petticoats'.  Many of the sleeves are short and square, though the odd short and gathered sleeve does appear (as well as one long-sleeved garment).

All told, they have a great deal in common with the Victorian chemises I usually work with (the angle of the sleeves with the neckline is the main visual difference).

Most useful are these diagrams of original chemises from the Ohio Historical Society.

For my first Regency chemise, I'm using cotton (because that's what I have on hand). I will be keeping an eye out for a deal on white linen for version 2.0.

First, sketched out the pieces by hand, just to get a feel for them.  I then compared the original's dimensions with my own measurement, and decided that the overall length and widths would suit without alterations.  The sleeves need to be a bit wider, so I'm scaling those up.

First I cut out two large rectangles and two triangular gussets for the body of the chemise. Next, there's the two smaller rectangles for the sleeves, and four more triangles to make the under-sleeve gussets (actually eight, to make them all double layered).  Finally, a long rectangular neckband and small "reinforcement" rectangles (for the underarm) are cut from the scraps:
Pieces for regency chemise.
Chemise cut pieces, in approximate relative locations.

I start be piecing together the under-sleeve gussets and the front/back pieces:
Triangular underarm gusset for Empire chemise.
First seam: underarm gussets attached to front/back


From there, I attach the lower gussets.  I'm machine felling these long seams (which feels like a mortal sin...):

Felling seams on a sewing machine.Gusset and gore for early 19th century chemise.


Now, I just sew the sides shut along both gussets. Next up is the sleeves.  I hemmed one long edge of each sleeve, then sewed and felled them along the undersleeve gussets (extending to the neckline):
Hemmed sleeves for Regency chemise or shift.
 Attaching sleeve to Regency chemise.

Inside-out view of sleeve and gusset on Regency chemise.


I debated attaching the sleeves before the long gussets (the underarm gussets definitely needed to go first), but decided on doing the long sides first, as they looked trickiest.  I cut all the gussets along the diagonals of rectangles/squares (per the diagrams and/or my best interpretations thereof), so the long gussets actually require some tweaking as they are attached--the hypotenuse of the right triangles is towards the back side, and is longer than the straightedge sewn to the front panel.

I made some changes to the chemise finishing.  Despite contrary measurements, the upper edge ended up way too wide, so I took in pleats at the top center (front and back) to make things fit better.  In doing this, I skipped the small placket & button at the center front of the original.

Then attach the neck-band, and hem the bottom to desired length:
Sewing the upper band to the chemise.
 Close-up of chemise upper band.


Voila:

Completed Regency chemise.

Lessons learned for next time: 1) Front and back pieces can be cut 4" narrower and 3" shorter,  2) Long gussets may work better in two right triangles back-to-back (as with the underarm gussets), 3) Try the neckband on the bias for easier cornering.  I ended up omitting the side reinforcement pieces, as there was considerable bulk in the side seams near the gusset points already (just from the felling).


Note: home sewing machines are definitely post-period. Hand-sew for maximum accuracy.  That being said, this is an undergarment.  Anyone who can tell it's machine sewn 1) shouldn't be judging, and 2) is in kicking-range.


Saturday, January 18, 2014

Links for Original Bonnet Patterns

Every so often, I end up digging out these links for someone or another, so here they are in one convenient place, with my comments and the bonnets I've made from them:


1. Godey's 1857 Sun Bonnet You have to scroll down to it.  I used this pattern for my corded sheer sunbonnet, and like the shape it has.  Don't be overwhelmed by the pattern pieces: there's actually only 3 of them, but they are given a second time as "half" pieces (to be laid out on a fold for cutting).  
Side view of sheer corded sunbonnet.White corded sunbonnet, from 1857 Godey's design.

(Back, close up on front brim and ties; 'first draft' bonnet sans ties)

Cut two of the brim/front, one crown, and one curtain.  Measure your head before cutting, to ensure that the brim (longwise) will go over your head, coming down to chin height, with the short side going from the crown of your head to your nose (add an inch or so for seam allowances, and a bit extra on the sides so they can be trimmed straight after cording: my first attempt developed a distinct slant and by time I had it straightened out, it was well-suited to someone much smaller than me). Cord the brim segment: I stitched the outer edge--curve to curve--right sides together, then turned it right-side out, and "sandwiched" the cords, top-stitching between all the layers behind each cord. Sugar'n'Creme crochet cotton was used for the cording, and it holds up alright, though it does better with a good starching.  I then joined the crown to the brim (it needs to be eased in a bit), encasing two self-fabric ties in the seam, so that they can be tied in the back for better fit.  The curtain is hemmed along three outer sides (I cut it on the selvage to reduce hemming), and then the top is sewn along the raw edge of the brim/crown portion.  Self-fabric ties are added to the front to keep the bonnet in place when worn.
    
2. 1859 Winter Hood (Finished sketch and description) Sometime it's called the "marquise hood", after the site where the pattern is found.  Though only two pieces, this one's a bit trickier.  Make a mock-up, and try it on over your period hair (mine slips down the back unless it's sitting on a bun).  The "half bell" piece is the brim and crown; cut it out with the straight edge on a fold, giving one large bell-shaped piece.  The other piece is the curtain: cut it on a fold as well, making a sort of rainbow-shaped piece.  The rim of the bell (the straighter curve) is the brim, gather the "top" of the bell to fit it into the curtain (leaving a few inches to fold back the brim), and try it on.  Once you're happy with the fit (I had to cut down the brim, despite my large head and mass of hair), cut the real fabric, quilt as desired, and line with a fun silk.  I encased the raw edges in a silk binding, but you could also sew the edges of each piece to it's lining right-sides-together, turn out, and then join the pieces (this will require hand-sewing the lining separately, I'd rather hand-sew binding). 
Red wool hood from 1859 pattern.Red wool hood with striped silk lining, from 1859 pattern.
(This bonnet is shaped by the curvature of the pieces and a little gathering along the connecting seam.)

3. Mrs. Clark's Sunbonnet Pattern (Not an original bonnet, but appropriate to the 1850s-1860s) This is a very straightforward pattern for a slat bonnet.  It includes women's, teen's, and children's sizes, and apparently makes up quickly.  I've seen several pretty cotton print bonnets made from this pattern, and the friendly people at the Sewing Academy have several threads explaining how to adapt it as a corded bonnet or winter hood.

4. Peterson's 1864 Red Riding Hood (Kelly of Mackin-Art made it up beautifully here, and gives construction details).  This is a straightforward hood; it's all one piece (plus optional lining/non-optional ties).  It's basically a 27" square, with scalloped edges.  One corner is rounded, and the whole piece is gathered along the rounded corner, and on the diagonal between it's two neighbors.  That gathered diagonal becomes the edge along the neck, with ties at it's termini, the rounded "corner" goes up over the head, and fourth, intact, corner is the center point of the triangular curtain.
Striped lining on Red Riding Hood, 1864 pattern.
Silk ties on the "Red Riding Hood".Red Riding Hood from Peterson's Magazine (1864).


(The lining in the upper half conceals the tapes used to gather and shape the hood; it also protects the hair when worn.)