Showing posts with label Regency. Show all posts

Saturday, May 1, 2021

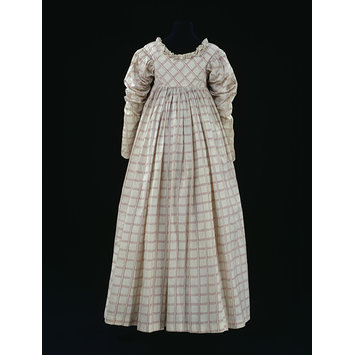
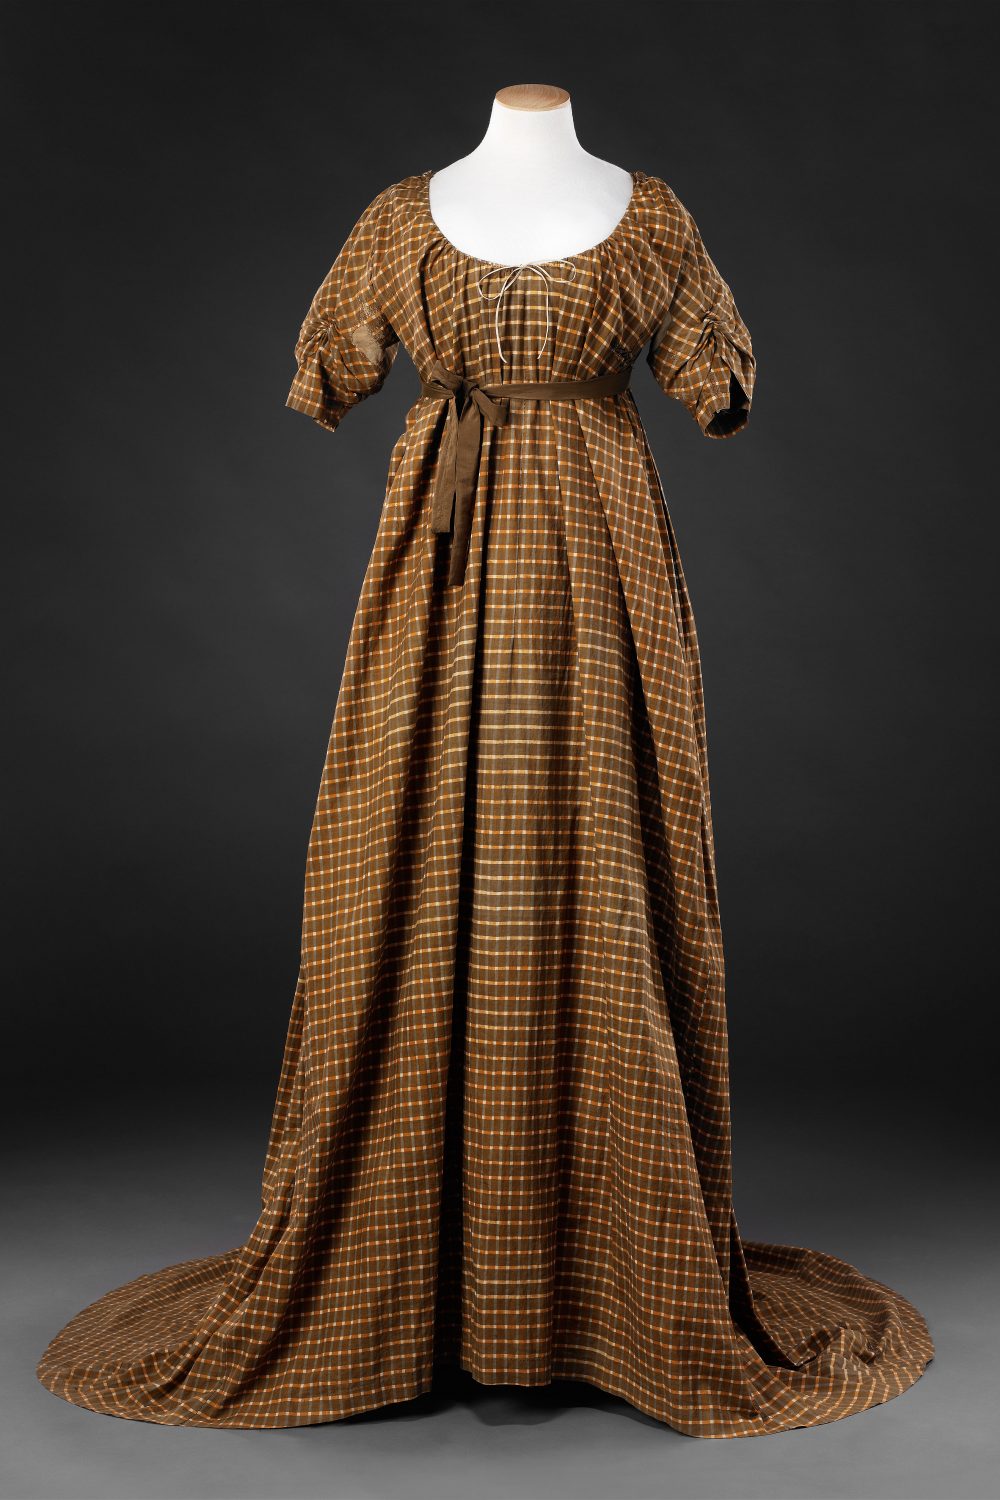
Original: Gingham Bib Gown, c.1800

Silk/cotton gingham dress c. 1800.
In the John Bright Collection.

I picked this dress because it's a lovely example of a bib-front dress that's not in white cotton. Also, I wish I'd found this back when I was making mine, as the the museum obligingly photographed the bodice under-structure (click through for that, as well as a back view). There's also a very interesting layered detail on the sleeve.


Monday, August 12, 2019

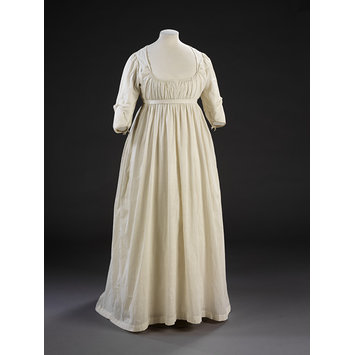
Original Empire Style Dresses

Sometimes, you start collecting images for a potential project, only to change course. Not entirely sure when I started this set, but enjoy:

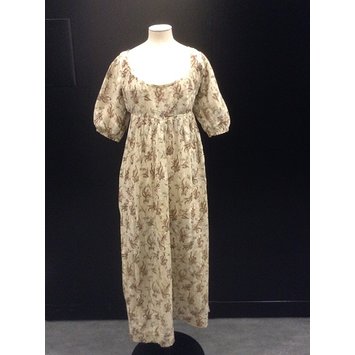
Cotton print day dress c.1800-1805, VAM.

Neat bias bodice on this c.1814 day dress.
VAM

Delicious neo-classical gown, c.1797-1805
VAM
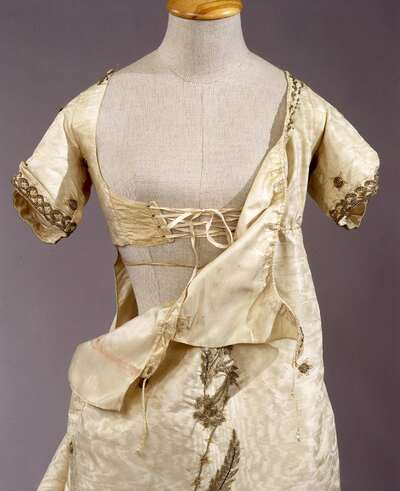
And a nice insight into a front-fastening silk gown:

Evening gown, Italian, c.1800-1825.
Europeana Fashion Project


Monday, July 1, 2019

Original: Striped Cotton Dress, c. 1804-1814

Dress, American 1804-1814. From the Met.

It's nice to see a cotton print dress from this period.

Friday, December 28, 2018

Book Review: Corsets and Crinolines

The fourth day of Christmas brings another long-delayed book review.

Color cartoon of a young woman in 1830s-style undergarments, standing before a dressing table; a clothed woman in the background holds a dress with large gigot sleeves.


Corsets and Crinolines by Nora Wraugh [I'm looking at the 2004 reprint of 1970 2nd edition; originally published 1954. Apparently, there's a newer (2017) edition out, too.]

This edition of Corsets and Crinolines comes in at  ~170 pages.  This includes 20 pages dealing with the sixteenth century through 1670; 38 pages for 1670-1800; and 74 pages on 1800-1925. Each of these three chapters is subdivided to first look at foundation garments for the torso (stays, corsets, bodies), then at the skirt supports (farthingales, rumps, panniers, crinolines, bustles), and finally at contemporary descriptions and depictions of these garments.  The other features include a bibliography, background on whalebone, advice on constructing hoops, and a glossary of historic terms and materials related to foundation garments.

Approximately 26 garments are featured with line-drawings and pattern sketches; these are mostly original garments, with one pattern excerpted from Diderot's Encyclopedia. The pattern pieces are presented with a scale ruler, but without a grid or measurements written in: you can draft a pattern from these, but it'll take some work and math. For appreciating how corset shapes changed over time, however, the illustrations are useful--there are 115 images all told, including the pattern diagrams, photographs of historical garments and contemporary (historic) images.  Still, for covering 3 1/2 centuries, I wouldn't mind a few more examples.

Other than that, the main thing I would change about this book is the formatting: the divide by time and then type organization makes it sometimes difficult to find what one is looking for, or to compare across time periods.  I have a number of bookmarks in my copy in order to locate the images I used most often. For how I use the book, I think that grouping all the corsets chronologically in one chapter, then all the hoops, and then the depictions, would be more useful.

This is really a classic book in costuming circles. If I recall correctly, it was first recommended to me on a LiveJournal corsetry group almost 15 years ago.  That is to say, this book has good information, and solid research, but the costuming community has had over 60 years to expand upon it.  I'd recommend that most costumers check it out at some point, but depending on your specific needs, there might be titles with more examples from your preferred era, with grided patterns that are easier to adapt, or with more/colored photographs of the original garments being discussed. That being said, I think this is still a useful book, particularly for context, ie, the textual sources and contemporary images which accompany the patterns.  Also, do check out the preface: I really like Ms. Waugh's hypothesis about silhouettes reaching maximum exaggeration and then radically changing direction.

Stars: 4

Level: Advanced to copy the garments; all levels to learn.

Accuracy: High.

Strongest Impression: A classic, and worth reading at least once. There's likely a newer title that will meet your specific needs, but this is still a solid book with interesting information. 

Friday, December 14, 2018

Book Review: Wearable Prints 1760-1860

Fourteen square swatches of printed fabric, framing the words Wearable Prints, 1760-1860 by Susan W. Greene
Wearable Prints, 1760-1860 by Susan W. Greene

Contrary to its size and appearance, this is not another encyclopedia of fabrics.

Instead, it's a 540-page overview of a century worth of fabric printing technology. A lavishly illustrated overview. And the appendices are a treasure, including a glossary of (historic-scientific) terms, charts comparing the different dyes/inks used to print different colors, timelines of when different dyestuffs were popular, etc.

The book's main divisions look at the historic background/an overview of printed dress goods (2 chapters), the dyes used c.1760-1860 (4 chapters), and the machines/technology used for printing on fabric (4 chapters). Within each, full-color modern photographs of antique garments/swatchbooks (and the odd quilt) are plentiful. As with What Clothes Reveal, the writing is highly informative, and the images really work with the text to clarify and illustrate the topic at hand, whether it's the characteristic details of copper vs. woodblock print, or fives pages of discharge prints in Turkey red and madder shades.

The combination of a large book and a (relatively) narrow year range means there is a lot of room to focus on details and nuance of textile prints, and that multiple examples are included for each point. That being said, layout isn't particularly conducive to scanning for a examples to compare.  It isn't Textile Designs where you can look up "paisley" and find a dozen goauches across decades, nor yet is it Dating Fabrics or America's Printed Fabrics where you can browse designs by year-range. Instead, I think this book is really equipping the reader to analyze the color schemes and printing characteristics of a fabric--to pinpoint why a given design 'looks' 1840s versus 1810s.

I think the most effective way to use this book for fabric identification is to read it all through once.  Then, use the summaries and timelines to estimate the dyes/printing techniques, and by this narrow the probable date range. Then, go back to the chapter to compare with the different examples.

TL:DR--Get your own copy, and fill it with sticky notes.

Stars: 5

Accuracy: High. So many original printed fabrics! And the citations are swoon-worthy.

Overall Impression: It's not the most 'plug-and-play' textile reference, but I think it's the most powerful. There's a great deal of useful information, and I think this book makes a good companion to the more encyclopedic books (by explaining the techniques, as well as by providing additional reference images). Honestly, if I was focusing somewhere within the 1760-1860 time frame and could only have one print reference book, this would be it.

Wednesday, December 12, 2018

Book Review: Costume in Detail 1730-1930

Cover for "Costume in Detail 1730-1930" by Nancy Bradfield

Costume in Detail: 1730-1930 by Nancy Bradfield

What it says on the cover: 200 years of costume in 380 pages. More specifically, it's western women's clothing, primarily dresses, but with a healthy mix of accessories and some undergarments included.

Garments are mostly dated within a 5-year span; each dress gets a 2-page spread, including front and back views, interesting details, and often interior or fastener details. Several also include a sketch of a similar dress being worn (generally adapted from contemporary portraiture or fashion plates).  The accessory items tend to be grouped by date and item type, with six or eight sharing a two-page spread; alternatively, some accessory sketches are paired with a contemporary dress (for instance, there's a c. 1830 wrapper which is accompanied by sketches of a corset, flounced bustle and other undergarments).

The book is arranged chronologically, though the dates overlap enough that it's worth flipping around a target date for similar pieces.  The emphasis is on the illustrations, with minimal text descriptions specifying material, style, and where the item is from. I liked the inclusion of measurements with many of the garments.

Overally, I think this is a valuable reference for understanding how women's dresses have been constructed, and as a style guide over time. It doesn't have the graphed pattern pieces of a Janet Arnold book, but uses the saved space to add even more illustrations and garments. If you're looking for eye-candy, be warned that it's all monochrome sketches; I find this very useful for lines and construction information, but it's not the full-color glamour shots of 19th Century Costume in Detail.

Stars: 5

Accuracy: All original dresses; details of cut and construction made readily available.

Difficulty Level: Useful at all levels, though some background (or additional reference books to cross-consult) would be useful to use this book fully.

Strongest Impression: A nice, encyclopedic book for dress styles and construction details. For making clothing, it's best used in conjunction with other references for sewing/cutting techniques. A good visual reference for designers and those interested in dress history.

Thursday, November 8, 2018

Book Review: Regency Women's Dress

Cover art for Regency Women's Dress by Cassidy Percoco

Regency Women's Dress: Techniques and Patterns 1800-1830 by Cassidy Percoco.

"Dress" is not limited to dresses: this book contains patterns for two chemises, two sets of stays, and three outer-garments (two spencers and a morning robe), as well as nineteen dresses. The earliest date on any garment is c.1795, the latest c.1827.  The narrow scope and large number of examples allow for greater specification than in many books of this type. The "type" being books diagramming the construction of garment artifacts, such as Janet Arnold's Patterns of Fashion series or Jill Salen's Corsets: Historical Patterns and Techniques.

The book starts with a three-page overview of fashion changes through the ~30 years in question; I liked that the table of contents employed sketches of each garment, making a nice fashion timeline for comparison, as well as a visual reference. Each garment featured in this book in an original from the late 18th/early 19th century, with full citation.  All the garments are held in American collections (mostly in New York, or else Old Sturbridge Village in Massachusetts).  Knowing the whereabouts of each garment is useful, in that looking up additional images of the garments online is almost required in order to make any of them.

I really love the scaled pattern diagrams of each garment (two pages), the inclusion of contemporary images and fashion plates (most of one page per garment), and the description of how the garment is assembled (also most of a page). Each garment also gets a colored photograph, and a pencil sketch. The problem I'm having with making any of these garments is the lack of comprehensive images: the line drawings are front-view-only, as worn, and the photograph is always a detail shot. While this is great for seeing the fabric (and occasionally the interior), not seeing the whole thing is really hard when you're trying to actually construct something. There's a ~3" tall line-drawing of each finished garment, shown from the front only as it is worn, but that's like trying to sew from the image on the back of pattern envelop (with no back view included).  The assembly information is descriptive rather than instructive--which makes perfect sense, but also makes internal and back views more necessary, for figuring out which seams should cross over which others, etc. Particularly for things like figuring out how to fasten the bib-front dresses (pins? buttons? additional ties?), there is simply not enough information included in the written instructions, and not enough back or internal views of the finished garment (photograph or sketch) to answer the question.*

The format begs for comparison to the Patterns of Fashion books: I think that Regency Women's Dress makes a nice addition to this genre for its narrow temporal focus, and inclusion of multiple garment types. I also like the color photographs of garment detail and the use of contemporary illustrations for context; but I think that the lack of detailed whole-garment sketches makes this book harder to use than Patterns of Fashion

Stars: 3**

Accuracy: Very high. All original garments, with some useful context.

Difficulty: Advanced. Additional sources or a lot of assembly know-how will be required to make the garments (above the usual 'scale and fit' skills).

Strongest Impression: Potentially a nice all-in-one reference for Regency/Empire styles, including undergarments, dresses, and some outerwear. However, there isn't quite enough construction information (and/or detailed images) to make the garments without consulting additional sources. A good reference for costume designers, and almost an amazing one for reconstruction sewing.

*For the other garment I've tried so far, a chemise, an internal photograph of the sleeve seams would have make construction infinitely easier. The written description of joining the sleeve to the main garment was almost impossible to follow: the sleeve is encased in the two-layer strap, and that is then sewn to the front/back pieces.  How, then, is the sleeve attached to the front/back without leaving a weak raw edge or a lumpy transition to the felling?  A photograph would have solved this instantly: instead, I spent a lot of time trying to find photographs of similar pieces, and finally ended up sewing several half seams, tacking down other pieces, and going back to finish seams out of order. Even so, there's a slight lump where the sleeve seam allowance transitions from being faced to being felled.

**I revised this down to three stars after attempting a further three garments from this book. Between scaling issues on the stays, a lack of fastener information on the bib-front dress, and sorely needed construction explanations on both gowns, this is simply not an easy book to use. You really need additional sources (or, ideally, a picture or sketch of the interior and back view of the garment) to actually make most of the garments I've attempted.

Sunday, October 21, 2018

Original: Silk Round Gown c. 1795

This month's eye candy, a nice round gown c.1795 from LACMA:

Silk round gown c.1795  from LACMA collection
The dress is great, but the staging also deserves love.
More pictures at LACMA's online collection.
There are a ton of additional images at the link, including close-ups of that trim. We're talking sequins, netting, and embroidery. Seriously, take a look.

And respect the dreadful nodding of that great plume!

Wednesday, September 27, 2017

Book Review: Corsets: Historical Patterns & Techniques

Cover of "Corsets: Historical Patterns & Techniques" by Jill Salen


The closest comparison I can make is that Corsets: Historical Patterns & Techniques resembles a more focused sequel to Nora Wraugh's classic Corsets and Crinolines, or a corsets-only companion to Janet Arnold's Patterns of Fashion books.  It surpasses these both in the number of specimens and the quality of its color photographs.  When I finally doubled back to read the introduction, I discovered that supplementing these specific texts was the reason for the book's existence--so, I'd say the author succeeded in her mission.

But dealing with only one type of garment, Corsets is able to investigate each example thoroughly: four pages a piece for 25* different corsets or stays, dated from c.1750 to 1917. For each garment, there is a color photograph, a half-page written description, a line drawing showing front and back views (the color images often being limited to half the corset), and half-scale diagrams of the garments' component pieces on a grid.  For each of the two corset projects (adult "jumps" c. 1790, and a girl's corset c. 1900), there are also two pages of instructions for constructing the garment. There are also ten pages of techniques, offering a brief introduction to stitches, lacing, and specific techniques such as inserting a busk or flossing around the bones.  Suggested books and supply resources are also listed.

The number of examples per time period varies: the largest groups are six corsets dated 1780-1800, and nine from 1890-1910.  In contrast, only three corsets are included for 1830-1880, and none for 1800-1830.  While my particular costuming interests would benefit for more examples from these years, I suspect their low inclusion had more to do with the number and quality of surviving originals than intentional omission.**

I think that the main strengths of this book are its close attention to detail, and beautiful photography.  I feel that it would be a useful resource for someone attempting to date original garments, or for an accomplished sewist who wants to use authentic historic shapes.  The lack of grading and brevity of the instructions will make it challenging for someone without corset-making experience to reproduce the garments therein.

Stars: 5

Accuracy: High. All original garments.

Difficulty: Advanced.  These are diagrams of original garments, not patterns, so making a corset to wear will involve grading/fitting, and well as knowledge of construction methods.

Overall Impression: Plenty of historic corsets to admire/ogle, and the drafts show not only how a given garment is made, but taken together also show the evolution of supportive garments. Very pretty, and useful for research and/or building your own corsets, though examples are more plentiful for some eras.


*Twenty-one of the corsets are adult sized, two are for children, and two are for dolls.  The doll corsets are graphed at full size.

**Approximately 1795-1820 being that "one time when corsets weren't popular, and underwent some weird changes", and approximately 1850-1870 being "that time we started using metal instead of whalebone/cord and weren't necessarily good at it yet."  At least, that's one plausible explanation I've heard for the relative scarcity of 1860s corsets compared to the 1840s or 1880s.

Tuesday, June 20, 2017

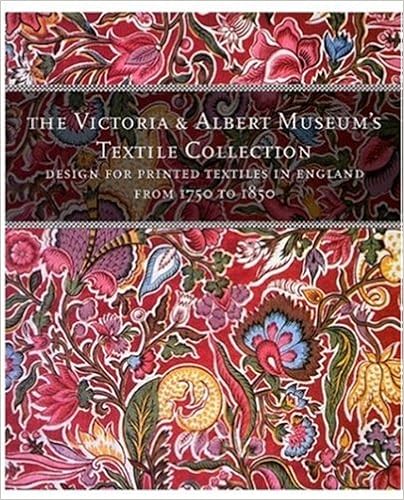
Book Review: Designs for Printed Textiles in England from 1750 to 1850

Cover art for "Designs for Printed Textiles in England From 1750 to 1850" by Wendy Hefford

Designs for Printed Textiles in England From 1750 to 1850 by Wendy Hefford

Though not a recent book (1992), this one was new to me.  And I was missing out by not knowing about it sooner!

I've reviewed fabric design books before (see here, here, here, and here), and where Designs for Printed Textiles stands out is in the size and quality of its images.  Written information is brief, concise, and in 10pt font (or smaller). The 236 samples are spread over 118 pages, allowing each image considerable space--most have an entire 10" x 12" page, or at least half of one; the handful of pages with four or more samples are all copies of period albums and sample books.  Some unusual specimens were included such as printed shawls and patchwork quilts containing many printed fabrics.

Compared to other works, this book has relatively few examples and a narrow scope: as the name indicates, it's all British printed fabrics from 1750-1850 (which are now in the The Victoria & Albert Museum).  Within that, various types of printed fabric are featured: furnishing fabrics, dress goods, shawls, etc.  The book seemed to contain more pages covering the late 18th century than early 19th (maybe 60% to 40%), so it may be more useful for people interested in the early part of the year range than the later.  While the bulk of the book is colored plates, there were also 7 pages of background information on styles/processes/technology, 17 pages of captions for the plates,  2.5 pages for a fabric glossary, and 3 pages about the history of different British fabric printing companies.

With all that in mind, I'd say this book is very useful for looking at changes occurring in British fabric printing over a hundred-year period, and fairly to very useful for looking at designs within that time period.  In most cases, you won't be finding multiple examples of a specific type of material for a narrower year range--but the one or two pictures that you do find will be lovely and detailed. I won't be making this my primary textile print resource, but I think it's a very useful addition to the library, and a good choice to consult before embarking on a late 18th (or early 19th) century project.

Score: 5 stars

Accuracy: High. All original examples

Strongest Impression: A pretty book which gives good, detailed examples of textile prints over a century.

Tuesday, August 30, 2016

18th/19th Century Silk Robe

Another recently completed project: a turn-of-the-nineteenth-century robe.  The inspiration pieces are a series of fashion plates showing a flowing outer garment which is fully open in front and has short sleeves.
Purple open robe over white dress with purple hair bands and reticule, 1797.
1797 fashion plate from
Journal des Luxus und der Moden
From Journal des Dames et des Modes, 1798
The pattern was taken from a c. 1795-1803 example in Janet Arnold's Patterns of Fashion I (the garment is in the VAM collection).  I altered the pattern to omit the front bodice and shortened/re-shaped the sleeves to better resemble the fashion plates. The outer material is a silk taffeta with satin stripes; the lining is a lighter weight plain silk.


Edited to add pictures of the front (er, side):

c. 1797 Open Robe, Jane Austen Festival

Saturday, August 27, 2016

Aerophane Embroidered Purse

Silk purse with aerophane and chenille embroidery, late 18th century design.
Silk purse, based a c. 1800 design.
The design from an original dated c. 1790-1800, which is featured in 18th Century Embroidery Techniques by Gail Marsh.  I decided to make it up as a gift for a mentor and friend who is travelling to Bath for the Jane Austen festival.

The purse material is black silk taffeta (the original was black satin), with stem-stitch embroidery in green silk chenille; the roses are made from bias-cut strips of custom-dyed silk chiffon.  The lining is white silk; cord and tassels are made from size FF beading silk in black and gold.

Wednesday, May 4, 2016

Book Review: Creating Historical Clothes

Creating Historical Clothes: Pattern Cutting for the 16th to 19th Centuries by Elizabeth Friendship is another recommendation/loan from Elise, a lady of excellent literary and sartorial taste.

This book reminds me a lot of Period Costumes for Stage and Screen, so I'm afraid comparisons are inevitable.  Still, there are a number of differences between them.  First, Creating Historical Clothes covers the 1500-1900 time span in a single volume, while Period Costumes does it in two. They also differ in method: Period Costumes teaches you to drape patterns, while Creating Historic Clothes instead gives a solid introduction to drafting and grading flat patterns.  Though both are aimed at historic costumers, and are well-supplied with research and period images, I'd say that Creating Historic Clothes puts slightly more emphasis on the "historic" portion, Period Costumes for Stage and Screen on the "costume".  That being said, they cover similar ground, so a person who already owns one may find the other unnecessary.

Creating Historic Clothes starts out with a 60-page introduction explaining how to use the book to make your own patterns (whether historically authentic, passable, or "inspired by"), and manipulating basic patterns for bodices, sleeves, skirts, and trousers.  Honestly, if you're interested in drafting, this section alone is worth the price of the book and it should see you through modern as well as historic patterns. Cartridge pleating (gauging to us mid-Victorian sewists) is also explained, though few other sewing techniques are handled.

Each section thereafter is divided up by century, with a two-page summary of fashion trends illustrated by period paintings, a glossary of costume terms, and a list of artists active at the time.  It then goes through explaining how to draft patterns for bodices, sleeves, skirts, and foundation garments.  Most of these are given in 5-15 year increments; for example, the 17th century chapter has bodice instructions labelled: "early 17th century", "1630-1645" (plus two variations), "c.1655-1665", "bodice with tabs", "c.1655-1670".  Trends which do not follow the calendar are noted--so, if you're looking for late 1790s Empire gowns, you'll be directed to the early 19th century pages.

Note that undergarments (except for foundation pieces) and accessories are not included; the good news is that shifts/chemises, drawers, and petticoats are relatively straightforward, and the last can often be adapted from the included skirt patterns.  Corsets/stays and various skirt supports (farthingales, panniers, hooped petticoats, bum rolls, bustles) are included.

Given the wide scope of the book, I am impressed with the amount of nuance included.  You will likely want to consult additional references for specific historic impressions.  For example, the 1850s-60s section of the book gives a pagoda sleeve, which is a valid style--looking at other period images, however, would also point you towards bishop and coat sleeve options (which could easily be adapted from the basic straight and two-piece sleeves in the basic drafting section).

Score: 5 stars for costumers, 4.5 for historic sewists

Accuracy: High. Some fine details are lost in the sheer amount of information, but it shows original images and references period manuals (as well as secondary sources).

Difficulty: Intermediate and up.  You're on your own for the sewing, but the pattern manipulations are well-explained.

Strongest Impression: A versatile, well-researched costume-patterning book that I'd recommend to anyone costuming a period play or film, doing history-themed cosplay, or learning to draft patterns. Living history sewists will likely find this book useful, particularly if looking for a single title that covers four centuries of women's clothing; others may want more period-specific sources, and/or ones which cover period sewing techniques in greater detail. Someone with a large collection of costuming books may find this one redundant.
Tuesday, May 19, 2015

Research Post: Regency Shoe Roses

"...the very shoe-roses for Netherfield were got by proxy." --Pride and Prejudice

I started compiling shoe and shoe-rose research few months back when working on ball clothes, but didn't have time to post it. So now, without further ado: early nineteenth century shoes with rosettes and bows.  Unless otherwise labelled, they're from the Victoria and Albert Museum (click date under the picture for full listings).
White slippers with matching rosettes, c. 1830-1840, from the Victorian and Albert Museum.

Three slippers with self-fabric or contrast bows to roses, c. 1820, from the VAM.

Low-heeled slipper with rose in accent color, c. 178--1800, from the VAM.

Slipper with self-fabric petal shoe rose, c. 1830-1850, Victoria Albert Museum.

Black slippers with matching bows, c. 1800-1824, Victoria and Albert Museum.

Pale blue slippers, no bows, c. 1800 from Victoria and Albert Museum.

Green slippers with self-fabric bows, c. 1810-1829, at The Met.
c, 1810-1829, from The Met
Slippers with contrast bows, c. 1815-1820, at The Met.
c. 1815-1820, from The Met
Slippers with contrast bows and laces, 1812, at The Met.
1812, from The Met

Observations: All of the shoes appear to be made on straight lasts (no obvious right and left); excepting the earliest pair with its low heels, the shoes are all flats.  Most have open tops, similar to a "ballet flat"; the earliest two pairs from the V & A (and all three from The Met) have shallow pointed or rounded toes; the four later V & A pairs have square toe boxes.  Excepting the earliest (patterned) example, the shoes tend to be solid colored. From the descriptions, these are primarily silk uppers, with leather soles and linen linings.

The "roses" take different shapes: bows, coiled 'rosettes', layered fabric 'petals', and what appears to be a fringe rosette around a button.  For the most part, the decorations tend to be the same color as the shoe itself; of the three with contrasting decorations, two have white bows on colored shoes.  Where used, the laces/ribbons also match the shoe color, save for the 1812 pair in which the ribbons match the contrasting rosette. 

So, to imitate a Regency or Georgian dancing slipper with modern shoes, I'd look for a plain, solid-colored, fabric upper with an open top; no heel; rounded (1800-1820s) or square (1820s+) toes; and minimal right-left emphasis.  The "look" can be further enhanced by adding color-coordinated rosettes or bows, and possibly ribbon laces.  In an ideal world, of course, I'd have snagged a pair of Robert Land's regency slippers before he retired.  Now, I'm thinking I'll just have to learn how to make shoes.  

Wednesday, February 11, 2015

Regency/Empire Stays, part III

With the front panel complete, it's time to assemble the rest of the stays.1

Working from front to back, I "sandwiched" the completed section between each two new layers.  So, for the first in-seam gusset (cut in two layers to permit the sandwich), the outer layer of the gusset is laid right-sides-together with the outer front panel, and the lining layer is set right-sides-together on the front lining.  I then stitched the seam through all four layers (gusset shell/front shell+lining combo/gusset lining), and pressed the gusset out.  The front+gusset is now the completed section and is treated as one.  To add the side section, the side shell is laid right-to-right over the front+gusset, the lining is treated the same, and the process is repeated.  The hip gusset in the side piece was made in a single layer, and treated as the bust gussets in the front panel.  Boning channels were stitched between the shell and lining after the two were attached and pressed flat.

To make the back section, I joined the shoulder straps to the back pieces (L shell to L shell, R shell to R shell, R lining to R lining, L lining to L lining), and then joined each back piece to its lining, along the center back opening.  I did this to make a clean center back, without binding (leaving more space for the bones and eyelets).  Pressed the back pieces flat and stitched the back boning channels (butted into the CB seam, and another 1/4" away, leaving space for the eyelets in between.  Made the eyelet holes with an awl and applied 2-piece metal eyelets (size 00) with a setting anvil.  Following the method in Period Costumes for Stage and Screen, the eyelets are paired, but with an extra off-set at the eyelet at top and bottom for internal spiral lacing.  [My initial attempts to don the garment with spiral lacing were unsuccessful, so it's displayed below with cross-lacing.]

Made remaining back-boning channels as before.  I then joined the back and side+gusset pieces by sewing the shell only (usual right-to-right and open method).  The lining was folded over (to cover the raw edges) and topstitched.

The straighter boning channels (short slanted bones on the front, center back pairs, side hip) received 1/4" straight steel bones.  Curvier sections, particularly along the panel joins, used 1/4" spring steel.
(To see the difference, I've put up explanations of the different steels here).

Prepared bias edging of tightly-woven cotton (also used for some of the lining pieces), and attached it along the top edge--including both straps--and the bottom, encasing all remaining raw edges.  Added 8 thread eyelets to fasten straps (two per strap, and two at each side of the bust).


Completed Regency/Empire Stays.
Finished stays, front

Side back view of 1820s Stays from Period Costumes for Stage and Screen.
Finished Stays, side back

Front side view of early 19th century-style stays.
Finished stays, side front

1. For the record, I know that the French First Empire dates 1804-1814 and the English Regency period ran 1811-1820, but I am using the terms in the expanded sense, to cover the neo-classical fashion of dress which was popular approximately 1795-1830.  My apologies to anyone who is bothered by this construction.  I have been known to flip out over similar misuses of the term "Victorian" (1837-1901) to denote "pre-1920", "1870 or later", and/or "looks sort of old".


Tuesday, February 3, 2015

Making a Regency Petticoat

The petticoat bodice combines the petticoat with a sort of short stays; but for use with my long stays and chemise, I need an actual petticoat.

Period Petticoats:
Early 1820s petticoat from the Museum of Fine Arts Boston.
 Petticoat, c. 1820-1825, MFA
Early 19th century petticoat, from The Met.
Petticoat, early 19th century
from The Met.

Early 19th century petticoat, front and back view, from janeausten.co.uk.
Petticoat, early 19th century, janeausten.co.uk,
also featured on 
The Oregon Regency Society,
but an original post with context has not been found.
 

The petticoat is basically a skirt.  Given that the stylish "waist" of the period falls at the underbust, the petticoat may have shoulder straps to hold it in place, or even an abbreviated sort of bodice.  The two (admittedly not closely-dated) examples with back views show significantly more gathering at the back of the petticoat than at the front, with what may be a drawstring or tie fastening the center back.  The description of the MFA (bodiced) petticoat mentions waist and neckline drawstrings and a tie closure at the back.

For my petticoat, I cut a rectangle of white cotton 45" x 90"; sewed it into a tube, leaving a 12" opening at the top back; and hemmed the bottom (1.5" doubled).  I then gathered upper edge by hand, prepared a waistband to my underbust measurement (measured over the corset), and enclosed the raw edge of skirt in the waistband.  While doing so, I concentrated the gathers towards the back, as with the bodiced petticoat--ie, half of the skirt gathered to the back quarter of the waistband.  Twill tape ties fasten the center back; this seemed easier than a button closure for dressing oneself.  Shoulder straps of twill tape are attached to the waistband.
Reproduction Regency petticoat with shoulder straps.

Reproduction Regency petticoat, full gathered back with tape closure.


Wednesday, January 21, 2015

Red's Regency Dress, #2

Continuing from part I: the actual dress construction.

Custom-fitted bodice pattern for Regency dress.
Start: Fitted and/or Draped Pattern Pieces 

To make the bodice, I cut out the front and back pieces in the lining and fashion fabric.  Sleeves are unlined.  The sleeves were sewn along the underarm seam, then the (lower edge) hem was pressed and hand sewn.  I experimented with adding decorative tucks parallel to this seam, but decided it made the sleeve too visually "heavy". For the front piece, I cut the fashion fabric with extra space in the center front, and then folded out the excess in six knife pleats (or four knife pleats with a center box pleat), and stitched the pleats down by hand.  They are completely flat, but add subtle visual interest to the body.
Decorative tucks on front of Regency dress bodice.
Bodice Pleating
Hand-sewn tucks.
Hand sewing on the tucks
The back lining was darted out, for use as a guide.  On the back fashion fabric, I opted for a faux "three piece" (well, "four piece", as it's back-opening) effect, by making a small diagonal tuck running from the shoulder seam to the waist.  On the originals examined in part one, I noticed that these don't have to be as curved as on an 1850s or 1860s-style dress; some of the 1810s dresses have very straight side-back seams, making the back itself diamond-shaped.  This faux seam took up additional material towards the waist, acting as a dart.
Back bodice lining.
Plain dart on back lining
Dart concealed in faux-seam.
Dart concealed in faux seam
The front and back pieces were then joined at the shoulder and side seams; the lining was treated likewise.  The fashion fabric and lining were then placed right-sides-together, and joined along the center backs and neckline.  The fabric was turned right-sides-out, pressed, and the sleeves were set into armholes.  Hooks and eyes were added along the center back.

To make the skirt, 2.5 panels (of the fabric width, 44") were cut, and made up in the usual manner with the placket at the center back. [Usual manner: sew panels into a tube, fell the seams, press hem and stitch, narrow-hem the placket opening].  Three 1" tucks were made  near the hem, again adding subtle decoration and a bit of weight to the bottom of the skirt--the fashion plates I was looking at tend to favor trim around the bottom of the skirt, especially in the later 1810s into the 1820s.  I did the tucks by machine, as the matching thread made the stitching blend in, and my wrist was already protesting the hand-sewn hem.
Tucks in skirt of Regency dress.
Skirt tucks
The raw upper edge was gathering with two rows of running stitch, and then were machine stitched to the raw lower edge of the bodice.  As with the bodiced petticoat, the back gathers were set close and the front gathers were spread out (half of the skirt width over the back quarter of the bodice, the other half over the front/side three quarters).

Voila:
Completed Regency/Empire/Neoclassical dress.


Sunday, January 18, 2015

Regency Stays, Part II

Finally satisfied with the fitted mock-up, it's time to start on the real stays.

Using the mock-up pieces as a pattern, I cut all of the pieces out of linen.  Gores are being worked as single layers, straps and "body" pieces as double layers.

To conceal the seams between layers, I'll be working from the front to the back (more on that in part III). The first point of business is to mark the busk pocket, under-bust quilting, and gores.  After stitching through both layers to form the busk pocket, it's time to add the bust gores.

I've found Alysaundre's Perfectly Pointed Gore Tutorial very useful when it comes to setting gores by machine.  Those tacking stitches really help.  I tried two methods of finishing the gore seams on my mock-up: in the first, I use my normal felling method for a single layer: the two "body" layers are treated as one, the seam allowances on the body pieces are trimmed close to the gore seam, and the gore's seam allowance is folded over the raw edges and top-stitched.  In the second method, I attached the gore only to one layer only, pressed the seam allowances flat, then folded the raw edges of the 'lining' layer to the inside, top-stitching over the lot.  Working with two layers, I found this approach slightly neater and easier.
Basting the pointed gores.
Basting the gore points
Gores stitched into outer layer of stays.
Gores attached to one layer only, before ironing the seam allowances
Lining of stays attached around gores.
Fold raw edges of lining to the inside
Front panel of Regency stays with finished gores.
Finished gores
With the gores completed, it was time to start in on the trapunto.  I found this tutorial particularly useful in figuring out how to approach it.  Inspired by several beautiful original corded stays, I decided to cord the under-bust area in a diamond-pattern.

I marked the diamond pattern in pencil on the reverse side (my fabric marker appears to be hiding). Intending to minimize the extraneous lines, I only marked one stitching line per row, and used the presser foot to make parallel lines at 1/8" and 1/4" to the marked line.  The area to be quilted was 3.5" tall (3" inside the horizontal border), with 1" between each 'line' (double row of cords, set in 1/8" channels).  The diamond pattern was measured from the center front, with the initial lines measured at a 45 degree angle to the busk casing.  I practiced stitching and cording this pattern on the second fitting mock-up, to make sure that it worked.
Trapunto quilting/cording on stays mock-up.
Mock up: corded trapunto quilting on the left, marked lines on the right
The cord is a cotton crochet yarn, ala sugar'n'creme, as I usually use in my corded petticoats and sunbonnets.  Not having a trapunto needle to hand, I substituted a blunt-end tapestry needle to run the cords through the sewn channels.  This worked sufficiently well, even sliding between the stitches where one channel crosses another (I tested this on the first draft to see if crossing lines would work or not).  The short length of the needle would prove severely detrimental over a larger area, but worked fine on this project.
Quilting the stays for the trapunto work.
Quilting the first lines.  The thread ends were tied on the back and clipped close.
Running cords in the stays.
Running the cords
Quilting on stays.
One side quilted!
Front panel of stays with one side quilted, and the other quilted and corded.
Contrast of layers: right side quilted, left side quilted and corded.
Detail: quilted versus quilted and corded.
Close view: corded versus quilted.
With the trapunto finished, the last thing is to add the two short bones (1/4" spring steel) along the lower, pointed sides.  To accommodate the many things going on at the top of this piece, the bones along the upper portion of the side seam will be encased in between the layers of the side panels.

Completed front panel of 1820s stays, with gores, trapunto work, busk, and bones.
Completed Front Panel