Showing posts with label weaving. Show all posts

Thursday, July 20, 2023

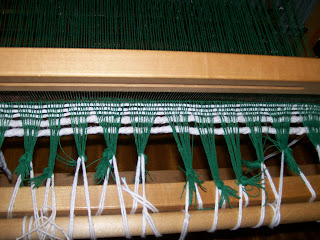
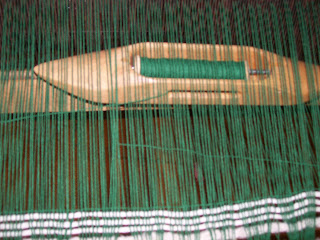
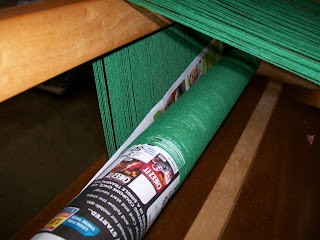
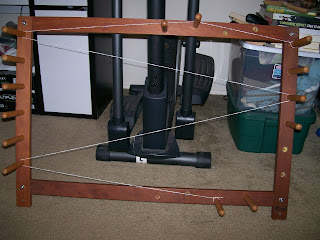
Rag Rug, Part 2: Dyes

With references to dyeing both warp and weft, I decided to try some natural dyeing on my rug materials. 

I first applied an alum mordant to 7 of the 9 skeins of wool rug warp, using the recipe described in Wild Color by Jenny Dean.

Marigold Dye Bath
 

I then made 3 different dye vats. The first was with dried marigold flowers from my last two harvests (about 2 oz pure petals and 3 oz of full flower heads). For the second, I used about ~4oz of powdered madder root.. For both of these dye baths, I first dyed the prepared wool (letting it soak for about 3 hours), then put in mordanted linen thread and some test strips of white cotton (with and without mordants) for the whole afternoon/evening, and finally threw in my unmordanted rag weft to soak overnight.


Marigold and Madder Dye Results.
I tried to keep the madder below boiling, to get more of a red than an orange shade, but as the wool dried it shifted from a deep scarlet color to a tomato red, and finally a bright orange. The cotton, meanwhile, dried pale pink. The marigold wool came out dark goldenrod color (in person, it more resembles the image above than the one below), with the cotton coming out a pale Easter egg yellow
 
Marigold-dyed and undyed wool.
 
For the third, I used Dharma's pre-reduced indigo to make a 3-gallon dye vat. I over-dyed two of the marigold-dyed wool skeins, as well as the two un-mordanted skeins. This produced a very dark green (tending black) and a deep indigo blue--the former darkened as it dried, and the latter lightened from a navy blue. I tried overdyeing some pink and yellow rag weft, but instead of purple and green, I got the same deep blue as with white rags. Subsequent batches of rags came out slightly lighter, but still a fairly dark blue.

Green and blue wool dyed with indigo.

Monday, May 29, 2023

Tablet Woven Band

Inspired by this video, I decided to break out the tablets and actually attempt a polychrome pattern. The design is a 8th-10th century eastern European pattern, which Lady Elewys conveniently wrote-up. In addition to the simple warp pattern (solid borders, are other cards the same, alternating S/Z), the appeal of this project was that all the tablets are moved together, and the same direction. When the warps get too twisted, you just start working the other direction until they're too twisted the other way. This was perfect for me, since I wanted an easy project that I could take to a Ren Faire, and work on amid interruptions, without need for notes.  


Band loom all warped up with 10 tablets.

I managed to finish the piece over one weekend, interspersed with spinning and netting and amusing children (who apparently love helping turn the cards).


Weirdly enough, the crewel yarn held up.

The single-strand crewel held up just fine as warp. It's a bit less tightly spun than I would have liked, but that's what I had on hand which came in multiple colors, was wool, and was the right size. I have ordered some 2/20 silk for next time.

Finished(?) band.

I had a thought of making this piece into garters, since my last pair ended up with the second band a hair too short to comfortably knot. To make sure there was plenty of warp of adequate garters, fringe, and the loom waste, I cut 3 yard warps. Exclusive of fringe, this gave me a 96" long piece of tape, so...that was successful. Now I just need to decide whether to cut and fringe two garters out of it (and a bit of left over), or have a really impressively long belt.


Sunday, September 20, 2020

Virtual Sheep to Shawl

First time trying one of these; with distancing, it ended up being a sort of relay with the different participants. As the team weaver, I was measuring and dying the (purchased yarn) warp while the other three members were preparing the fleece and spinning it up. 

Measuring out 275 ends of 100" each. .

Need to remember to allow for shrinkage on dyeing.

The spinners dropped off four full bobbins of a yarn.
I used 3+.

The warp is Harrisville Shetland yarn; I dyed it with Dharma's "forest green" fiber reactive dye. The weft is grey/"natural-colored" Romney ewe fleece, spun in the grease. Most of it was done as a 2-ply "thick & thin", to maximize consistency among the 3 spinners' singles, with one bobbin of Navajo (3) ply that worked out to the same diameter.


Finnish Birdseye Twill is fun.

I used a Finnish Birdseye threading (4-3-2-1-4-3-4-1-2-3) on my 4-harness table loom, because it's a pattern I enjoy in two-colors. Within that, I opted for the zig-zag, since it's fun and the treadling is easy to remember when working at speed (treadle 12, 14, 43, 32--just a 2-2 twill). The warp had 275 ends; I used a 12 sett with 2 threads floating for selvedges on each side.

A (1) shawl, woven in a single 4-hour stretch.

To finish, I made a simple two-level fringe using square knots, then steam-pressed the whole shawl with an iron. The steam-pressing is fairly fast, and I like that it doesn't shrink the final piece as much as more vigorous fulling/finishing processes.

The handspun has some lovely subtle color gradations.

Zig-zags are fun.


The completed shawl is 20" wide and 72" long, with 2" of fringe along the short sides. It involved three spinners (who did all the fiber prep, spinning, and plying), and one weaver (warping, weaving, finishing). Prep (dying/warping) was not counted for the final time; my timed part was 4 hours of weaving plus 40 minutes of tying fringe, trimming threads, and steam-pressing the final product. 

Saturday, August 18, 2018

Hair Tapes

The band loom returns, with another round of less-than-photogenic white linen. I'm sort of proud of this from an endurance perspective: each tape is over 2 yards long.


Sunday, May 20, 2018

Belt on a Band Loom

Cleaning up the old projects, to make room for the new. I started this band last summer to practice tension on the medieval box loom (beating it evenly with a wool warp is a bit trickier than the cotton I used the first time around).  By the end I think I figured it out, so hopefully the next project turns out a little more...consistent in its width.  It'll do for a belt with my serving attire, at least, or maybe just a strap for hauling small bundles.

Green, white and red striped woven wool belt.
Warp-faced wool belt.
Woven on a band loom with rigid heddle.

Thursday, April 27, 2017

Band Loom


Red, white and green narrow band woven on JK Seidel medieval-style tape loom.
First warp-faced band woven on the loom.
First project on my newest loom: a medieval-style tape loom from J.K. Seidel. It has a rigid heddle, which I used for the red, white, and green warp-faced cotton tape which constituted my first project.  The loom can also be warped for card weaving, which I hope to try over the summer.
Medieval-style band or tape loom with rigid heddle, made by JK Seidel.
On the loom.
Meanwhile, I'm experimenting with hand-woven fringe.  The narrow width of this loom makes it much more practical for this work than any of my others, but weaving with such fine thread is a slow process. The tension difficulties aren't helping, and so this is likely to be my only attempt at weaving fringe of this weight (unless I find a much smaller heddle).
Silk fringe being woven on a medieval-style band or tape loom with rigid heddle, made by JK Seidel.
An upcoming project.

Sunday, January 3, 2016

Book Review: Women's Work: The First 20,000 Years

Book Cover Image: Women's Work by E. W. Barber.

Women's Work--The First 20,000 Years: Women, Cloth, and Society in Early Times by Elizabeth Wayland Barber.

Women's Work is a history book aimed at general audiences; I found it a pleasant and informative read. It traces the development of spinning and weaving from the stone age up to about 500 b.c.e. Tapping into linguistics, archaeology, folklore, ethnography, mythology, dance, and comparisons to modern fiber arts, Dr. Barber creates a working narrative of how textiles developed, and how women's roles changed with them.  Original cloths and fiber-working tools also figure prominently into the story.  

While being highly accessible, I think this book also does a good job of including documentation without interrupting the narrative.  Particularly in the earliest years covered, actual textiles and tools are scarce; however, the author does an excellent job of finding indirect evidence and explaining the conclusions drawn from it.  The twelfth chapter is devoted to methodology, and an extensive source list is also included.

The book is arranged chronologically, with the later chapters (covering better-documented times) also divided by geographic region: Minoan, Assyrian, Egyptian, Greek and northern and eastern European textiles each get special attention.  Certain themes, such as the economic status of the textile workers or the purpose of decorating fabric, are revisited throughout, making a more cohesive work.
I agree that this was the best way to handle the information available, though one sometimes needs to take a moment and remember when and where the narrative is in space-time.

People already familiar with archaeological dating terms and basic fiber-working processes may find the introduction a little slow.  Likewise, if you hated reading the The Odyssey, parts of chapters 4 and 9 may not be fun, though I enjoyed them immensely (and had forgotten just how much textile work is mentioned beyond Penelope's weaving).

Score: 5 Stars

Accuracy: High. Many images and sketches of original items are included. The extensive source list provides many options for further reading.

Strongest Impression: This is a popular textile history book: less dense that Prehistoric Textiles, but still full of examples from history.  The author explains her reasoning well, and makes a compelling case for her history of textile development.  I especially liked the quotations from Assyrian business correspondence, and Wayland-Barber's interpretation of select scenes from The Odyssey. and European folk-tales. A must-read for anyone interested in early cloth-making.

Wednesday, December 30, 2015

Weaving Basics, Part 4: Finishing

Once the weaving's complete, it's time to take the piece off the loom and finish it.

There are two edges to finish when the warp threads are cut--the selvages form neat finishes to the other two sides.  This may be done with a knotted fringe, with special stitching along the end, or with hemming the raw edge to stabilize it (hand or machine).  The stitching is easiest (in my opinion) when done on the loom, but the piece will have to be cut off first for the other two options.

If weaving multiple pieces on the same warp (such as matching placemats or dish towels), some waste weft may be inserted between the pieces, and the weaving continued.  Finishing stitches may be done in place when the individual piece is complete.  Be sure that sufficient warp space is left between pieces for any desired fringe.

I finished this piece using a used a hem stitch with extra weft thread, binding the final weft threads together and to the warp.
Finishing the woven cloth with hem-stitch.

After relaxing the tension slightly, the warp is then cut.  If a fringe is desired, be sure to leave sufficient thread along the cut edge.
Trimming fringe on woven runner.

Once the piece(s) is/are off the loom, the fringe (if desired) can be trimmed to uniform length. Long fringe may also be braided or knotted.  Depending on the fiber and purpose, the piece can also be blocked, fulled, felted, or sheared, as desired.
Woven runner or mat.

Tuesday, December 29, 2015

Weaving Basics, Step 3: Weaving

And now, to actually weave.

The weft (crosswise) thread is loaded onto shuttles for easy movement back and forth.  I like the boat shuttle with its bobbins, but stick shuttles are equally effective.  There are other types as well, ranging from large ski shuttles for bulky yarns and rag strips down to small tapestry bobbins with pointed ends for darning through the warp.
Stick and boat shuttles, extra bobbins for boat shuttle.

The first "shed" (space between the warp threads) is made by raising one or more of the heddles, leaving at least one at its neutral position.  The shuttle passes through this gap, leaving the weft in between.  To maintain neat selvages, the weft should be slightly angled: this way, the weft isn't under extra tension, increasing the draw-in.  The shed is changed, then the reed moved forward to "beat" the new weft thread into position.
Boat shuttle passing through shed made by raising heddles holding half of the warp threads.

Beating the new weft/woof with the reed.

When starting a new weft thread (changing color, or just ran out), a tail of thread is left on the first pass; during the second pass, this tail is tucked into the shed, forming a partial extra row, and leaving a smooth edge with no thread ends.  The same method is used to hide the ends when you're done with the that shuttle; if it will be needed again shortly, the same thread can be used, it'll just "float" along the selvage until it's needed again.
Tucking in the weft ends.

Starting colors/new shuttles at opposite ends keeps the extra threads from distorting one end or the other.

Keep weaving as long as you want the piece to be.  When there's no longer room to beat evenly, the warp can be advanced by loosening the tension on the back warp beam, and then re-tightening it on the front beam (this frees more unwoven warp and wraps the finished cloth out of the way).
Boat shuttle and woven cloth on loom.

Monday, December 28, 2015

Weaving Basics Step 2: Warping the Loom

Now it's time to place the prepared warp threads on the loom.

The "X" of the warp threads is maintained by two lease sticks (each thread passing over one and under the other); this helps keep track of the ends and prevent excessive crossing. Put the lease sticks with this crossed thread over the breast beam (front) of the loom, with the long tail of chained warp out front.

Warp crossed on leash sticks.

Next, sley the reed.  Each cut end of warp is threaded front-to-back through a slit in the reed (which spaces and holds them apart, and allows the weft to be beaten).  Reeds come in different sizes, and ideally you use one of the same "dent" as the project at hand (if you want 10 threads per inch, use a reed with 10 dents per inch).  You can also double up threads if needed.  I only have a 12-dent reed for this loom, but want to weave 20 epi--by threading 2-2-1 I can get 20 threads through 12 slits.  If I was planning on weaving a lot of projects on this scale, I'd get a 20-dent reed.
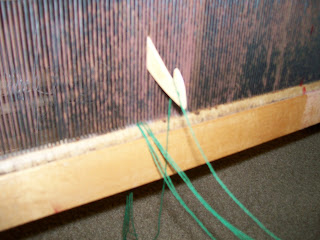
Sleying the reed.
Actually, the camera flash makes it look like this
12-dent reed needs replacing first.
With two people threading the loom, you can have one sley the reed, immediately handing each end to the other person for threading through heddles.  Alone, I sley it all at once, tying off bundles of 20 threads so that they don't fall out of the reed.
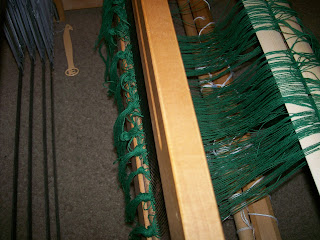
Sleyed reed.

With the reed sleyed, it's now time to thread the heddles.  The heddles raise and lower the warp threads while weaving, so each thread needs to go through its own heddle.  These are divided between four different heddle bars, which can be raised and lowered independently. For the "rose path" pattern I'm using, the four heddle bars are threaded 1-2-3-4-3-2-1-4, repeated.  So, if you want every other thread raised, you lift 1 & 3 and the same time, leaving 2 & 4 down: _ - _ - _ - _.  If you only raise  3 on it's own, the shed will look like _ _ - _ - _ _ _ _ _ - _-, etc. Tabby or plain weave an be done on as little as two shafts: 1-2-1-2.  A basic 2,2-twill: 1-2-3-4-1-2-3-4.  Since I'm weaving on a "jack" loom, I speak of raising the heddles from their starting position: other looms will change the shed by lowering a heddle bar, or moving it forward and back (vertical looms).

Warp threaded through heddles.

The warp threads are tied off in bundles again after being put through the heddles.  This is a good time to try raising and lowering the heddles, checking for crossed warp threads, which will catch on each other and produce a confused shed.
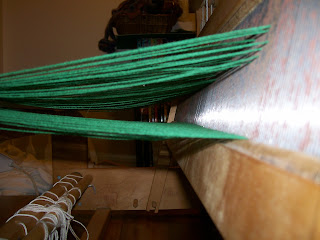
Shed formed by raising some heddles.
Clean shed: a good sign.
The warp bundles are tied to the back "warp beam" by loops of thread (they could also be tied directly on, but the bundle method leaves less warp thread as "loom waste").  Once all the threads are put through heddles and tied off, the back beam is rotated to wrap the warp around it.  A piece of paper between each layer of threads helps keep them neat and under even tension.
Warp threads attached to warp beam.

Warp threads wrapped around back warp beam.

When all the excess warp is on the back beam, the front ends can also be tied into bundles and attached to the "cloth beam."  Instead of loops here, I use a long piece of linen thread laced between the bundles and the beam: I find this easier for adjusting tension than using single loops as on the back.
Warp bunches and reed.

Warp bunches laced to front cloth beam.

To spread the warp threads out (note how they bunch slightly moving towards the knots), some waste weft is inserted: this can be a chunky cord or fabric strip run across a few time, or even a piece of wood. The idea is to space the warp threads evenly a provide a smooth start for the actual weaving.
Waste weft stabilizes warp for weaving.

The loom is now fully prepared for weaving.

Sunday, December 27, 2015

Weaving Basics, Step 1: Preparing the Warp

For those interested in fabric production, here's a short overview of horizontal loom weaving. As a sewist, I found it very interesting to learn about where my material(s) come from, and thought others might feel the same way.

There are certainly variations in how each step is done (consider the many different kinds of looms available), but the general process is this: measure out the warp, mount the warp on the loom, weave the fabric,  take the fabric off the loom and finish the fabric.  I'll be using my 4-harness table loom throughout to demonstrate.

The first part of the first step is math.  Without going into too much detail, you need to figure out how many threads are needed in each direction and how long each of these needs to be.  For the best results, one weaves a small sample using the estimated sett or ends per inch (the number of warp threads per inch of woven cloth) and picks per inch (passes of the weft per inch of woven cloth) to see that the desired effect is reached, and to figure out how much extra yardage is needed for draw-in (width reduction under pressure) and loom waste (additional warp length that goes onto the loom but can't be incorporated into the finished product). The sample is also then available to test laundering and finishing methods.

Once the calculations have been made and the yarn/thread has been procured, the warp will need to be measured and cut.

Take the total length needed for a single warp thread (finished length + loom waste + any planned fringe + space between pieces if more than one is being woven) and cut a guide thread equal to this length. Tie it onto the warping board, where it measures out a path equal to the desired warp length.

Guide thread on warping board.

Now, the actual warp threads are run along this path, forward and back, until the right number of ends are reached.  The board keeps the threads from crossing and tangling, as well as ensuring constant length.
Warp measured out on warping board.

The "X" at the start makes it easier to count the number of warp threads measured, as you're dealing with exactly half of them.  When transferring the warp to the loom, this "X" will help keep the threads aligned and not tangled together.  It'll also help keep your threads uncrossed in future steps.

Crossed warp threads.

When the desired number of warp threads are measured, they are tied off at intervals with contrasting string, and the excess is chained together like a massive crochet project (to keep it from knotting up). The free end near the X is cut, so that you have individual warps instead of continuous yardage.

Prepared warp.

Next up: getting this on the loom.

Monday, December 29, 2014

Woven Placemats

Happy 5th Day of Christmas!  My parents have unwrapped their presents, so it's now safe to share my latest weaving project: plaid placemats (an unfortunate camera malfunction prevented the planned 'in-progress' post).

Handwoven plaid placemat.


I haven't tried weaving a plaid before, and this seemed just the project to start on.  The dining room in question is primarily done in blue, with some accents in green, gold and red on the curtains. With that in mind, I opted for a neutral blue and white as my main color scheme, with hints of green and yellow to add visual interest without becoming too loud and/or busy.  They're meant to look nice in the room, without looking ridiculous in the event of a future remodel.

I experimented with a few designs in Plaidmaker, and eventually decided on this one.  In the interest of keeping my selvages neat, I decided to confine the accent colors to the warp (I am still fairly new at this, and know that color changes in the weft are one of my sticking points).  So, this plaid is basically a check with two extra color stripes down the warp columns.  I'm using a tabby (plain) weave, because the yarn I selected already had some visual interest and texture of it's own, and I thought the simple weave would set it off better than a complex one.

Warp: (8 blue 4 yellow 8 blue) (8 white 4 green 8 white), repeated.  No special selvage treatment.
Weft: 20 blue, 20 white, repeated.  Hem-stitch with a short fringe.

Tuesday, December 9, 2014

Christmas Table Runner

Red, green and white table runner in Finnish Birdseye pattern.

Finnish birdseye pattern woven on a handloom.
Table runner, 14" x 41".  Woven on a four-harness, jack-style table loom.  Warp 5/2 perl cotton (red and green); weft 5/2 perl cotton (white).  Pattern: Bird's Eye.