Showing posts with label corset. Show all posts

Sunday, September 7, 2025

1919 Corset Ad

I came across an ad-article for Gossard Corsets in the March 1919 issue of Women's Home Companion, and was intrigued by their take on "What the War Has Taught Us About Corsets." Or rather, I was interested in how the conclusion presented is almost diametrically opposed to every modern narrative I've heard about how corsets interacted with women's expanded sphere of activity during WWI. 


What the War Has Taught Us About Corsets 

NEVER in in the world's history has any one article of clothing been so prominently brought before the world as an economic force, as has the corset by the part it played in the Great War. 

It was demonstrated to the Governments of Europe in the early stages of the conflict that women could not stand the burden of their unaccustomed duties unless they were properly corseted. 

Thousands broke down under the strain of the new work and production suffered. When these same women were put into proper corsets, sickness decreased and in many instances production was practically doubled. 

From then on corsets were recognized as an essential in war work and when America's women responded 35,000,000 strong to their Country's call GOSSARD Corsets The Original Front Lacing Corsets [emphasis original] were privileged to contribute, in a large way, to the important duty of preserving their health and efficiency. 

Daily it was demonstrated that the correctly corseted woman was capable of greater and more sustained effort than her uncorseted or poorly corseted sister. The hygienic body support of a correctly designed and fitted corset kept thousands of willing workers well and sustained that splendid woman power that was one of the greatest forces contributing to the conclusion of a successful peace. 

Not only has the war taught every thinking woman the value of correct corseting; it has taught her the wisdon of buying only corsets that are hygienically correct; it has taught her to be fitted carefully and to adjust her corset each time it is worn so she may realize its full benefit and service. 

Gossard Corsets are the complete expression of modern corsetry. If possible, the new Spring and Summer corsets are superior to those of the past season which were generally acknowledged to be without equal in meeting the needs of active womanhood from the stand point of comfort, hygiene and style. 

Even allowing for bias (the whole point of this ad is to sell corsets), the fact that this ad was written in this way indicates that someone in 1919 thought 'corsets help you work better and achieve more' was a plausible and persuasive line or argument for other people in 1919. Which is a useful data point to keep in mind when evaluating the claim that corsets fell out of favor because women started doing a wider variety of active work during the later 1910s.

Friday, December 29, 2023

Corset, 1870s

Another from the summer railroad events: the corset for my 1873 ensemble. I used the same material and hardware as on the corset for an 1890s ensemble. The pattern is one that was custom-made for me by Marie of The Fitting Room, right before everything shut down back in 2020. It's based on the corset design on page of Corsets and Crinolines.

Shaped-seam corset.

The material is a double layer of cotton coutil, with self-fabric binding, and 1/4" spring steels throughout. Busk and steels from Wawak; I forget whether this piece of coutil was from Renaissance Fabrics, Lacis, or somewhere else, which is unfortunate, as I'd prefer not to order it again.  It's a decently stout twill, but heavier and not quite as stiff as my favorite coutil.

On this garment I really tried to improve my ironing technique. Each seam was pressed closed and open,on both sides, with the clapper to help set them. For the more pronounced curves, I steamed and ironed the fabric over a dressmaker's ham to help set the shape. So far it seems to have paid off with a smooth finish and a garment that can't lie flat 

Saturday, April 8, 2023

Corset, c.1895

Another for the railroad living history event. I needed to outfit our telegrapher for the 1890s. Unfortunately, my own corset for this approximate time was 1) barely started, and 2) going to be just a bit small for the lady in question. Instead, I ended up scaling up my custom pattern, and then fitting it to the volunteer. She found it comfortable, and I found it easy to drape a toile over, so I'm calling this a win-win situation.


The corset is from a double-layer of coutil, which I sourced from Renaissance Fabrics. The busk and 1/4" steel boning (and pair of spiral bones for the front curve) were purchased at Wawak. The grommets are from the two gross I purchased at my favorite neighborhood hardware store many years ago (RIP Hardwicks). Self-fabric binding.

Sunday, December 26, 2021

1780s Stays

For the second day of Christmas: the stays I cut out a year ago last April. I actually finished binding them over the summer, but never managed to photograph the finished garment. The chamois leather was much easier to sew than any other sort I've work with; I ended up using a regular sharp needle rather than a leather needle, and it didn't have any sticking trouble. 

Finished Stays


I realized after I'd committed to the style that the shoulder straps really shouldn't have been bound. I also watched a couple of Luca's videos on original 18th century stays (via Foundations Revealed) while doing said binding, and now want to completely re-make these stays, with slightly different grainlines on the pieces.


Underarm guards are based on several examples in PoF 5


Easing the leather around the curves got easier as I worked, but it was still annoying, and there are several points I've less than pleased with--but I can live with that as an alternative to re-doing the binding.

Still rather pleased with the eyelets, if not the tab binding.

Saturday, March 13, 2021

Update on c.1780 Stays

 After cutting them out last year, I put the pieces for my late 18th century stays in a safe place. I finally found them again in late February, and have finished no other projects since then.


Fully boned, eyelets bound, and attaching the binding.

The stays are made of a double layer of linen canvas, stiffened with artificial whalebone. Chamois leather guards the underarms and will be used to bind the raw edges. I started out lightly boning the stays, just along the seams and openings, but decided on the first fitting to fully bone the garment instead. The boning channels are machine sewn with cotton thread; the eyelets and leather are hand-sewn with waxed linen.
  

So many eyelets.

I had also originally intended these stays to lace only down the back. Reflecting on my 1820s long stays, and what a pain they are to lace, I decided to switch to a front-and-back lacing style. I hadn't accounted for the relative ease of spiral lacing versus cross-lacing behind one's back, and after going to all that trouble, I'm not sure it was worth it. 


And the three eyelets that I had to remove.

After some slight miscalculations, I ended up with 13 eyelets down the each side of the back, 14 on the front, and four at each shoulder strap, for a total of 62 hand-bound eyelets. I actually ended up sewing 65, as I was four eyelets into the second front piece before remembering that these stays were going to be spiral-laced, and thus the eyelets needed to be staggered. As I had done already done on the back panels.

Fortunately, I'd managed to open the eyelets with very little thread breakage, and managed to cut off the stitches on the three extraneous eyelets, then carefully darn over the broken threads. After the first, I found that darning from the inside made a neater and less visible mend. The structural integrity of the stays does not appear to have been compromised, though it is frustrating to have this error in the most prominent place on the garment.

With the chamois leather underarm protectors appliqued into place, all that remains is to attach the leather binding on the upper and lower edges of the stays, then cut and attach a lining made of lighter-weight linen. Even with my best sharp needles, and a very thin, supple leather, the stitching is noticeably slower and harder on my hands than a moderate-to-fine linen or cotton.


Tuesday, April 21, 2020

Cutting Stays c. 1780

I'm taking a short break from sewing masks to mentally recharge with a different project. Back before Things Fell Apart, I commissioned three custom corset patterns from Marie at The Fitting Room. The mock-ups fit beautifully, and I was very excited to start work on the late 1890s corset as the foundation for an 1896 opera ensemble. That performance of La Boheme has since been cancelled.

So I decided to try a completely different era, un-shadowed by disappointment or uncertain deadlines, and started working in earnest on the 18th century stays.

Off-white fabric with pattern pieces and silver-colored dressmaking sheers.
With very careful layout, I got all the pieces cut
(on the grain) from 1 yard of 56" wide canvas.

Several original garments were considered, with this pattern primarily based on a c.1780 set of stays in Nora Wraugh's Corsets and Crinolines. I debated making it up with front-lacing (or both front- and back-lacing), but decided to try this first set with back only, as it appears to be the most common arrangement of the time.

So far, I've just cut two layers of linen canvas (Fabrics-Store's 8 oz bleached, if I recall correctly), for each of the pieces. There will also be a lining of finer cotton or linen. Eventually.

Saturday, March 30, 2019

Short Stays, 1795-1805

Drafted out of the 1795-1805 example in Regency Women's Dresses.

I realized half-way though that this should have been a photo tutorial, so...here's a half-illustrated one.

I started by scaling up the book pattern, whereupon I realized that the scale provided is... not right. As given, the 'short stays' allegedly have a 17" center front and 23" center back length. For comparison, my 'long stays' (which run from mid-bust to upper hip) have a 14" busk.  Halfing the given scale (1 square = 1/2") gives a 8.5" center front, which more closely resembles the provided illustration, with the lower edge of the stays reaching the bottom of the rib cage.

Anyway, I drafted my stays using the half-scale length, and adjusted the width to my personal measurements. Since most squishyness is up front, I measured between my shoulder blades, and widened the back pieces of the pattern to that measurement by the 'slash-n-spread' method. For the front pieces, I kept the area near the underarm curve at the initial proportions, and used slash-and-spread to widen the central area of the front pieces. After the first test, I ended up removing nearly 4 inches from the center front, and re-shaped the center back seam to suit the curvature of my back. Much of the curving 'tail' of the original pattern did get revised out this way.  I also cut the straps extra long, and then shortened them to fit.

Once I had a working pattern, I cut out a double layer of heavy linen (four copies each of front, back, and strap pieces), and marked the boning channels on the inside layer.

The original garment was apparently stitched by whipping together the individual pieces (the raw edged being turned in and sandwiched between the inner and outer layers).  Being short on time, I changed this to machine sewing in the following way:

1. Prepare the two straps by folding in the seam allowances on the long sides of the four strap pieces. Match up inside and outside layers, and topstitch the long edges. 

2. Sew together two front and two back pieces to make the lining; repeat to make the outer layer.

3. Baste the straps to the lining.

4. With right sides together, join the lining and outer layer, by stitching along the upper edge. This will sandwich the short, raw edges of the straps between the two layers. [I nearly just pressed the seam allowance and top-stitched this, but I wanted the straps well-secured before doing so].

5. Turn the stays right sides out, press the seam allowances all around the raw edges, and top stitch from the center front, over the previously sewn upper edge (to help stabilize it further), and down the other center front edge. 

6. Stitch the boning channels. I started at the center back, paying particular attention to the side seams, where short angled bones meet at the seam. I did the ones on the back pieces as normal, and inserted the bones; for the second set, I stitched the uppermost seam, slide in the bone along the long side of the eventual channel, stitched the middle seam (between the two bone channels), slide in the second bone, and then finished the channel. After all four bones were in place, I top-stitched over the side seam, sealing off the four channels. The angled bones at the center front are more straightforward, but do need to be stitched and inserted before the stitching the vertical channels at the center front.

The side-back seam of a pair of linen short stays, with black lines marking the location of pairs of bones.
The tricky meeting of short, angled
boning channels at the side seam.
7. With all the channels stitched and bones inserted, topstitch over the lower edge (the raw edges having previously been folded to the inside).

8. Mark and make the lacing holes at the center front. I used two-piece metal grommets. Hand-bound eyelets would be more accurate, but time is an issue here. And my particular shape will be putting a lot of strain on the lacing...
Center front portion of linen short stays, with three applied grommets, and a setting die in place for the fourth. Wooden mallet net to the stays.
Inserting the grommets. As always, I put one in backward.
9. I gave the garment a final press to remove the guidelines I'd drawn in for the channels. [Maggie K. turned me on to using friction-erase pens, which come out with the heat of, say, an iron.] In retrospect, this would have been slightly easier before inserting all of the bones...

The same side-back area of the stays as in the first picture, but with the channels markings erased, and the actual channels sewn.
But seriously, this ink comes out much faster
and neater than water-soluble pens.
And there they are. The short stays are quite comfortable, and very easy to put on, though I like the shaping of my long stays rather better.

Completed front lacing short stays.
Finished stays.

Saturday, December 29, 2018

Book Review: Patterns of Fashion 5

On the fifth day of Christmas: a review of the newest Patterns of Fashion book, which I received as a present this year. It's currently available for sale from the School of Historical Dress (this is the first printing, and future print runs are not guaranteed).

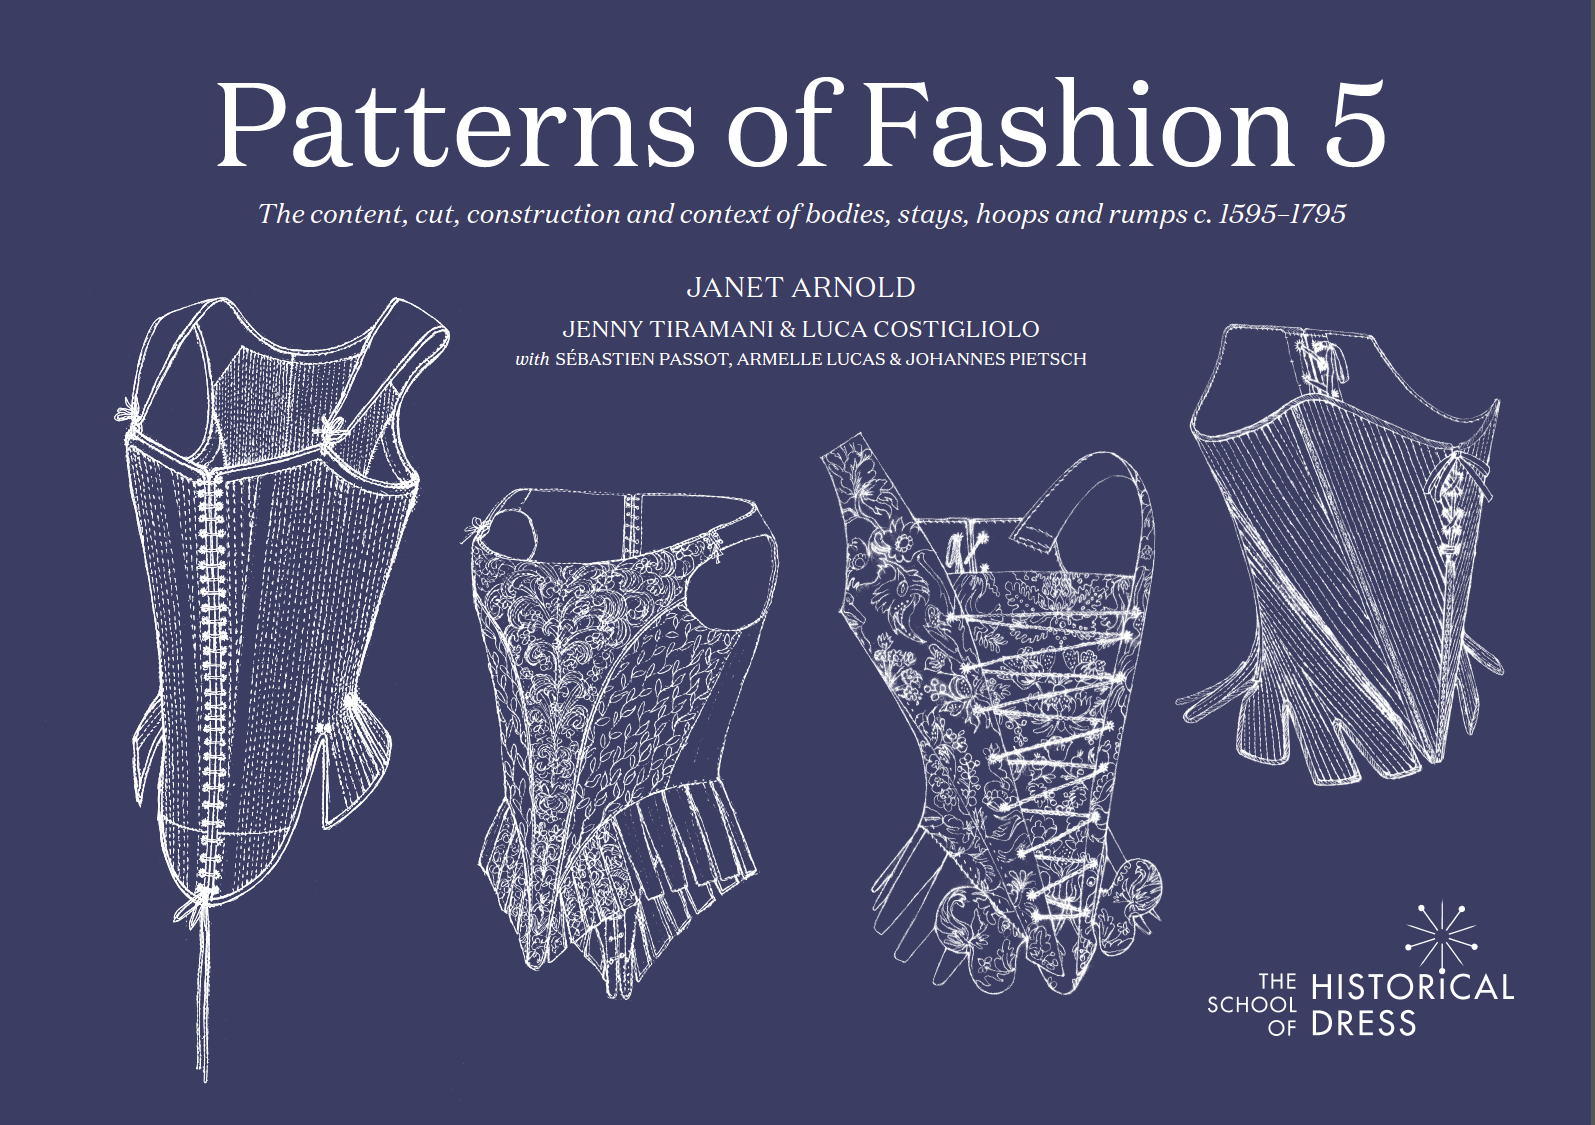
White line-drawings of four 16th-18th century corsets, on a black background.

Patterns of Fashion 5: The content, cut, construction and context of bodies, stays, hoops and rumps c.1595-1795 is the latest, posthumous, book from Jane Arnold's extensive research into Western costume (additional content by Jenny Tiramani and Luca Costigliolo, et al).  Having already covered gowns, gowns and more gowns/doublets, as well as linens, we now get women's foundation garments--all the stays and skirt supporters that make the fashionable silhouette of the 17th and 18th centuries.

First off, this is a huge book--at 160 pages, it's the same size as volumes 1 and 2 combined. Like volume 4, volume 5 has color photographs of the historic garments. Here, however, they are placed right next to the patterns instead of making a separate gallery at the beginning. In several cases, the color photographs have replaced the line-drawings of the complete garment; all told, I prefer the cases where both are present. The photographs show color and texture, while the line-drawings show cut and construction (though, admittedly, the pattern pieces do this too). The use of color has also been extended to the patterns themselves, where it it used to differentiate layers and boning, etc.

The book is divided into two main parts: stays, and skirt supports. Twenty-seven sets of stays or boned bodices (and two busks), dated from c.1598 to the 1790s are featured, as well as twelve farthingales/hoops/rumps from c.1550 to 1800.  Before the patterns, there's a 25-page introductory section: lavishly illustrated with both modern photographs of surviving garments and historic images, it explores the materials used in stays and hoops; historic cutting diagrams; and contemporary illustrations of the garments.

As a fun bonus, some of the 17th and 18th century stays have accompanying stomachers; two court ensembles (1660s and 1760s) are patterned along with their petticoats, trains, and stomachers.  I was also intrigued by the inclusion of a set of maternity stays (c.1665-1675), and of riding stays (1780s).  For those making garments, there's a page discussing how to take measurements for 17th/18th century stays, and another three explaining how to draft custom patterns based on the historic ones (with pictures). I'm also enjoying the English-French-German-Spanish-Italian-[Swedish/Dutch] glossary of fabric and garment terms.

I'm honestly a little overwhelmed by the size and scope of this book. My main impression is that it's 1) beautiful, 2) detailed, and 3) full of useful information. Definitely useful for making 17th and 18th century undergarments, and vital for those interested in English court dress of that time frame. 

Stars: 5

Accuracy: High.  All original garments, lots of contemporary portraiture included.

Difficulty: Advanced for making garments (there is some drafting advice included to help). All levels for appreciating garment construction.

Overall Impression: Possibly the best one yet. The research remains impeccable; the pairing of photographs with the pattern diagrams makes it even easier to use than volumes 3-4, since there's less need to flip back and forth.   

Saturday, December 12, 2015

Corset Upgrade

After a hard summer of wear, the sateen in my 1850s/60s corset failed--it was, alas, not nearly as sturdy as the sateen used in its predecessor.  So, I re-made it in coutil, and while comfortable, it's also basically armor.
1850s/1860s style coutil corset

Tuesday, April 14, 2015

Mid-Nineteenth Century Gored Corset

Updating my gored 1850s/1860s number.  It started life as the Simplicity 2890 corset (pattern by Kay Gnagey).  After two alterations, I got the bust gussets to the almost-proper widths for me.  Following Liz Clark's advice (and scissor-work) at the Nisqually workshops in October, there are now four additional hip gussets in the side and side back; the back gusset has also been re-sized, and the entire upper front extended by 2". I also added some additional boning, to help support the extra swaths of fabric.  Additional fitting advice from the SA ladies, and some final gore re-shaping/ change of bone placement from Dana, and voila:

Gored mid-Victorian corset for 1850s and 1860s wear.

Corset on dress form, to better show the shape.

I've decided that I still hate sewing in gores, but that they can be effective.

Tuesday, April 7, 2015

Corded Stays, 1860s

Using the suggestions in The Dressmaker's Guide, I adapted the Simplicity 9000-series shaped-seam corset into corded stays for Mom.  For a wide variety of reasons (most pertinently, that her first/only-planned event is a 4 mile walk) I think she'll find them more comfortable--or at least less unfamiliar--than the steel-boned corsets I favor.

In an ideal world, after the initial measurements, I'd baste some plastic boning onto a single-layer toile, adjust the fit and then build the real corset sandwich style, putting the seam allowances between the layers.  Since I'm on a time budget, fitting over a distance, and likely to be recycling/remaking this garment in the future, I instead kept the two layers of each piece together and have the seam allowances visible on the inside.  This allowed me to do some of the cording before fitting (adjustments will be made at the seam lines, so cord channels down the center of each piece will be safe).  I also worked the button-closures and set the lacing-grommets in advance, as those portions are straight lines and fastening points, ie, unlikely locations for seam tweaking.
Handsewn eyelets and buttonholes for corded stays.
Corded pieces, showing eyelets and button holes
My grommet setting tools, however, had ideas of their own, and went into open rebellion while working on the back pieces.

With the pieces basted together, Mom tried on the ultra-lightly-corded stays; I pinned out excess fabric at the seams, until the garment fit smoothly and snugly.  After re-stitching the seams along their new lines, I added additional cording channels along each.  Finally, the raw upper and lower edges were finished with self-fabric bias binding, and the seam allowances were  whip-stitched against fraying.
Mid-19th century corded stays with front button closure.
Finished Stays
Vital Stats: Front fastens with 9 bone buttons (hand-worked button holes); back adjusts with 26 hand-sewn thread eyelets; stiffened with two 1/4" spring steel bones at center back and approximately 92 vertical rows of cording running down the center of each piece, at the center front and back openings, and along the seams.

Friday, March 27, 2015

I am the queen of handsewn eyelets...

...or my grommet-setting die started chewing up fabric, ruining two otherwise finished back pieces for these corded stays.

Hand sewn eyelet and button holes on an 1850s style corded corset.

More pictures to come.

Wednesday, February 11, 2015

Regency/Empire Stays, part III

With the front panel complete, it's time to assemble the rest of the stays.1

Working from front to back, I "sandwiched" the completed section between each two new layers.  So, for the first in-seam gusset (cut in two layers to permit the sandwich), the outer layer of the gusset is laid right-sides-together with the outer front panel, and the lining layer is set right-sides-together on the front lining.  I then stitched the seam through all four layers (gusset shell/front shell+lining combo/gusset lining), and pressed the gusset out.  The front+gusset is now the completed section and is treated as one.  To add the side section, the side shell is laid right-to-right over the front+gusset, the lining is treated the same, and the process is repeated.  The hip gusset in the side piece was made in a single layer, and treated as the bust gussets in the front panel.  Boning channels were stitched between the shell and lining after the two were attached and pressed flat.

To make the back section, I joined the shoulder straps to the back pieces (L shell to L shell, R shell to R shell, R lining to R lining, L lining to L lining), and then joined each back piece to its lining, along the center back opening.  I did this to make a clean center back, without binding (leaving more space for the bones and eyelets).  Pressed the back pieces flat and stitched the back boning channels (butted into the CB seam, and another 1/4" away, leaving space for the eyelets in between.  Made the eyelet holes with an awl and applied 2-piece metal eyelets (size 00) with a setting anvil.  Following the method in Period Costumes for Stage and Screen, the eyelets are paired, but with an extra off-set at the eyelet at top and bottom for internal spiral lacing.  [My initial attempts to don the garment with spiral lacing were unsuccessful, so it's displayed below with cross-lacing.]

Made remaining back-boning channels as before.  I then joined the back and side+gusset pieces by sewing the shell only (usual right-to-right and open method).  The lining was folded over (to cover the raw edges) and topstitched.

The straighter boning channels (short slanted bones on the front, center back pairs, side hip) received 1/4" straight steel bones.  Curvier sections, particularly along the panel joins, used 1/4" spring steel.
(To see the difference, I've put up explanations of the different steels here).

Prepared bias edging of tightly-woven cotton (also used for some of the lining pieces), and attached it along the top edge--including both straps--and the bottom, encasing all remaining raw edges.  Added 8 thread eyelets to fasten straps (two per strap, and two at each side of the bust).


Completed Regency/Empire Stays.
Finished stays, front

Side back view of 1820s Stays from Period Costumes for Stage and Screen.
Finished Stays, side back

Front side view of early 19th century-style stays.
Finished stays, side front

1. For the record, I know that the French First Empire dates 1804-1814 and the English Regency period ran 1811-1820, but I am using the terms in the expanded sense, to cover the neo-classical fashion of dress which was popular approximately 1795-1830.  My apologies to anyone who is bothered by this construction.  I have been known to flip out over similar misuses of the term "Victorian" (1837-1901) to denote "pre-1920", "1870 or later", and/or "looks sort of old".


Sunday, January 18, 2015

Regency Stays, Part II

Finally satisfied with the fitted mock-up, it's time to start on the real stays.

Using the mock-up pieces as a pattern, I cut all of the pieces out of linen.  Gores are being worked as single layers, straps and "body" pieces as double layers.

To conceal the seams between layers, I'll be working from the front to the back (more on that in part III). The first point of business is to mark the busk pocket, under-bust quilting, and gores.  After stitching through both layers to form the busk pocket, it's time to add the bust gores.

I've found Alysaundre's Perfectly Pointed Gore Tutorial very useful when it comes to setting gores by machine.  Those tacking stitches really help.  I tried two methods of finishing the gore seams on my mock-up: in the first, I use my normal felling method for a single layer: the two "body" layers are treated as one, the seam allowances on the body pieces are trimmed close to the gore seam, and the gore's seam allowance is folded over the raw edges and top-stitched.  In the second method, I attached the gore only to one layer only, pressed the seam allowances flat, then folded the raw edges of the 'lining' layer to the inside, top-stitching over the lot.  Working with two layers, I found this approach slightly neater and easier.
Basting the pointed gores.
Basting the gore points
Gores stitched into outer layer of stays.
Gores attached to one layer only, before ironing the seam allowances
Lining of stays attached around gores.
Fold raw edges of lining to the inside
Front panel of Regency stays with finished gores.
Finished gores
With the gores completed, it was time to start in on the trapunto.  I found this tutorial particularly useful in figuring out how to approach it.  Inspired by several beautiful original corded stays, I decided to cord the under-bust area in a diamond-pattern.

I marked the diamond pattern in pencil on the reverse side (my fabric marker appears to be hiding). Intending to minimize the extraneous lines, I only marked one stitching line per row, and used the presser foot to make parallel lines at 1/8" and 1/4" to the marked line.  The area to be quilted was 3.5" tall (3" inside the horizontal border), with 1" between each 'line' (double row of cords, set in 1/8" channels).  The diamond pattern was measured from the center front, with the initial lines measured at a 45 degree angle to the busk casing.  I practiced stitching and cording this pattern on the second fitting mock-up, to make sure that it worked.
Trapunto quilting/cording on stays mock-up.
Mock up: corded trapunto quilting on the left, marked lines on the right
The cord is a cotton crochet yarn, ala sugar'n'creme, as I usually use in my corded petticoats and sunbonnets.  Not having a trapunto needle to hand, I substituted a blunt-end tapestry needle to run the cords through the sewn channels.  This worked sufficiently well, even sliding between the stitches where one channel crosses another (I tested this on the first draft to see if crossing lines would work or not).  The short length of the needle would prove severely detrimental over a larger area, but worked fine on this project.
Quilting the stays for the trapunto work.
Quilting the first lines.  The thread ends were tied on the back and clipped close.
Running cords in the stays.
Running the cords
Quilting on stays.
One side quilted!
Front panel of stays with one side quilted, and the other quilted and corded.
Contrast of layers: right side quilted, left side quilted and corded.
Detail: quilted versus quilted and corded.
Close view: corded versus quilted.
With the trapunto finished, the last thing is to add the two short bones (1/4" spring steel) along the lower, pointed sides.  To accommodate the many things going on at the top of this piece, the bones along the upper portion of the side seam will be encased in between the layers of the side panels.

Completed front panel of 1820s stays, with gores, trapunto work, busk, and bones.
Completed Front Panel


Thursday, January 15, 2015

Regency/Empire Stays, Part I

Picking up from last year, I'm finally making up the 1820s stays from Period Costumes for Stage and Screen. According to the notes, the original on which the pattern is based was made of double layers of cotton and linen.  It was also, very frustratingly, in almost my exact dimensions--but the schematic had been slightly sized-down for the book. :(

Step 1: Resize the book diagram.  The length, underbust circumference, and waist measurement are close enough to leave as is (for the first draft), but I definitely needed more space in the hip and bust. As a rough approximation, I took the difference between my measurements and the pattern pieces, divided by 4 (there being 2 gores per side at both bust and hip), and increased each individual gore by the resulting value.  To increase the gore, I slashed it down the middle, and pivoted the two edges out until the additional space was accommodated.
Pattern pieces and wooden busk for 1820s stays.
Front, Side, and Back Pieces (with wooden busk).  Not pictured: triangular gores and shoulder strap.

Slashed and expanded gores for corset.
Slashed gore on right, expanded version on left

Step 2: Make the muslin.  This was made in 1 layer, except for the front (which needed two layers to form the front busk pocket).  Since I often need extra length over the bust, I used two different sized gores on the initial fitting: both were expanded to the width I expected would be necessary, but on one side, I lengthened the gores by an inch.  Featherweight boning was basted along the boning lines, where double layers weren't available to make channels, and eyelet tapes was basted along the back for trial fitting.
Eyelet tape damaged after lacing corset mock-up.
Exhibit A: In which I remember why I don't use eyelet tape.

Step 2A: Fiddle with the fit.

This got very frustrating, very fast.  (Lacing up a corset from behind, while wearing it, is enough to put anyone in a sour mood--I'll look into longer laces to expedite the process in the future). The obvious first problem was that the back hip wasn't full enough, while the front/side was a little too full.  So, I pinched out the excess in the side gore and slit the lower part of the back panel.  In draft 2.0, this new, third gusset was shifted to the side-back seam, as I prefer sewing gussets between panels.

The bust was a whole 'nother mess.  The main problem, I discovered (thanks to some help from the Oregon Regency Society's stays fitting advice) is that I was trying to adjust the bust before determining the strap length.  Need to reverse the order there.  In any case, even the lengthen gores were still 1/2" too short--and they also needed to taper slightly towards the top for a close fit.  Also, they were too far forward: all the extra room was going to the front, with none to handle side fullness. Frustrated with the re-drafting, I finally draped the needed cup-shape (lower half only) and expanded the triangular front panel so that the side seam falls to the outside of the bust (instead of awkwardly over it).  This was accomplished by measuring from the center front to the side bust along the underbust line, and then re-sloping the front panel through that point.  To get a better gore shape, I superimposed the draped 'cup' over half of the new front piece, and pinched out fabric until it lay flat within the boundary of the front piece.  I traced along the pinched out portion to get two darts (the difference between the needed amount of fabric and the portion supplied by the main body piece).
Revised front panel for 1820s stays, with stitching lines marked.
New, expanded front panel, with marks for busk placement, trapunto corded quilting, and bust gores.
Cup and gore sizing.
Draped "cup" and resulting gores.  The remainder of the "cup" material will be provided by the sloped front piece.
Adding seam allowances to the new bust gores, I cut out new front and back sections (the side piece was alright), added the back hip gore (starting with the basic shape used on the other two), took in the side hip gores by the amount pinched out, and set in the new bust gores.  Most importantly, I fastened the straps, using string to make the front adjustable  for fitting.
Front of Regency stays mock-up.
Mock-up 2.0, front
Side view of early 19th century stays (mock-up).
Mock-up 2.0, side
Fitting Success!  Selfie not included.

And for some uplifting inspiration, here's a beautifully embroidered corset, circa 1820-1839 from the Met.  Next time, I just may have to try using single bust gores.  With embroidered birds.
Embroidered 1820s/1830s stays from The Met.


Wednesday, October 15, 2014

Experiential History: Living in a Corset

When I started reenacting/doing living history, I was looking for a reason to dress up.  Over time that rationale has morphed into dressing up as a way to teach others about history (creating 'the look' of a time), and--as I've lately come to realize--to teach myself more about how people lived and performed various activities.

Exhibit A: Wearing a Corset.
Corset from Der Bazar, February 1865

When I started living history, I expected to be somewhat hampered by the clothing: that I'd need to learn a different way of moving, and that some activities would be difficult or even impossible.  As it turns out, very little is impossible (no back bends), and the operative d-word is actually 'different'.   

Even among living historians corsets have a reputation as uncomfortable, problematic, or even downright dangerous.  They've been out of mainstream wear for a good 3 generations, leaving a nebulous mythology of Scarlet O'Hara's tight-lacing, professional invalids, professionals of another sort, and 'fainting couches'.* I've seen visitors (who had just commented on the group's good posture) visibly flinch when it's mentioned that the ladies present are, in fact, wearing corsets.  Others have assumed that I'm not wearing one because I'm doing 'X' activity, or that women of the period didn't do 'X' because of corsets, or that corsets of the period must be different from the one I'm wearing because I can do 'X' while wearing it.  (For the record, the following list is largely based off my experience wearing 1850s/1860s corsets--either gored or shaped-seam styles--which are somewhat shorter in the torso and less heavily boned than some other time periods).

Activities I have done while wearing a corset:
  1. Dance (ballroom, contra, swing...)
  2. Cook over a fire or on a stove
  3. Split kindling with an ax
  4. Start a fire
  5. Sing
  6. Pick apples
  7. Scale a low fence
  8. Jog/run (not recommended)
  9. Wait at table
  10. Move furniture
  11. Shoot arrows (also tried throwing a tomahawk once, but I'm apparently very bad at it)
  12. Nap
  13. Eat
  14. Dig potatoes
  15. Play games (rolling hoop is a bit tricky, see #8)
  16. Strike tents
  17. Act in a theatrical
  18. Drive a car
  19. Style hair (own or others)
  20. Help others to dress
  21. Ride the bus
  22. Jump over puddles
  23. Tie my shoes**
Things that I can't do in a corset:
  1. Slouch
  2. Overeat
  3. Some Yoga poses
'No slouching' is the really noticeable bit, in my opinion.  It can be bit weird and somewhat tiring to sit up straight all the time--and it makes modern car and movie theater seats really annoying, as leaning backward isn't comfortable--but the corset also provides ample back support.  I can and have sat down to elaborate dinners in period dress, and enjoyed many of the delicacies offered, but learned that you need to take small portions if you want to try everything.  You can even do a number of yoga poses while wearing a corset--just not all of the ones involving lots of torso flexibility (though I can still touch my toes).  

In all cases, the different ways of moving become more intuitive with practice.  You can't bend much at the waist, so you bend at the knees when tying your shoes or lifting an object. You walk briskly rather than running because it's easy to get out of breath (though, even with snug laces I can sing or do moderate exercise without trouble). Stretching to pluck an apple is no problem--from the corset at least, dropped armscythes are another issue.  Straight-back period chairs are actually really comfortable when your only option to sit up straight. 

The other thing that gets easier with practice is actually wearing the thing.  When I was dressing 5+ days a week this summer, I found myself getting dressed a bit faster each time.  The 'comfortable snugness' also changed with practice: I adjust my laces based on feel rather than measurement, and by the end of July most of my dresses were getting loose at the waist because my comfortably laced corset was tighter than it had been in June.

For a while there, not wearing a corset actually started feeling really strange; I remember taking a walk one day and just feeling really weird about my posture and carriage, only to realize that it was the just second time in ten days that I'd been in modern attire. It was certainly a different perspective: not so much 'liberated' as 'awkward and somewhat exposed'. A feeling shared, I imagine, by those dress-reformers who went without stays (not all of them did) in the 1850s, by some of the women adopting the early regency/directoire fashions of the late 1790s, and by many young women after WWI.

The only time I've found a corset really uncomfortable is when I've laced it too tightly (not worth, won't repeat), or when a bone works it's way loose and started poking me in the hip or shoulder.  Bits of metal hurt.  The plastic's better in that respect--my first two corsets had plastic boning--but in all other ways, 1/4" spring steel really is more comfortable.  It gives better support than featherlight or zip ties, and is much less bulky than the latter.

One thing that's stayed true over time: however comfortable a corset is to wear, however good the support (think your favorite bra times about a million), taking it off always feels really nice.

*The true purpose of a chaise lounge is, of course, posing dramatically.  For maximum effect, clutch at your pearl necklace with one hand, while dramatically holding the other up to your forehead. Employ smelling salts as desired.

**Nonetheless, I prefer to take care of my shoes and hair first when getting dressed in period attire, particularly the shoes

Tuesday, September 2, 2014

Pattern Review: HMP-400, Historic Moments Cloth Doll Pattern

As I can only wear one historic outfit at a time, I decided to make a clothing demonstration assistant.

Meet Nelly:
1850s/60s style cloth doll from HMP-400 pattern.


She's made from Mrs. Clark's "Great Aunt Maude's Cloth Lady Doll" pattern.  Her first outfit, above, consists of the chemise, corset, drawers, apron and high-necked dress (all from the pattern), with an additional apron of my own design, and a sunbonnet based on Mrs. Clark's free sunbonnet pattern (as drawn from memory, scaled down to fit a 15" doll).

Undergarments:
HMP-400 cloth doll with undergarments.

Accessories:
HMP-400 cloth doll with undergarments.


I've been enjoying making doll clothing so far.  The small pieces let me use up scraps from my other projects (this will be great with the wools and silks that aren't appropriate for my quilting activities), and they items go together really quickly.  All of Nelly's clothing has been handsewn--so far--and working on them has been a great opportunity to practice my hand-sewing in a low-stress way; doll clothing also makes for a very portable period project, and gives a great sense of accomplishment as it gets finished very quickly.  The downside to the small garments, in my opinion, is making the tiny eyelets.  Miniature piping is the other tricky bit.  For easier sewing, many of the instructions call for decorative buttons with functional hook-and-eye closures, instead of functional buttons with tiny button-holes.

The doll herself and the undergarments are made exactly as given in the instructions (save that I added a functional button and loop on the petticoat).  I think I made my seam-allowances too small on the corset, as it turned out a little loose.  It would also have benefited from some ironing during production (which it would have had, were I not sewing it in the car on my way to an event...). For the dress, I made some changes to the basic high-neckline bodice pattern.  It's gathered, rather than darted, but I didn't get the bulk down quite enough, making for a front that 'poofs' a bit above the waist.  The bishop and cap sleeve options were both among the given variants (there's also a pagoda sleeve, a puff sleeve, a bias sleeve, and with the wrapper, a coat sleeve).

What You Get With This Pattern: 

  • 39-page instruction booklet
  • 2 sheets of pattern pieces--done on writing-weight paper, not tissue--with pieces to create one doll and twenty garments/accessories, plus variations.  The dress pattern includes 3 bodice options and 5-6 sleeves to play with.

Rating: 5 stars
Difficulty: Varies from easy to intermediate
Accuracy: The shapes and methods are all good for the mid-19th century, based on my knowledge of women's clothing.  No pictures of original dolls are included, though the author provides some background information.
General Impression: A very complete pattern for a doll and her wardrobe: there are dress variations, underclothes, nightwear, and accessories included (no bonnets, per se, though there are two caps and a hood).  The clothes are all (almost entirely) pre-fit to the doll, making this pattern the easiest introduction to mid-century clothing that I've seen.

Saturday, July 26, 2014

Book Review: The Dressmaker's Guide by Elizabeth Stewart Clark


A good seven/eight years after I started reading at her website, I finally got a copy of Mrs. Clark's "The Dressmaker's Guide".  I hadn't done so at first, as I was 1) at college, with little spending money, and thus 2) on hiatus from the hobby.  By time I got back into the swing of things, I felt confident on the basics, and didn't think I'd have much to learn from this particular source.

This turned out to be--very much--not true.

The book is divided into twelve chapters, detailing how to drape or draft and then make up each of the layers* which goes into women's wardrobes c. 1840-65.  The first three chapters cover preparation for sewing and context for one's living history: a year-by-year timeline of events, approaches to progressive reenactment and documentation of research, a timeline of dress styles, and a 50-page tutorial of stitches and fabric terms.  Chapters 4-11 go through each garment or element, discussing how to fit it, what materials to use, and how to make it.  Chapter 12 is a quick-reference appendix, with three "croquis" in different body types (instructions are given in chapter 2 for using these paper dolls to plan your outfits and play with styles).

For a preview of style and content, the free women's patterns found at the Compendium are mostly taken from the book (except for the sunbonnet, shawl, and apron).  The chemise chapter, for instance, includes the personally-drafted banded chemise found at the Compendium, as well as instructions for a gored chemise, and a discussions of the different fabric choices.  Similarly, the basic drawers and petticoat are given free on-line, but the book offers additional design choices, including decorative tucks and whitework insertions, and instructions for corded and quilted/wadded petticoats.  If you can follow the directions given on-line, you'll have no trouble with the book's instructions.  Additional book content includes a whole chapter on draping a personal corset pattern, cage crinoline instructions, a self-drafted sleeve pattern with 8 different variations, and a chapter on personal accessories.

What I found most valuable were the bodice and sleeve drafting instructions.  Several variants were included for each, with the time period when each is popular, and instructions for personalized fitting. To get an idea of the breadth of the bodice chapter, take the "Having a Fit" article, then add sketches of each step for the draping, advice for fitting commercial patterns, and instructions for creating 6 different bodice variations from the basic pattern (high or low, gathered or darted, V-necks or rounded, and some beautiful pleated/shirred "fan fronts").  The sleeve portion follows, and I'm excited to experiment with some of the variations shown.

I expect this book will prove valuable to sewing enthusiasts of all skill levels.  Despite extensive reading on the subject, I was surprised by new elements like the diagonal tucks.  At the same time, all the basics are present.  A person with no experience in mid-19th century women's clothing could go through every step from selecting an impression to finishing a completed ensemble with the instructions given here.  It may take a while, by the information is all given in a clear manner which should be accessible for beginners.  Additional help is available through the author's website, or at the attached forum.

Looking for downsides, the main things which come to mind are the overall size: there are 100 pages of information before any garment instructions show up.  This is possibly overwhelming, but also provides interesting background information and useful techniques.  The instructions can at times 'run-on' in my opinion (separate tables for calculating yardage for each type of petticoat, for instance, instead of just adding or subtracting from the basic plan), but this may be useful to those not mathematically-inclined or who need to take some things in 'baby-steps'.  Erring on the side of more information and simpler explanations isn't a bad thing.  For those that need visual instructions, there are nice sketches included with most of the techniques, but no photographic images of garments or steps.  I liked the drawings as given; your mileage may vary. The table of contents gives page numbers for the chapters, but the one thing I would change about this book is adding a topical index,*** so you can look up "coat sleeve" or "petticoat: whitework" and go directly to the page.

Score: 5 Stars
Difficulty: Absolute beginner & up.  Basic sewing skills are useful, but not strictly necessary.
Accuracy: No original garments are presented, but the variations and techniques are all very accurate as far as I can tell.  Read Janet Arnold if you want details of original garments, this is more a summary of the the period and its aesthetics.
Strongest Impressions: This is a book to reference.  It's not meant to be the end of your research, but the beginning.  Find an original for inspiration, then use the sketches and instructions in here to reproduce the elements you like.  The introductions and instructions in chapters 1-3 are a good basis for making one's first forays into historic clothing--and will put you miles ahead of the non-fitted, ready-mades found at most reenactments.  Should I even become an eccentric millionaire (half-way there!), I would be giving these out like Bibles.

*On further reflection, stockings & garters, shoes, gloves, and millinery are not included as topics.  All trunk garments from the chemise outward are covered, however.**
**Ok, not aprons.  But you should be able to figure one out from the all the techniques given.
***Edited to add (11/28/14) that a printable index is now available here. Rumor has it that future editions will include an index.