Showing posts with label Civil War. Show all posts

Sunday, June 1, 2025

Original: Seaside Outfit, c.1864-1867

Cotton seaside ensemble, c.1864-7, in LACMA.
 

Something summery this month! I selected this sacque-and-petticoat outfit partly for the seasonal theme, and partly because it breaks all the 'rules' (read: general trends) of reproducing 1860s dresses. It's a two-piece outfit; the bodice (sacque) does not closely fit the figure; and the fabric is a solid cotton (no printed design in sight). And it's covered in embroidery! But there are reasons for all of these departures from the norm, which is that this is a very specific kind of outfit, made of a very specific kind of fabric, worn by very specific people for very specific purposes.

In short: this is a rich person's casual summer recreation outfit, intended for outdoor daywear in a "watering place" (read: seaside resort full of other rich people relaxing and having fun outside). The loose fit of the sacque makes the whole thing look relaxed and informal, while the unprinted white cotton should both look and feel cool in the summer heat. And that isn't just any kind plain cotton: it's a cotton pique, which as far as I can recall is only used for summer wear (and is one of the few solid-colored cotton materials to feature in women's dresses of the period). And the white won't be fading or crocking; not that this need be a concern, because the person commissioning hyper-specific garments for hitting the beach on vacation is not someone trying to eke out a meager clothes budget, and can readily replace this outfit when it starts getting dingy or dated. Note also the long train on this skirt: it's meant to be worn over the fashionable elliptical hoops of the later 1860s, despite the ostensibly 'relaxed' show made by the sacque.

Sunday, March 16, 2025

Chemise Embroidery Designs, 1856-1860

 Looking through some old notes, I found these embroidery patterns for chemises (bands, yokes, and sleeves) from the late 1850s. I don't recall planning an embroidered chemise at that time, though it is certainly nice to dream.


Chemise Band embroidery from Peterson's, June 1859.

And yokes from the February and August 1859 issues of Peterson's:
And September of '57:

Many chemise band, yoke, and/or sleeve embroidery patterns from Godey's 1856-1857:


A nice simple embroidery design from The Hesperian, May 1859

Arthur's Home Magazine (1860) has three designs for chemises with embroidered components in their (with the embroidery described, though no patterns are not given). I'm including these because they give some interesting ways the embroidered segments can be used (aside from the obvious 'band or yoke across the top, sleeves at the sides').
 

Saturday, March 1, 2025

Original: Silk Ankle Boots, c.1855-1865

 I never did get my new mid-19th century boots started last summer, but with my size out of stock at my last supplier, it is a project I need to get busy with. So, time for some more inspiration.


Girl's Boots, made from silk and patent leather, c.1855-1865. LACMA.

Sunday, January 12, 2025

Clothing Longevity c.1840-1870, Part 1: An Introduction

This project stated with the broad question of "How long did mid-Victorian clothing last?" (and it's reenacting corollary: "Can one justify wear a dress with specifically 1840s style elements at an event set in the 1850s, 1860s, or later by pretending to be old, poor, or rural?"). I've since come to realize it's really a series of related questions encompassing among other things:

  • How frequently are dresses (or clothing more generally) being replaced?
  • How long is a particular dress expected to be used in its original configuration by its original owner?
  • How long can a particular dress (or other garment) continue to be used as clothing in some capacity by any person at all?
  • Which people have the means, ability, and inclination to update old garments? Are there groups who do not?
  • What assumptions or stereotypes do period writers attach to wearing outdated or outworn clothing?

Related to this, of course, is the issue of what happens to a garment after it's initial period of service. Is it being "turned" or altered to continue being used by the same person in the same capacity? Is the garment being altered to serve a different purpose for the same person? Is it being passed on, intact, for use by another? Is it being remade to a different purpose for a different person to use? Is the garment's fabric being re-used for a non-clothing purpose? Or is fiber itself being recycled?

Consider a woman's formerly 'best' silk dress...

  • which has been re-made for/by the owner to keep the sleeve shape and other style elements up to date, for continued use as her best silk.
  • which has been re-made for/by the owner as a wrapper for wear around her own house, with a new dress taking the role of "best."
  • which has been sold through a used clothes dealer and bought by someone else to wear as-is.
  • which has been gifted to a servant and re-made to suit the new owner's size, taste, and social station.
  • which has been been taken apart and used to make a mantel for the original owner's daughter
  • which was put away for several years, and later cut up to make a "crazy quilt"
  • which has been used for one or more of the above, until the last pieces are finally picked apart by a rag-merchant and sold to a fertilizer company.

Arguably, most of these events can mark the end of the dress, if not the end of the fabric's useful life. And, unfortunately, the sources available to use don't always differentiate between one of these fates and another, especially when it comes to the issue of remaking the dress. As a result, my answers here are going to take a few different forms, and there will be a certain amount of uncertainty about how remade and altered dresses fit into the "life expectancy" of the middle class wardrobe. I'm mostly sticking to sources from the period 1840-1870, excepting The Workwoman's Guide (1838) and a beautifully comprehensive guidebook published in 1873 which brings together many of the elements suggested and implied in the 1850s and 1860s sources.

I'd also like to observe, before we get too much further, that different materials may perform very differently, not only due to their inherent properties, but also on account of how they are worn, laundered, and repaired. Sheer dresses (cotton, silk, or wool) can be very fragile; figured weaves can snag and collect fuzz; cotton prints may be subjected to harsh laundry methods; woolen materials are preyed upon by moths; an expensive silk might entail a much higher level of care than a cheaper material and be worth re-modelling.

And, as a final aside, modern clothing really can't be a guideline in this matter, in my opinion. The materials out clothing it made out of has changed drastically; the manufacturing processes of the fibers themselves produce different fabrics; wear patterns have changed; laundry methods have changed; the frequency a given garment is worn has changed; mending and alterations are much less common; there's greater tolerance for idiosyncrasies in dress; and the way our garments work together are all very different from the practices of the 1850s and 1860s. A modern person retaining clothing from 20+ years ago is not evidence that people in the year 18-- commonly did so without censure.

Tuesday, September 26, 2023

HFF 6.16: Harvest Time


Detail from an 1850s painting with a woman's hands gesturing over a table of food.

The Challenge: Harvest Time. Try a recipe associated with the harvest. [I harvested the salsify from my garden today, so I think that counts.]

The Recipe: Fried (Celery or) Salsify from Miss Leslie's Lady's New Receipt Book:

FRIED CELERY--Take fine large celery, cut it into pieces three or four inches in length, and boil it tender, having seasoned the water with a very little salt. Then drain the pieces well, and lay them separately to cool on a large dish. Make a batter in the proportion of three well-beaten eggs stirred into a pint of rich milk, alternately with half a pint of grated bread crumbs or of sifted flour. Beat the batter very hard after it is all mixed. Put into a hot frying pan a sufficiency of fresh lard, melt it over the fire, and when it comes to a boil, dip each piece of celery twice into the batter, put them into the pan and fry them a light brown. When done, lay them to drain on an inverted sieve with a broad pan placed beneath it. Then dish the fried celery, and send it to table hot. 

Parsnips and salsify (or oyster plant) may be fried in butter according to the above directions. Also the tops of asparagus cut off from the stalk and the white part or blossom of cauliflower. Cold sweet potatoes are very nice peeled, cut into long slips, and fried in this way.

The Date/Year and Region: 1850, Philadelphia
 
How Did You Make It: Not without two notable errors, despite the simple instructions. I started by picking five salsify plants from my garden (mammoth sandwich island salsify, which is the/a white variety). I washed them, cut off the leaves, and peeled the roots, then cut them in half, aiming for 3" pieces, but getting between 2" and 4" pieces. These went directly into the boiling water, to which (first mistake), I forgot to salt. I let them boil while preparing the batter from 1 egg, 2/3 cup milk, and 1/3 cup plain bread crumbs. I melted a couple ounces of lard on the stove (second error: it's lard for the celery, but butter for the salsify), and when it started bubbling, I dipped the salsify twice in the batter, and set it to fry.
 
Fresh out of the garden.

Time to Complete: I wasn't paying attention to the clock, but safely under an hour.
 
Total Cost: Everything was on hand.
 
How Successful Was It?: Not spectacular, but not bad. It was definitely improved with a little salt and pepper (and would be more improved by salting the water, I expect), but mostly just tasted like the-status-of-being-deep-fried-in-lard. Even the largest pieces with the lowest batter to salsify ratio didn't taste much like anything.

I noted the two error above, and if making this again (which I might, simply because there's more salsify in the garden to use), I would salt the water and cook it in butter to see if there's more flavor to be had.
 
As much as I'd like to give this another try, I doubt it's going into my living history rotation. I'd need an autumn event (when the salsify is readily available in the garden) at which I'm serving food hot (this is not going to travel well after being made up in advance), and even then the main interpretive thrust is just that Victorians cooked with a plant called salsify or oyster plant. As far as I've read, the plant's main point of interest is that it's supposed to taste like oyster, though I haven't had the real thing to compare it with. It does remind me of the mock oysters of corn I've previously made, but only in that both taste like deep-fried-breaded-things.

How Accurate Is It? Heritage crop! Aside from the two errors, I'd put this as fairly accurate. No modern substitutions.

Fried salsify with a parsley garnish.


Friday, September 1, 2023

Original: Black Lace Bonnet Veil, c.1850-75

Bonnet veil, c.1850-1875. LACMA.
 

This bonnet veil is true silk lace and a lovely example of the fine accessories available in the third quarter of the 19th century. The "spots" over the face are a popular element c.1860, while the border is more heavily decorated with floral designs and intricately scalloped edges. The changing bonnet shapes of the era makes me suspect this half-oval-shaped veil is from closer to the middle of the century (1850-1865) rather than the last ten years of its range (1865-1875).

Tuesday, July 18, 2023

HFF 6.12: Eat Your Vegetables


Detail from an 1850s painting with a woman's hands gesturing over a table of food.


The Challenge: Eat Your Vegetables. Make a dish that incorporated vegetables in some capacity.

Unfortunately, my garden plot's right between vegetable rotations at the moment, so my choices are herbs from the container garden and nasturtium leaves/flowers. Or the world's saddest little lettuce bits (the size smaller than 'micro-greens'). 

 
EGG OMELET--Frisk until light, the whites and yolks of twelve eggs, separately, stir well together with a tablespoonful of cold water, season with pepper and salt. Have about an ounce of butter boiling hot in a frying pan, pour in the mixture, shaking the pan as it browns to prevent it sticking, and turn up the edges all round with a broad bladed knife, and continue to roll over until the whole is brown. Lift on to a meat dish with an eggslice without breaking, and serve hot for breakfast. 
 
Another--To the above quantity of eggs [12], add a handful of fine curled parsely and twelve fresh nasturtium flowers, chopped fine.  
--Pennsylvania Farmer and Gardner, February 1861

The Date/Year and Region: 1861, Philadelphia

How Did You Make It: On a 1/6 scale (2 eggs, 2 nasturtiums, a small handful of parsley). After chopping the plants small, I I followed the first instructions, separating the eggs and beating them, then adding the water, parsley and nasturtium while the butter heated up. I then fried the eggs without turning them, instead lifting the edges and shifting the pan to encourage the liquid to solidify. Reading "meat dish" as "a meat-based dish of food" rather than "a physical dish usually used to serve meat", I finished the omelette by laying it on four small slices of fried bacon.
 
Time to Complete: About 15 minutes.
 
Total Cost: Everything came out of my garden or my friend's chicken coop. Except for the <1 Tbsp butter.

Omelette with parsley and nasturtium (and bacon).


How Successful Was It?: Lovely to look at, with the red and green of the parsley and nasturtium. I really like my eggs cooked through, so I was nervous about not flipping the omelette to cook on the other side, but it did fully solidify. I think the dish could use some salt; looking over the instructions again, I think there's room to interpret the recipe as calling for salt and pepper like the first one, though on my initial read I took it as "substitute parsley and nasturtium for the salt and pepper." I didn't really notice the nasturtium flavor except for one bite, though there was a low-key parsley flavor throughout. Overall, it tasted of egg and looked nice. I think that the water and beating the egg parts separately were meant to make the omelette lighter, but I didn't notice much of a difference over the modern omelettes I've made mixing the whole eggs.  

Despite not seeing much of a difference with separating the eggs, but the parsley and nasturtium do make a pretty variation on a simple egg recipe, and I would consider adding this receipt to my arsenal.

How Accurate Is It? I think I followed the instructions well, and am pleased that I could source home-grown ingredients for this one (including eggs from heritage-breed chickens, so for once egg size shouldn't have been a problem).

Tuesday, June 7, 2022

HFF 5.24: The Tiffany Problem


The Challenge: The Tiffany Problem. Try making a dish that's older than you'd expect; something that seems like it should be an anachronism, but isn't. 

Quinn's 19th century macaroni was how I was introduced to the 'Tiffany Problem' in the first place, so it seemed fitting to finally make some for myself.

The Recipe: To Dress Macaroni from Mrs. Hale's New Cook Book

The Date/Year and Region: 1857, Philadelphia

How Did You Make It: Per the instructions, I boiled the noodles (~4-5oz of cavatappi) until soft, drained them, then returned them to the pan with milk (1 cup), butter (~2 Tbsp), a dash of salt, and a dash of cayenne pepper. I grated ~2 oz of smoked Gruyère cheese into the pan, and stirred it all together for ~10 minutes while the oven pre-heated. I then poured the macaroni into a glass dish, sprinkled over it the smallest amount of bread crumbs I could justify, and let it sit in a cooling oven for 10 minutes to brown.

Total Time: 40 minutes

Total Cost: About $3

How Successful Was It?: Very tasty. I thought at first that I should have used more cheese (since the sauce seemed a bit thin), but the flavor was lovely and I found that after stirring the noodles around, they picked up the sauce very nicely. I don't usually like bread crumbs on pasta, but it actually didn't bother me this time.

I really liked this receipt as I made it this time, and wouldn't change anything. If I had to pick something to alter, I might try adding just a touch more cheese and/or pepper, but I'm not sure either of those would necessarily be an improvement. I would, however, add the salt and pepper to the milk before the noodles go it, just so it's a little easier to stir.

How Accurate Is It? I did use cavatappi-shaped noodles because the store was out of elbow macaroni, and that's the closest I could get. The cheese type wasn't specified, so I picked gruyère because I heard it's a popular option for macaroni. It melted easily and tasted great, so I think this was a good decision--and if the internet is to be believed, this cheese has been made since the middle ages. I have less confidence that Victorians were using hickory smoked gruyère in their macaroni, but it certainly tasted nice. For the ingredient proportions, I did follow the instructions to use enough milk to half-cover the cooked noodles; the rest of the ingredients are to one's own taste, excepting the butter, which I scaled down since I am only one person and wasn't preparing a dish for a whole table. I think this is a reasonable alteration since "butter the size of a turkey egg" isn't scaled to anything. I am disproportionately proud that I used homemade breadcrumbs in this receipt.

 
Macaroni from an 1857 recipe.


Saturday, April 2, 2022

Original: Chemise c.1850

I still need to remake most of my 1850s underthings, and decided some inspiration was in order.

American or European chemise, c.1850. The Met.

Even at the highest magnification, I can't tell what technique is used on the decorative infill. My first thought it wavy braid (as on the chemise in my own collection), though the completely contained circles would be a pain to make in that technique, which leads me to suspect tatting or crochet. However, I can't clearly see any of the stitches to make a determination. I'm certainly not copying this garment, though, so for now it can remain a mystery.
 

Sunday, February 6, 2022

HFF 5.15: T Time

Out of order, but once again caught up on the historic cooking challenges!


The Challenge: "T" Time. Make a light dish or confection suitable for tea. Or anything with the letter "T". I decided to revisit my solo tea party menu, and noticed that I hadn't yet made rusks (and alternative to wigs on the tea table, per Mrs. Crowen's recommendations).

The Recipe: Rusks from The Economical Housekeeper by John Walsh ("assisted by a company of ladies")

The Date/Year and Region: 1860, London

How Did You Make It:  I did the full quantity this time: melted 2 oz of butter and combined with 1 cup milk; mixed 1 lb of all-purpose flour with 2 oz granulated sugar; beat 1 egg, and added it to the flour mixture along with 2.5 tsp active dry yeast (substituting for 2 Tbsp fresh), then mixed in the milk/butter, and let it all rise for an hour. At that point, I had more of a dough than a paste, but I read the instructions to 'work up into a paste' followed by cutting into strips as flattening the dough somewhat. I ended up using my hands rather rolling the dough out flat, but then proceeded to cut it into squares and let them rise another hour (plus the time required to pre-heat the oven). I baked the rusks for 10 minutes at 350F, which produced neat little square buns: cooked through and barely starting to brown. After letting them cool overnight, I again pre-heated the oven to 350F, then promptly turned it off and set the rusks back in to dry. After 40 minutes or so in the cooling oven, they had darkened substantially, so I took them out to avoid overcooking. This batch made 12 palm-sized rolls.

Total Time: About 20-30 minutes total mixing and shaping, a bit over two hours rise time, 10 minutes to bake; overnight cooling time and another 30-60 minutes to bake a second time. Make at least the day before needed; not a ton of active work, mostly lots of waiting time.

Total Cost: About $1 worth of dairy, plus pantry staples.

How Successful Was It?: Despite posible over-cooking on the 'drying' step, they're quite edible. I tried one before the second bake, and found it a rich, fairly light roll. The flavor was slightly insipid: not so much sweet as 'lacking salt'. I found some butter or preserves made up for this deficiency. All told, these remind me of sally lunn buns, but more shelf-stable. I assume the second bake is to promote this stability, so they can be baked a few days in advance rather than the exact same day. 

After the second bake, the rolls were quite dark and crispy on the outside (I think I should have let the over cool a bit more before putting them in). They were still perfectly soft on the inside, and again tasted fine with jam. Just looking at the related recipes in this book ('bread rusks', 'tops and bottoms'), the darker color may be a good sign, but I suspect that a longer bake in a cooler oven is really needed to dry out the interiors. 

I'll need to tweak the cooking time/temperature a little on the second bake, but even so I think that rusks will make a good addition to my receipt rotation. I really like that they can be made in advance, but still have the rich flavor and fine texture of other tea-time rolls and buns. And even if a longer bake changes the crumb, I think the convenience will make these more than worthwhile.

How Accurate Is It?: I used the modern oven and yeast, but my largest qualm is the shaping step. I like the size and appearance of the rusks I got, but don't know how accurate they are. Will likely need to find more sources to refine this in the future. 


Rusks


Tuesday, February 1, 2022

Original: Embroidered Child's Coat, c.1860

Still in a coat/outerwear mood, and February is a good time for cute things:

Child's Wool Coat with Silk Embroidery, c.1860. The Met.


Monday, January 31, 2022

January Mending

Not much to look at, but I am trying to be more timely in my mending this year and there's nothing like a scheduled blog post to hold me accountable. January flew by, so I only got a few small tasks done.

My quilted petticoat ties gave out when I last wore it, and needed to be replaced. A few stitches also secured a bit of the waistband which came loose, and an inch of the placket which worked free.


My pink half-apron has also seen some tough times. I ended up securing both pockets where the edges were coming loose, and reattaching the skirt to the waistband at two points where they detached. I also moved both buttons into better positions, so that I can actually fasten the apron with them, instead of knotting the waistband.


Sunday, January 30, 2022

HFF 5.14: Topsy-Turvy


The Challenge: Topsy-Turvy

The Recipe: "Turn-under Pie" or Apple Pie No. 4 from Mrs. Bliss's The Practical Cook Book

The Date/Year and Region: 1860, Philadelphia

How Did You Make It:  I made a half-batch of the No. 6 paste ("half-puff paste"), by cutting 4oz of butter into 2 cups flour with 1/2 tsp salt. I added one beaten egg and a little water to make a paste, then rolled it out twice, folding in another 2 oz of butter each time. The instructions said to make it like the previous puff paste after giving the starting amounts, which left me confused about whether this included layering in the extra butter--in the end, I used half as much butter as the previous recipe called to be layered in, since it otherwise would have duplicated No. 5 but with an egg.

Once the paste was rolled out, I put a crust on the pie tin, then peeled and sliced three medium-sized Granny Smith apples, which neatly filled the pan. I added a top crust, taking care to set it on top without pinching the two crusts together. I baked the pie for a bit over 45 min, though the crust was just starting to brown. I lifted off the top crust, added 1/4 cup white sugar, a small pinch of salt and a generous sprinkling of powdered nutmeg to the apple mush, removed about half of the apple, then replaced the crust upside down and spread the remaining apple over it.

Total Time: Just over an hour, including cooking time.

Total Cost: About $4 for butter and apples

How Successful Was It?: It tastes great. I'm not entirely sold on the 'flipping the crust' step actually contributing anything worthwhile, but it was something to do. I think the reduced butter amount was necessary--I've had some mixed experiences using period puff paste recipes, and this avoided the worst of those problems. The crust was rich, but it wasn't leaking butter. The sugar amount was a guess, but it suits the tartness and quantity of apples; next time I would use a hair less nutmeg. 

The half batch of pastry was a good idea for this pan, and I had sufficient leftover paste to make third crust. The apple cooked down a lot, so next time I use this pan I'll aim for 4-5 instead of three and really mound them up. I'd also be tempted to find an apple that holds up better to cooking.

Additional note: it says to serve hot. This is absolutely imperative. I couldn't eat the whole pie in one evening, but by the next morning it was distinctly un-appetizing. If I make this in the future, it'll be for an event with enough people that left-overs aren't a concern.

How Accurate Is It?: I used the modern oven and a modern apple variety, but prepared the ingredients with hand tools. I did use my new repro tin pie pan, and especially liked how easy it was to shape the paste along the scallops.


Upside-down apple pie.


The apples before cooking.


Wednesday, January 5, 2022

Aunt Sophie's Visits


While researching Christmas trees a few years ago, I encountered a series of stories in Godey's. "Aunt Sophie's Visits" were published in fourteen installments between 1857 and 1864. In each story, the eponymous heroine visits a relative, and gives them life advice. They are the sort of didactic story which I find enlightening about household details, so I started tracking them down.

While most of the stories are less useful for material culture than I had hoped, I think they offer some interesting insights into ideals about how families and marriages should function c.1860.

I. (November 1857) Aunt Sophie visits a newly married niece, and advises her on self-care.

II. (December 1857) Aunt Sophie instructs a different niece on preparing a Christmas tree [with strings of parched corn, dyed egg shells, riddles, lace bags of sweetmeats, paper ornaments, and wax lemons.]

III (July 1858) Aunt Sophie helps her nephew and his wife lay foundations for a good marriage and dealing with the loss of a child

IV (November 1858) Aunt Sophie teaches her husband's nephew to save and not to be extravagant with money.

V. (March 1859) Aunt Sophie advises her sister-in-law on being a stepmother, and the family comes together after the death of a child.

VI. (July 1859) Aunt Sophie visits her niece, and helps her niece's new husband realize that a person can be good without being dour. Includes references to picnics (with outdoor dancing), summer amusements, and Fourth of July celebrations.

VII.(March 1860) Aunt Sophie advises her brother and sister-in-law about assessing the character of their daughter's suitor.

VIII. (October 1861)  Aunt Sophie cautions her niece about pride and shows kindness to a worthy friend fallen on hard times.

IX. (April 1861) Aunt Sophie visits her sister, models moderation in diet, and advises her niece on the salutary benefits of anticipating pleasant events.

X. (November 1861) Aunt Sophie helps her niece and her niece's husband to find contentment in their marriage, which started inauspiciously.

XI (February 1862) Aunt Sophie advises her friend(?) to help raise her motherless nephew, to the great improvement of his character.

XII (August 1862) Aunt Sophie visits her nephew's widow, and encourages her to have her children help with the household work--easing their mother's cares while providing structure for the children and helping them develop industrious habits.

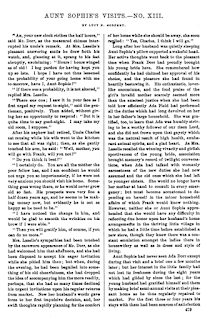
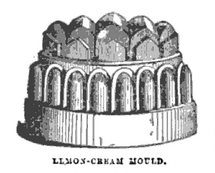
XIII:(November 1862) Aunt Sophie advises her niece-by-marriage on balancing household and social duties (with bonus Wholesome Menus for Entertaining).

XIV (June 1863): Aunt Sophie advises her sister-in-law and nieces about choosing good reading material, including a cautionary tale about the dangers of bad novels and positive observations on the sublimity of nature.

*XV: (October 1863) Aunt Sophie, with her husband and two of their children, visit some old friends who have moved away. They discuss finding contentment in old age as in youth, and on the importance of avoiding addictive substances (tobacco and alcohol).

*XVI: (June 1864) Aunt Sophie visits her brother, and helps her new sister-in-law adjust to her new home. Much of the story is told from Mary's perspective, as a poor, but cheerful and hard-working orphan, wife and widow.


In the September 1863 issue of Godey's, a short notice announced the death of Lucy N. Godfrey in her home at Bethlehem, Vermont on May 21, 1863. The June 1863 issue, with installment XIV of the Aunt Sophie stories, would have been delivered the week she died. The announcement mentioned that the editors had one or two more of Mrs. Godfrey's stories on hand; these appeared in the October 1863 and June 1864 issues.

I was curious about the author's life, and how it may have related to her writing, which is focused on ideas for domestic harmony. Lucy Newman Godfrey  (1829-1863) was the eldest of eight children. She appears to have spent her whole life in the vicinity of Brattleboro, Vermont, among a closely-knit family. At age twenty, she married Hartwell Godfrey, a mason five years her senior. Their only child was born in 1857, when Lucy was twenty-six and Hartwell thirty-one. In the only census taken during their marriage, Lucy and her son were living with her parents and siblings, while her husband boarded in New Jersey

Lucy's brother, George Newman Jr., may have had a wife named Lydia who died in 1857, the same year that he married a Sarah Caldwell. The fifth "Aunt Sophie" story, published in early 1859, features the heroine meeting her younger brother's second wife and advising her on relating to her stepchildren.

Lydia K. Newman, Lucy's possible sister-in-law, was predeceased by her daughter, Mary (1850-1853) and infant son, Orrin (1856). Stories three and five (published 1858/1859) include a family coping with the death of a child. The extended Newman family, unfortunately, experienced this grief multiple times in the years to follow.

In January 1863, Lucy's husband died of consumption, leaving her a widow with a 6-year-old son. In the final "Aunt Sophie" story (written by May 1863, published 1864), the character Mary's husband dies suddenly of consumption, leaving her a widow with several young children; her greatest help and comfort is her oldest son, aged 8.  This story differs from the others, in that much of the narration is Mary telling her history to Sophie; most characters' backstories are given by the omniscient narrator, or by Sophie talking with a third party. The story also focuses on a second marriage for two parties: a melancholy widower who is financially secure, and a persevering widow who has always been poor. With a minimum of Sophie's advice (that Mary needed to resume some of her former occupations), the marriage provides them both with stability and companionship. I have to wonder if that's how Lucy hoped her own life might proceed after widowhood.

Monday, January 3, 2022

HFF 5.13: Party Food


The Challenge: Party Food

The Recipe: Lemon Cream from Mrs. Beeton's Book of Household Management

Fancy mould = party food.
 

This dish appears in the menu suggestions for dinners of 6 or 12 people in December, but not in the "plain family dinner" list, which makes it a party food in my opinion. [The December dinner party suggestions include orange jelly, lemon jelly, orange cream, and vanilla cream, so this fits the theme. Also, I have lemons to use up.]

The Date/Year and Region: 1861, London

How Did You Make It:  Per the instructions, I simmered together 1 pint of cream, 4 oz of white sugar, the peel of 1 large lemon, and 1/2 oz gelatin (substituting for 1 oz of isinglass) for ~10 min. I strained the cream into a ceramic jug, then added the two beaten egg yokes, and stirred it in a water bath ~10 min. I then added the juice of the lemon, stirred it well, and poured it into an oiled mould to set. After it cooled a bit, I put the mould in the refrigerator overnight; the cream had solidified nicely by the next evening.

Total Time: Half an hour to make, then let it set overnight

Total Cost: About $3.50

How Successful Was It?: Fairly. It solidified, and it came out of the mould neatly. The texture is smooth and consistent. The taste is a bit tart (you can tell it's flavored with lemon juice and not extract), but I didn't find it overwhelmingly sour. It fits my expectation of 'Victorian sweet'--sweet, but not as sweet as I'd expect a similar modern dessert to be. I didn't want to eat a lot of it at once, but it's pretty good in small servings. 

I probably won't make this for my own use, but I could see it working very nicely as part of a larger spread--maybe a third course remove where it's accompanying both sweet and savory dishes. The receipt was also straightforward and easy to remember, so I will add this to my cream repertoire alongside the chocolate and raspberry creams (which I like better, but which are trickier to make).

How Accurate Is It?: I used the modern conveniences (stove, gelatin powder), but I weighed out the sugar properly. And peeling/juicing a lemon is the sort of satisfying hands-on work that makes it feel like an authentic cooking experience...


Lemon cream.


My sophisticated cooking set-up.


Tuesday, December 14, 2021

Queencake Pans

I'm very fortunate to have a friendly neighborhood tinsmith who likes experiments. 

Thus, queencake pans:

The pans are both numerous and shiny.


Sources for this project were both informative, and less common than I expected. I couldn't find any contemporary (c.1840-1865) illustrations of them, as are sometimes found in Beeton's or the other household books. In fact, the only historic illustration I could find was this from 1907: 

Queen Cake Pans from Saleable Shop Goods (London, 1907)


Written sources are a bit more plentiful, though again most receipts only say to use queencake pans, without describing them in great detail. Put all together, we know that the tins:
  • Come in multiple sizes
  • One of those sizes has an average volume of ~1.5-2 cups
  • Various shapes are used, including round and oval
  • Most queencake receipts give a thick batter, and are expected to double in size while cooking

Miss Leslie's Seventy-Five Receipts for Pastry, Cakes, and Sweetmeats (1828) specifies that oval or round pans are best, and gives a queen cake receipt which calls for ~12 such pans; it uses 1 lb of flour, 1 pound butter, 14 oz sugar, and 10 eggs. The pans are to be filled about half-way. This advice is repeated verbatim in other books, as late as The American Family Cook Book (1860). [Compared to similarly sized cake receipts I've made, this suggests each queencake pan should bake about 5/6 cup batter, or that the total volume of each tin is 1.67-2 cups. As noted below, though, contemporary pans apparently came in a few different sizes.]

The complete Biscuit and Gingerbread Baker's Assistant (1854) calls for "some oval, round or other shaped small pans, similar to Queen's cake pans but rather deeper".  

The Practical Cook Book (1860) has three queencake recipes, one calling for rounds and two for tins. One of the tin receipts mentions rolling out the "paste" and spreading it 1/8" thick on the bottom of the tins (implying a very thick dough rather than a liquid batter).

An 1842 catalog of tin and japanware lists "Small, medium, and large" queencake tins.

The Saleable Shop Goods bakery manual (linked above) gives two sizes of queencake, the larger priced twice as high as the smaller.


Two sizes of the replica tins. In real life,
the short tins are also noticeably smaller in footprint.

For construction and detailed size information, I searched my usual material culture archives. None of the U.S. museums I checked had queencake pans or tins mentioned. Fortunately, the UK National Trust online collections came through with several sets. None are dated, but they show an array of shapes including some set combinations; some include dimensions, and most of the pictures are close enough to show construction techniques (some even mention the edge/corner construction in their descriptions!

These pans include a pair of square tins made "with rolled over edges and chamfered corners on the bases", and another set of five pans: an oval, a crescent, a clover, a diamond, and a triangle. Other lone shapes are a hexagonkite, and heart. I also found another squarecrescent, and two different triangles

Construction details. 

This was an interesting find. According to the expert, these style of folded and chamfered joins are easier and cheaper than a soldered join or wire edge. Experimentally, most of the tins hold water short term (say, while washing them), but won't contain a thin liquid indefinitely (as when a receipt calls for way too much butter so that the batter melts into a pool of butter with some sad currants at the bottom).
Even the shapes with sharp corners (like the diamond above) which have tiny holes in some of their corners are capable of containing the thick queencake batter while baking. 

Note on patty pans: this isn't a case of British and American English diverging. I've found queencake tins and patty pans named in cookbooks on both sides of the Atlantic. For example, Walsh's The Manual of Domestic Economy (1857) refers to patty pans of different sizes and shapes, but does not include any among its illustrations. Mrs. Rundell's Domestic Cookery (1859) mentions baking in small and very small patty pans, and has one receipt which call for "small moulds, patty pans, or saucers." Esther Copley's The Cook's Complete Guide (1810) mentions patty pans for making tarts, tartlets, and individual cheesecakes; The American Family Cook Book  (1859) does as well. I haven't found a definite answer for how queencake tins and patty pans differ, though the illustrations in Beeton suggest patty pans have sloped sides where queencake tins in the 1907 illustration have straight ones (miniature pie pans versus cake pans). The sources indicate that patty pans are small, come in different shapes and sizes, may have lids (?), and can be about the size of a saucer, tea cup, or half a soup plate in volume. This tracks pretty closely to I could find about queencake tins as far as size and shape. 

As for surviving patty pans, the only American museum example I found so far had no picture, description, or dimensions attached. The Museum of London and UK National trust again came though, the latter with several large sets of identical pans: about 90 of these 9cm diameter round pans, 24 rectangular (4.5cm x 6.5 cm); a set of 33 shallow round patty pans; an 18th century transferware patty pan; a set of 11 fluted round pans; fluted square pans, diamond-shaped pans, and more

Monday, November 15, 2021

H.F.F. 5.9: Fear Factor

I ended up putting this one off for a bit longer than intended. I was busy....and intimidated, seeing as that was the challenge.


The Challenge: Fear factor. Try using an ingredient or technique that intimidates you. 

The Recipe: Boiled Custard from Domestic Cookery, Useful Receipts, and Hints to Young Housekeepers

The Date/Year and Region: Baltimore, 1859

How Did You Make It: Half scale. I peeled one lemon, added the peel to 1 pint of whole milk, and set it on the stove over medium-high heat. Meanwhile, I beat 2 eggs with 2 Tbsp of granulated sugar. [Rounded down to from ~2.5 eggs to 2, because I was using large modern eggs.] When the milk just barely started to boil, I removed it from the heat, lifted out the peel, and then slowly poured in the eggs while stirring vigorously. I set the egg-milk mixture back on the burner at medium-high, stirring it carefully for 5 more minutes until it began to thicken, then removed it from the heat, poured it into a ceramic pitcher, and continued stirring it for 25 more minutes as it cooled.

I spent a lot of time stirring this mixture.

It actually seemed to get thinner as it cooled, not thicker, so I heated it again for 20 more minutes on medium-high (not allowing the mixture to boil) until it looked to be thickening again, and stirred it for 20 more minutes as it cooled.

After two attempts, the 'custard' had the
consistency of eggnog. Or a very melted milkshake.

Still being a liquid, I gave up and threw the whole pitcher in the refrigerator to deal with the next day.

Success through giving up?

After some 18 hours of cooling, it had thickened to passable custard consistency. [And I should have sprinkled with nutmeg.]

Time to Complete: A day. Prep: 5 min pre. Heating: 30 min to boil milk + 5 min to thicken. Cool: 25 min. Then another 20 each of heating and cooling. Then refrigerating  ~18 hours.

Total Cost: $2.25 

How Successful Was It: Delicate lemon flavor, and not too sweet. Custard-consistency was eventually reached, but there were some unpleasant lumps lingering in the custard.  I'm not sure whether these were caused by insufficient stirring while it cooled, or something about how I added the eggs, but it's just annoying enough that I'll need to solve it before serving this to anyone. I'm pretty sure I needed to boil the milk longer (I was scared of scalding it), and probably also to heat it with the eggs longer (I was scared of cooking the eggs in the milk, which I've done on accident). I expect this would help it thicken at room temperature, but failing that, my next step would be to use an ice or water bath to cool the pitcher further while stirring. 

I liked how straightforward the ingredients and instructions were, but probably won't bother with this receipt on its own: it's alright, but not worth the trouble. I think it's a good candidate for further practice, though, so that I can make custard when another recipe calls for some.

How Accurate Was It: I forgot the nutmeg. Alas.

I used a modern stove for heating (and ultimately, a fridge for cooling), but did all the mixing by hand. I already noted the adjustment for egg size. With no quantities given, I had to guess on the lemon peel and sugar. My initial thought was to use half a lemon peel, but I think using 1 lemon per pint milk is a tasty proportion--noticeably but not overwhelmingly lemon-flavored. Next time, I'd be tempted to go up to 3 Tbsp of sugar per pint milk: 2 Tbsp gave it the not-overly-sweet flavor I've come to expect from Victorian dessert receipts, but I think it could be a little sweeter and stay true to that standard.

Saturday, October 9, 2021

H.F.F. 5.5: Save It For Later

Believe it or not, I actually have been keeping up on the cooking part of the HFF. It's the writing that's fallen so far behind...


The Challenge: Save it for Later. Try to preserve a food for later use, or make a dish with preserved ingredients.

The Recipe: 

Pickled Nasturtiums (a very good Substitute for Capers)

To each pint of vinegar, 1 oz of salt, 6 pepper corns, nasturtiums. 

Gather the nasturtium pods on a dry day, and wipe them clean with a cloth; put them in a dry glass bottle with vinegar, salt, and pepper in the above proportion. If you cannot find enough ripe to fill a bottle, cork up what you have got until you have some more fit: they may be added from day to day. Bung up the bottles and seal or rosin the tops. They will be fit for use in 10 or 12 months and the best way is to make them one season for the next.

Look for nasturtium-pods from the end of July to the end of August.

The Date/Year and Region: British, 1861

How Did You Make It: I picked about three dozen nasturtium seed-pods ( I grew the "dwarf jewel mix" from Baker Creek, and have been getting red, orange, yellow, and particolored blossoms since June, with seed pods from late July to October), rinsed them with water, and patted dry.

I put 1 oz white vinegar, 1/2 oz pickling salt, and three peppercorns in the smallest canning jar I had, then added the nasturtiums. Since there was still space, I threw in a few radish seed pods that I'd picked as well. Following modern safety standards, I processed the jar for 10 minutes in a boiling water bath, rather than corking it.

Time to Complete: I spent about 10 minutes picking all the nasturtium pods I could find, <5 minutes to assemble all the ingredients, and 10 minutes processing the jar. Bringing the water bath up to boiling took a bit longer, though I did not time it.

Total Cost: $0, everything was from my garden or out of the pantry.

How Successful Was It?: I haven't tried it yet, but the jar appears to have sealed successfully.

How Accurate Is It?: I really should do more research into period vinegar varieties, but other than the modern safety measures, there were no known inaccuracies.


Nasturtium pods (and a few radish seed pods).

Having extra produce, I mixed up some of Beeton's Universal Pickle at the same time, and used it on the radish pods out of my garden and some cucumbers that a coworker grew. I made it at 1/6 scale, using 1 qt vinegar, 3 oz salt, 1/2 tsp cayenne pepper, 1 tsp mace, 1.5 tsp tumeric, 2 tsp mustard seed, and a small amount of coarsely chopped fresh ginger and small onions. This filled two quart jars, with a bit of the pickle left-over. If I make this again, I would not actually boil the mixture together before canning, as the vinegar vapor quite overwhelmed the kitchen, even with windows opens and fans at top speed (whereupon I stopped boiling it after ~10 minutes rather than 20, and promptly fled outdoors.)