Showing posts with label hair. Show all posts

Wednesday, June 23, 2021

Five-Strand Cable Twist, c.1855

"The twist is continued below by a five strand cable twist..."
Harper's, February 1855.

Here's the other five-strand plait I've found: a five-strand cable twist. To be fair, the only reference I've seen to this twist is in the Harper's illustration above.  Except for the instructions, which call for three strands, I've found no other references to cable twists/plaits/braids which say how many to use. This leads me to suspect that three-strand cable twists are the default, but the evidence isn't concrete.  At least one source uses "rope" for the two-strand version, but there may be come overlap between cable and rope twists.

To review, the three-strand cable plait is slight variation on a basic flat three strand braid: the right-hand strand goes over the center, but instead of staying there, it loops around the center strand and goes back to the right side; the left likewise goes around the center and back home. 

Transforming that into a five strand, the key attributes seem to be:

  • Center strand (probably) stays put
  • The moving strand returns to its general area
  • Strands need to advance


First method attempted: Far left strand goes over less-far-left and center, around the center and into the less-far-left position. The center strand stays in the center, while the former less-far-left strand advances to the far-left position. Repeat with the right. Then the left again. This is the most straightforward and most similar to the 3-strand, so it's my preferred option.


The active strand going over its neighbor and the center strand.


Continue advancing: over 2 and back under the center,
then repeat from the other side.

This five-strand cable plait is round, but looks 
an awful lot like the three-strand version.

Second hypothetical method: As the first, but with the moving strand goes over the three middle strands instead of just two. That's over three, around the far two, and back to the position next to where it started. This one was really hard to keep the strands separated, and ends up being a more complicated way to achieve the same effect as the first one.


I can't tell them apart, but #2 was a lot more annoying to make.

Third hypothetical method: borrowing a little more from the weaving of the flat 5-strand plait: take the moving strand over the nearest strand, then under and around the center strand, and ending between the center and the starting position. This does give an interesting woven effect, but I'm seeing much of a 'cable'.


The first method looks like a cable,
but the third just looks like the flat 5-strand braid.


When all is said and done, I think the first method (moving strand goes over neighbor and around the center, repeat from other side), is the easiest method that actually produces a cable-plait. I'm not seeing much benefit to using the five strands rather than three, but it is possible.

To recap with ribbons:

Monday, May 17, 2021

Mareschal Pomade, c.1775

This is a fun variation of the common pomatum with mareschal powder. I used for the base the same lemon/neroli pomatum that went into the hard pomatum, figuring that it would work well with the spices in the powder.


Mareschal pomade. It's quite lovely,
and will probably be my go-to receipt for 18th century.


The pomatum is a bit paler than I expected, but it still has a mild spicy scent. I was pleased to discover that the spicy odor is imparted on the hair (it's very faint, but pleasant). Otherwise, this pomatum worked just like any other I've made and used. It's one of the mutton-fat tallows, so a bit on the hard side compared to my earliest Victorian ones, but practically that just means I have to work a little slower (digging out small pieces of pomatum and rubbing it in my hands to warm it up).

Thursday, May 13, 2021

Mareschal Hair Powder, c.1775

Back to The American Duchess Guide to Beauty, with a hair powder variation. This is builds upon the basic hair powder, but colored and scented with powdered spices.

Favorite cosmetic jar to open. It smells so nice!

 When I first looked at the recipe, I was concerned that this powder would be too dark for my not-quite-brown-or-blond hair, but it turns out to be a perfect light brown shade, which works fine. It also has a nice spicy scent (noticeable in the hair, very noticeable while applying the powder).

Left: pomaded & powdered hair. Right: au natural. 

Ultimately, there's little difference in color between powdering my hair with the common powder versus the mareschal. The common powder is a little lighter when applied, but I'm not convinced that's entirely the powder (versus my inexperience in applying it).

Left: common hair powder. Right: mareschal powder.

Tuesday, May 11, 2021

Flat Five-Strand Plaits

 "There are few real novelties in hair-dressing; the plaits of five, seven, ten, and even more strands, woven more or less openly, and arranged differently on the head, the "Grecian" plait, and the "basket" or "chain" plait, and the "cable" plait, are repeated again and again in various forms and convolutions.

--- Godey's Lady's Book (June 1855) repeated verbatim in The Englishwoman's Domestic Magazine (March 1857)


For she had her hair to oil and brush and braid up in that five-strand plait which Mrs. Mabury's maid had taught her; and sometimes it was awkward to get the braids to sit nicely, just so as to show under the curtain of her bonnet. 

--Janita's Cross by Eliza Stephenson (1864) 


I've waited on this tutorial for a while, because it's really hard to photograph. Holding five strands in place means a hand is always blocking something critical. The concept, however, is really simple: take an outside strand over the neighboring strand, then under the next one. For a wider braid of 7, 9, or more, continue going over then under until the active strand reaches the center. Repeat from the other side with the next strand.

It's so simple, that I couldn't find any contemporary hair-styling instructions which explained the basic* "five, seven, ten, and even more"-strand plaits. The Workwoman's Guide does explain them for straw-plaiting. The main complication for hair is just holding all of the strands. Straw has the benefit of being a single piece, so you only have to handle the ones you're currently working with. 

To start, divide the section of hair that will be braided into five equal groups. Pick the side that you'll start on, and take three strands into that hand. Hold the two remaining strands in your other hand.

Taking the right-most strand over
the second-right-most strand and under the center.

I started on my right (viewer's left), holding three strands in my right hand and the other two in my left. I took the right-most strand over the second-most-right strand and under the middle-most strand; as it went under the center, I passed this active strand from my right hand to my left.  

Tightening the plait and preparing for the next pass.

At the end of that first round, the old right-most strand is now in the center, and there are three strands held in the left hand, ready for the second pass. This will take the left-most strand over the second-left-most strand, under the center strand, and into the right hand. These two motions repeat until the braid is done. Over, under, over, under, over, under...

Three-strand and five-strand plaits.

Compares to a standard three-strand braid, the five-strand is flatter and slightly wider. Visually, it has as a distinct woven look from each strand going alternatively over and under its neighbors as it zig-zags down the plait. Practically speaking, I found this five-strand plait a little trickier to start: it's more sections of hair to keep ahold of, and I have much less practice dividing into fifths compared to thirds. Once I got started, though, it progressed fairly easily.  

Here's the same braiding with multicolored ribbons, which are a bit easier to photograph in motion.

Sunday, April 25, 2021

Hair Powder, c.1772-1784

Basic hair powder, from  The American Duchess Guide to Beauty. I appreciate that they worked out quantities for each ingredient, the original receipts being a little...intense. And sometimes vague:

230. Common Powder. The best Starch dried is generally the basis of all Hair Powders; sometimes worm eaten or rotten Wood, dried Bones, or Bones calcined to whiteness, which are sifted through a fine hair sieve after they have been beaten to powder. This kind of Powder readily takes any scent particularly that of Florentine Orrice, a root which naturally possesses a violet smell. Of these Roots the whitest and soundest are made choice of; they are to be powdered as fine as possible, and this can only be done during the summer season.

231 White Powder. Take four pounds of Starch, half a pound of Florentine Orrice Roots, six Scuttle-fish Bones, Ox Bones and Sheeps Bones calcined to whiteness, of each half an handful; beat the whole together and lift the powder through a very fine sieve. 

--The Toilet of Flora (1772)

In addition to these white powders, the Flora also gives two recipes for gray hair powder (tinted with wood-ash), and one "flaxen-coloured" (with yellow ochre), the latter with an observation that the powder can be tinted any color. I may someday feel brave enough to try one of those...


Hair Powder


Aside from the optional cuttlefish, sheep, and ox bones, this receipt is very like the violet powder used in the 19th and early 20th century (which itself has persisted into the 21st as baby powder). Scented starch is apparently quite versatile.


Powdered hair and natural.

I've never used hair powder before, and was pleasantly surprised at how it turned out. I had to apply a lot more than I expected, but the hair powder didn't get everywhere like the various powder rouges I've made. And while white powder lightened my hair by a few degrees, it didn't turn the hair pure white. When I washed it out, the powder came away instantly, without any fuss.

I haven't tried sleeping in pomaded-and-powdered hair, but that experiment is indefinitely postponed. Unless I start attending multi-day 18th century events...


Monday, April 19, 2021

Hard Pomade, c.1775

More hair care from The American Duchess Guide to Beauty: a hard pomatum. As with the Victorian version, it's a variation of a softer pomatum with wax added. 

Hard pomatum, in fun shapes.

I used a combination of lemon and neroli scents for this batch of pomatum; I think the combination of scents works nicely.  I also followed the advice to set the hard pomatum in molds, which should make it much easier to use than the Victorian hard pomatum that I set in a tin. The important lesson I'm taking from this experiment, is to always have the small rose molds on hand for any extra material.  

Tuesday, April 6, 2021

Rosemary Hair Wash, 1857

 ROSEMARY HAIR WASH Rosemary water, 1 gallon; spirit, 10 oz; pearlash, 1 oz. 
---The Handbook of Practical Receipts (1857)


Rosemary water, spirits, pearlash

This one got scaled down, as I only had 6 oz of rosemary water left from my last adventure distilling herbs (and also because I don't think I actually need a whole gallon of it). Proportionately, those 6 oz of rosemary water requires 0.94 oz spirit, and .09 drams pearlash; for ease of measurement I rounded these to 1 oz alcohol and 3/8 tsp pearlash (potassium carbonate).  


I only have so many large bottles,
so the hair-wash went back into the rosemary water one.

The three ingredients mixed together easily. To use, I just poured a little over my scalp while showering--taking care not to get any of the hair-wash in my eyes--worked it in, and then rinsed thoroughly, and towel-dried. 

I suspected that the alkaline pearlash would do something towards removing any built-up grease from the hair, and was pleasantly surprised by this being true. The hair-wash imparted a short-lived rosemary scent, but otherwise seems to have cleaned my hair just like the shampoo I usually use. I am curious about how it would work over an extended period, and hope to continue the experiment in the future.

Addition: I managed to get four uses out of this batch of ~7 oz of hair wash. It removed pomatum with perfect ease, and generally has proven quite satisfactory. I did notice my hair feeling greasy again a day or two sooner than with modern shampoos, but that's not necessarily a problem with the hair wash. Sometimes my hair just does that with a new product.


Thursday, March 25, 2021

Common Pomatum, c.1772-1784

Finally playing around with the receipts in The American Duchess Guide to Beauty. That is, I finally found a place to order mutton tallow.

The common pomatum seemed a good place to start. It's quite like the later Victorian pomatums I've made (melt two fats together and scent as desired), but this time I decided to do things properly and use the mutton tallow and leaf lard, rather than beef tallow and the hydrogenated lard that my grocery story actually carries.  The receipts in this book are adapted from the Toilette of Flora (1772-1784*), though the modern recipes have a number of advantages: the authors have scaled them down to a more manageable amount, and they describe the actual process in more detail. With pictures.


Tallow, mostly without the sheep odor...

One thing I learned, was to soak the tallow in advance to get some of the odor out. I ended up letting it go for two weeks, because even with changing the water regularly the sheep smell wasn't fully dissipating.

Common pomatum.


In lieu of the suggested scents, I decided to experiment a bit, and used both jasmine and neroli. In retrospect, using two florals was not a good choice--I should have used a citrus or a spice oil with one floral to get a more interesting mixture. It's not bad, just a bit boring (and mostly only jasmine).

The finished pomatum is more solid that the versions I've made with beef tallow. It's not quite as hard as the ones with wax added, but you can't just scoop it up in your fingers either. In use, it seems to function no differently from other pomatums I've used.


*At minimum, editions of this book appeared in 1772, 1775, 1779, and 1784.

Monday, December 7, 2020

Fastening Braids, 19th Century

In the 19th century, the most commonly method for tying the ends of braids is to wrap the hair several ties in a string/thread or ribbon and tie it off. If you want to go earlier, there's a really neat iron age wire cone hypothesized to secure plait ends, sewing plaits together in Imperial Roman styles, and the similar hair lacing of the medieval and early modern periods. 

Ribbon Versus Thread

At some point between the 16th and 18th century, functional hairpins supplant the sewing/lacing method of securing updos. But thread/laces/ribbon continues to be used to tied bunches of hair together, particularly at the end of a plait/braid.  William Moore's The Art of Hairdressing (1750) refers frequently to strings--not just on braids, but also on toupees and curls. This isn't conclusive that the braids are fastened off with string (the context tends towards pinning or securing the various pieces rather than making the braids) but it is suggestive. A 1770 poem on The Art of Dressing the Hair names "braided Locks with pleated Ribbon tied". The New London Toilette (1778) describes fastening plaits with packthread--at least for tying in false hair or preparing for horseback riding.

Moving into my usual 19th century range, there are actually very few specific references to how braids are fastened. Most of the hair-styling instructions show braids without describing how they should be tied. The few that mention fastening off a braid offer little more detail about how. An 1855 Godey's article on "How to Treat the Hair" recommends that girls' hair be tied with ribbon:
"We may here mention that it is a great mistake to plait the hair of children under eleven or twelve years of age. The process of plaiting more or less strains the hairs in their roots, by pulling them tight, tends to deprive them of their requisite supply of nutriment, and checks their growth. The hair of girls should only be nipped, and allowed to curl freely. When they are about eleven or twelve, the hair should be twisted into a coil, not too tight, nor tied at the end with thin thread, but with a piece of ribbon." 

[Incidentally, that paragraph was reprinted in 1859, independent of the rest of the article.] I can see two different readings of this passage. The first is that girls' hair needs to be tied with ribbons instead of thread to allow for future growth, and that by implication thread is fine/normal for tying off women's braids that will be pinned up. The second reading is that only ribbon should ever be used to tied off braids and girls are specified because women's updos don't require the braids to be tied off. I'm inclined towards the first reading, given the context of hair-cutting for girls and promoting long-term growth. However, working experimentally, I've found that it's quite possible to just braid a section of hair all the way down, and tuck the ends in when pinning it up. A bit of pomade or hair oil will help the ends stay neat. It's trickier when the hair has recently been cut, and has an abrupt edge rather than tapering down to nothing, but all of the 3+ strand braids I've tried will hold up this way in 1850s-1860s styles.

A young lady's braided updo in Elegant Arts for Ladies (1856) calls for ribbon to be wrapped around the plaits, as well as tying off the ends and flowing behind as streamers. Black velvet ribbon is used similarly in a fashionable coiffure from 1854, though the ribbon is not specified to be tying off the braids as well. Looking to literature, in Les Miserables (1862), the 15-year-old urchin Éponine ties her hair with a string or cord ("pour coiffure une ficelle" 3.8.4).

Later in the century, the fashion magazines give a little more information about tying off braids. In Harper's (1871) hairdressing instructions, the girls' styles all call for ribbons to tie the hair, though the women's styles mostly say to "fasten" without specifying. In one case, however, narrow ribbon is ordered (with a decorative bow applied on top), and in another string is used, at least temporarily (the hair is then fastened with pins).

The Homekeeper (Boston, 1872), among other interesting assertations, warns that "fastening the hair by a string near the roots injures the head by the strain on it, and causes baldness." This suggests that some people probably did tie their hair with thread, apparently to bind sections near the scalp (my guess would be for waterfalls). Campbell's Self Instructor (1867) describes making hairpieces and gives instructions for popular styles, but never specifies how to fasten and clasp the ends of braids, etc. Both ribbon and string are used in the making of the supplemental hairpieces, though.

Girls' ribbons continue to get more blatant attention than women's braids. Styles in Donahue's Magazine, in 1879  show girls' hair tied with ribbon. In February of 1886, Demorest's Monthly discusses general hair-dressing trends, noting that little girls' hair is usually braided and tied with ribbon (worn down or looped up). 


Elastic and Rubber Bands

The earliest reference I can find to an elastic hair fastener is in the 1853 Goodyear catalog. It has two intriguing descriptions:
HAIR CLASP This is an ingenious little article made of gum elastic, with a clasp of polished steel or other metal, and used by ladies as a hair tie. There is also a tape made of gum elastic which is used for the same purpose.... 
HAIR LOOP This consists of an elastic ring or tie looped upon an artificial ivory button It is found useful for fastening ladies hair. 
Unfortunately, these items are not evident in any of the plates included in the catalog. The first could be a basic round hair-tie with metal joining the edges. I've not found any other references to "rubber" or "elastic" hair clasps or loops this early, only to smooth rubber hair pins and crimping devices. [Loops of elastic are apparently favored to metal pins for setting curls overnight.]
 
While rubber bands made of vulcanized elastic date to c.1845, the earliest I can find that technology applied to hair is an 1882 patent. This hair-fastener (a piece of elastic with a metal catch), describes the old method for fastening the hair as ' winding a string several times about the hair and then tying in a knot', and claims that 'fastening the hair with a string is found by most ladies to be a very uncomfortable operation.' It makes no allusion to the vulcanized rubber bands being applied to the hair, nor to the Goodyear clasps/loops.

1882 elastic hair fastener patent

 
A series of designs with straight pieces of elastic closed with metal clasps followed this--a hook and ring style was patented were patented in 1897 in Great Britain, and 1898 in the US. A similar design again appeared in the UK in 1900.

Patent drawing from 1898 showing an elastic hair-holder with hook and loop closure.


A similar arrangement (now adjustable) with elastic joining a halves of a metal clasp and/or ring was patented in 1921-22:
Adjustable hair clasp with elastic-joined metal fittings.
US Patent 1424654A, 1921.

The use of elastic was not universal in hair clasps at this time. Metal devices for fastening braids were proposed using 'spiral wire' (1901), pivoting clamps (1902), and a clamp with a wire loop (1903). A 1909 patent describes a rubber, celluloid or metal ring with teeth, used to hold the hair in a "pony-tail" shape as a foundation for styling.
 
1903 Hair fastener with clamp.


Anton Nagelschmidt filed a patent for 'hair ties' (1901) and a 'magic circle' (1902) hair fastener, though I can't find an image or description of either. They caught my eye for possibly referring to elastic hair bands of modern use, but might just as easily be a metal or hybrid metal/elastic like so many other hair-fastening patents of the time. A 1924 French patent for a "hair tie elastic", likewise with no further information, sounds rather like the modern elastic hair tie; an even more obscure "fastening device" from 1921 does not reference shape or material, though it's function is to tie off plaits or braids. These 1953 patents for a ponytail hair holders and 1955 improved hair tie have intriguing names, but no descriptions or diagrams are available.

It's worth noting, however, that neither "elastic" nor "tie" necessarily means a modern thread-covered elastic loop. From the same time period, there's a 1921 British patent for a "hair clasp" includes an elastic section with a pin and buckle, while an American "hair tie" patent from 1923-4 describes a wire device:

1923-1924 wire "hair tie" patent.

The elastic loop could be too simple to warrant patenting, though the metal closure (or not) and techniques for covering the rubber with thread would seem fertile ground for refinement. The first such patent I found was an 1967 one for a double loop-with-beads fastener, which refers to rubber bands succeeding ribbons as the common way to tie off hair. It appears to describe the prevailing device as a closed loop of elastic with a probably-metal clasp joining the ends ('sharp-corners' being a problem with them)*. A similar two-loop-with-beads design patented in 1972 looks identical to the hairties that were the bane of my childhood.

The most clear mention of rubber bands I've found comes from this 1942 hair braid fastener. It itself is a decorative two piece clasp joined by 'elastic cord or rubber band', though I didn't find clarification on whether the rubber is to be covered with thread/fabric to protect the hair. Referring to the use of rubber bands and development of hair-specific bands, it says:
One type of retainer, replacing the ribbon type has been a common rubber band which has been utilized by stretching it and wrapping it over upon itself several times around a point on the hair body. The rubber band type holder has been found to be generally satisfactory insofar as retaining the desired hair arrangement is concerned, however, two disadvantageous features have somewhat limited its usage...

Various easily dissociable hair holders have been proposed to alleviate some of the dis-advantages of ordinary contractile bands as noted above, but in general they have had too high a unit cost to be widely usable and have necessarily included sharp-cornered contractile band end retaining means into which subjects hairs can become wedged during ordinary usage of the devices with the attendant painful removal of the device as noted hereinbefore with respect to ordinary contractile bands.


Elastic braid fastener with decorative clasp, 1942.
 

Conclusion

From the dates I've been able to find, it is possible that bare elastic rubber bands could have been used by later Victorians to fasten off plaits. However, the literature so far examined does not offer any positive support for this occurring. The reference to rubber bands in an 1940s hair elastic patent, and omission of rubber bands from similar patents of the 1880s-1920s, suggests that rubber bands did not achieve widespread use for fastening hair until approximately the second quarter of the 20th century. Writers of the mid-19th century mention ribbon and thread being used to tie off braids, with the ribbon being particularly recommended for young girls' hair. It is also possible that braids were pinned up in some cases without being tied off first. Further research onto this topic, particularly into the development of thread-covered rubber hair bands, is warranted.


Sunday, December 6, 2020

Roman Hair-Dressing

I may have just binged-watched a bunch of Janet Stephens' hair-tutorials, and decided to start messing around with second/third century AD Roman hair dressing. While many of the styles are complex and benefit from having extra hands, some of them look possible for self-styling. I decided to start with two of the simplest ones:

Empress Faustina the Younger (c.161 CE):

Braided bun sewn with wool thread
Simple braided bun.

The second hairstyle on the Faustina tutorial seemed like a good place to start. It's a braided bun, like I wear most days, so the main novelty was sewing the coil into place with wool thread. That experience was not entirely dissimilar to hair-lacing--I even used the same bodkin. However, I was working entirely by touch so the lighter yarn was a noticeable departure from the linen tapes. Taking it down again was not as difficult as I feared, in part because the thread was so easy to break

Julia Domna (c.211-217 CE):

Ropes into a double braided bun.

I like how the two-strand ropes work on the side hair, and plan to practice this style further. Though still fairly simple, it feels less utilitarian than the first style, and I think it has potential to look well with some practice. I suspect this first attempt would look a lot neater if I was dressing someone else's hair and could see what I was doing, but it came together will little fuss and has held up all evening, so I'm considering it a success.

Saturday, November 28, 2020

Hallstatt Hair

Elise sent me Morgan Donner's video on recreating prehistoric hairstyles from the iron age (c.200-800BCE) graves in Hallstatt, Austria, and suddenly I'm brushing off my German vocabulary to read the source papers describing archeological experiments in hairdressing.


Pins and spiral made of brass and bronze wire.


Hallstatt Museum gallerie has images of the original pins. While there are now a few artists selling reproduction pins on Etsy, the handmade bronze hairpins are a bit outside my budget. So instead, I used Morgan's tutorial to make my own pins and spiral out of brass and bronze jewelry wire. For the spiral, I started with the 1-2cm diameter cone of 22 wire wraps, as described in the video.  


"Wreath" at the back of the head. The simple bun
looks the same, just more compact.


I rather like the hanging braids.


Low side buns.


I skipped the top-of-head "wreath" variant for now, but will need to try it at some point. The simple bun was just like the coils I wear every day. The braids hanging by the side of the face (and meeting over the head) were fun, and I want to find excuses to wear them. The pins weren't any different to use that the straight-sided U-shaped pins I usually use for historic hairdressing. Like those, these bronze pins need a little more 'weaving' to place than a modern wavy hairpin (though the technique helps with modern pins, too). I didn't have any trouble with pins sliding out or hair getting caught in the loops, which were may main concerns. 

For the low side buns, I simply tucked the ends of the braids, without fastening them off. The single-braid wreath and bun were finished off with the spiral, as were the joined hanging braids. I found that the ends of my hair were a little too thick and even for this size spiral, but still worked on the individual braids. The joined braids were even less tapered toward the ends, and this cone just didn't fit over them.

Monday, November 9, 2020

Hair Lacing, Medieval/Renaissance

I decided to try properly lacing my hair (not just tying the braids), since the Tudor Tailor has spent quarantine producing a series of videos about this very topic, and it looked like fun to try. 

The author, wearing her Tudor kirtle and smock, with hair laced and stitched into a coronet at the back of the head.
Solo hair lacing, day three attempt.

The whole style, after combing/parting, took 6:55 to complete. Two minutes of this was braiding, one minute was pushing the braids around on my head pointlessly, and the remaining 3:55 sufficed to thread the bodkin twice, stitch down the hair, and tie the ends of the laces. I expect to speed up with practice. I didn't use a mirror or modern styling tools, because that felt like cheating (and probably wouldn't have helped anyway).

The author, as before, holding a two-sided wooden hair comb and a blunt 4-inch needle made of bone.
Tools used: bone bodkin, wood comb, 2 2-yard linen tapes.

I found, experimentally, that the one of the just-over-two-yard tapes I wove for tying up my hair isn't quite long enough for this technique on it's own. Which makes a certain sense--I made the pair with the intention of using both to braid and tie my hair in this exact style. The Tudor "hair fairies" recommend a single 3-yd lace, which I was able to emulate by overlapping the two laces--instead of knotting them together, I braided a short length of each into the opposite braid, letting them cross at the back of the head. This anchored the tapes soundly, leaving a long tail to lace each braid with, and securing the extra ends away within the braids themselves.

Other initial lessons: this style is very convenient for tucking the hair away to sleep, with no lumps at the neck/back of head (even if it looks awful the next day--though I should see how it works with a coif overnight...). It will stay up for a whole day, including exercise, and doesn't have the 'strain' that a modern bun held with elastics develops over that time. My first attempts tended to stay "up" but slide back and forth on top of the head. I'm not sure whether this was because I was stitching through the braid or not starting at the hairline, but once I took my stitches from the far front and around the whole braid(s), everything stayed better in place. Two overhand knots (half hitches) work great for tying the end of the braids. Also, my hair is at a slightly awkward length for concealing the braid ends (they wind up just past the roots of the opposite braid), so I'll need to practice tucking those neatly or catching them in the opposing lace. 

Sunday, March 22, 2020

Letting One's Hair Down (1850s)

At some point, I got into an argument about when women of the 1850s wore their hair down versus up. It resulted in the following list of contemporary paintings, which, in my humble opinion, supports the hypothesis that even very poor women generally wore their hair up.

Rural Working Class & Poor
French peasant (1855) Hair worn in fashionably wide bands.
Gorse gatherer (1855) Hair pinned up (details unclear, seems unfashionably tight and narrow, but still very much worn up and out of the way).
Countrywoman (1855): The cottage may be small and dark, but mom's wearing her hair up, under a neat cap.
Rural Scottish women (1855): Orphans, dirty cottages...and both women wearing their hair up, under caps, with neat center parts.
Cottager (1850) dressing a baby: hair is up, center parted, and under a cap.
Cottagers (1850) dressed up for a Baptism: hair is up and under caps!
Horse-riding member of the rural working class (1850) [note the man's smock]: Again, hair is up, bonnet is on.
Peasant woman in short skirts (1850): Hair up with center part and low chignon at the back.
Peasant woman (1855): Wearing her hair up, under a cap.
Cottager (1855) getting visited by the local gentry: has her hair up under a neat cap, center part visible.
In the yard (1854), the young mother wears her hair neatly dressed up.

Urban Working Class & Poor
Lacemaker (1855) In a garret, starving (the painting's titled "Bread and Tears"), but her hair is not only worn up, it's neatly brushed to glossiness and dressed fashionably wide over rats.
Seamstress (1858) Neatly dressed, with hair likewise.
Beggar girl (1855) Literally freezing on a street, still wearing hair up under a cap.
Dead destitute woman (1850): Has frozen on the streets, but her hair is still worn off the face, and appears contained.

Household Work
Peeling onions (1852), with hair worn up out of the way.
Cooking (1856) with hair up in stylish glossy bands.
Making stew (1854), the mistress wears her hair in fashionable bands, but the servant also has her hair up neatly up and out of the way.
Cooking waffles in a hearth (1853), the woman's hair is dressed low in bands.

Travelling
Emigrant woman (1855) She may be riding uncomfortably on the deck, but Madame has her hair up in wide bands, and wears a bonnet and shawl.

Undress
Bathing in a stream (1855), this lady still puts her hair up in glossy, wide bands.
Sleeping outdoors after bathing (1850) Hair is mostly obscured, but appears to still be up. [Note before clicking link that the figure is unclothed.]
Half dressed, without a chemise, but hair being put up first. [Note that the figure in this painting is topless before clicking link.]
Wearing a wrapper (1857) while caring for a baby, hair is worn up.
Wearing a wrapper (1855) while playing with baby, hair is worn up.

Hair worn down
Young woman with a sick baby (1855): Alone, in the privacy of the house, and with other pressing concerns, this young woman's hair is down...but still center-parted and smoothed behind the ears.
Teenage French Peasant herding cows (1855), one exception to the many women wearing their hair up and out of way while working outdoors.
Elizabeth Siddal appears with hair down or being combed in a number of Rosseti's drawings and paintings of her (some historical, some contemporary).

My conclusion remains that (unless one is running with the pre-Raphaelites) adult women of the 1850s wore their hair up--even if they were poor, or working, or in their own room at home.

Tuesday, October 15, 2019

Opera Coiffure, 1856 (first attempt)

Two engraved images (front and back view) of a fashionable hairstyle from the late 1850s, with double rolls on the side and a back coil of hair surrounded by feathers.
Opera Coiffure, suitable for a young married lady, Godey's, 1856.

Meantime we open our own novelties, commencing with a simple but extremely tasteful headdress, suited to a young married lady, for opera, or an evening reception.
Fig. 1.—Front view, showing the division of the hair into two rouleaux which are marked by two small jewelled or ornamented hair-pins, placed over the ear; these are softly shaded by the outline of the plumes at the back of the head.
Fig. 2.—The back hair twisted into a smooth coil, on each side of which pure white ostrich plumes are arranged turning in towards it at the end. Plumes are sometimes worn by young ladies, but are more suitable for those who have a right to be addressed as "Madam," though not sufficiently staid for chaperones.
--Godey's, November 1856

My first (very bad) attempt at the hairstyle. It was a Murphy's Law sort of day, but posting these pictures will hopefully guilt me into re-doing them properly as I've been putting off for a month. The main issues I need to address are:

  1. Making new rats that fit under half the side-hair. The ones I usually use could not be positioned securely and out of sight. Parting the hair on a diagonal rather than vertically will likely help.
  2. Anchoring the smooth coil at the back effectively. After the second failure, I threw it into a braid to make it stay put.
  3. Using the right feathers. All my ostrich feathers went into hiding last Opera Night, so I ended up using mirabeau. They really didn't work.


The author, hair arranged in two twists on either side of the face, each twist topped with a hairpin containing a pearl cluster.
Front rolls. They need to be done over rats (not these small twists).

A back view of the author, wearing light brown hair in a large braided coil, with white mirabeau feathers around it.
Braided rather than smooth coil. And the mirabeau (above)
don't really give the same effect as ostrich.

Friday, October 4, 2019

Oil For Baldness

Returning to A Cyclopedia of Practical Receipts (1856) for more hair oil receipts. This one is supposed to strengthen the hair to prevent it thinning; the ingredients, however, are the same as every styling oil I've tried, only scented differently. So, I decided to make some up for those friends whose taste doesn't run towards floral smells.

To 1 oz of olive oil ("salad oil", any sweet oil will do), add 12 drops of origanum (oregano/marjoram*) oil, 10 drops rosemary oil, 6 drops lavender oil, and 3 drops clove or cassia (cinnamon) oil. Shake to mix the oils, and color with alkanet root.**

I decided to try infusing fresh marjoram and dried whole cloves in the olive oil, mostly because I didn't want to buy two most oils for the few drops needed here (and because have a ton of fresh marjoram in my herb garden). I put a small handful of marjoram and 12 whole cloves in the oil, heated it slightly in a warm water bath on the stove, and let it soak for 2 days. The oil smelled slightly like marjoram, with just a hint of cloves, after that time. I then added the other oils and alkanet (reserving 1 bottle without any lavender), shook, and strained out the alkanet root.

*Origanum is the genus of both oregano and marjoram. When I started this project, it was unclear which of the plants was intended; I currently believe oregano is meant.

**Like many other Victorian cosmetic recipes, the base color is an unappealing yellow or yellow-green. The alkanet turns it reddish, but does not tint the hair or skin. It can stain handkerchiefs, though.

A 150ml beaker containing yellow oil oil with 2 inch pieces of the herb marjoram.
I substituted fresh marjoram and whole cloves
for the orignum and clove oils.

Three 1 oz glass bottles of red-tinted oil, each stopped with a cork.
Finished oil.
The finished oil has a nice red-orange color, and smells mostly of rosemary and marjoram. The two bottles with lavender contain traces of that odor, but little of the clove comes through.

Tuesday, July 30, 2019

Miscellaneous Thoughts on Hair Dressing

Painting of a woman. She wears a champagne-colored crinoline dress, and sits in profile, looking in a mirror over a dressing table.
La Toilette (1858) Joseph Caraud

Mostly with the mid-19th century in mind:

*Some sort of oil/pomatum really helps achieve the 'slick and neat' look so favored in the mid-century. I've also found that thoroughly soaking the hair can be effective. This is my preferred option on days when I need to go directly from a period event to a modern one, as sleek oiled hair can read as 'dirty' in modern styles.

*Bobby pins are meant for bobs--for guiding short hair into position. Hairpins are better suited to long hair and bulky updos.

*Staight-legged hair pins do not grip the same way wavy ones do--that's why wavy legged pins were invented and have remained popular.  For best effect, insert the pin in the opposite direction from where you want to end up, then flip it around and weave it into place. Sliding it in makes it easy to slide out again. You will still lose pins, but less quickly.

*A lot of hair can be put up with surprisingly few pins. I can do a mid-19th century 'do with as few as four, and for 16th century I've managed with a single hairpin, or even none at all (wrapped braids and a linen rail help).

*Freshly-washed hair tends to slip and rebel a little more than hair washed a few days earlier. If you have to wash your hair that same day, try putting it up damp rather than fully drying it.

*Hair elastics didn't exist in the mid-19th century; I try to avoid using them, favoring thread or ribbon or nothing at all. If you need to use elastic to fasten off a braid, try using small bands that are transparent or else ones that close to the color of the hair, and then tuck them into the coil/chignon.

*Smooth your hair with a natural bristle brush to distribute applied oil/pomade and to get a neat look.

*Rats can be made in various shapes to fit the look you're going for. They do need to be replaced periodically, as they can get matted and flat.

*Whatever your hair's default color or texture, people in the period had it, and you can make accurate hairstyles.  Dyed and cut hair is trickier. Consider your living history goals, the standards of the event you are attending, and your resources: clever arrangement may temporarily conceal a jaunty color, supplemental hairpieces can fill out short hair in an updo. Look, also, at historic photographs: though not prevalent, you can find occasional examples of women with short hair (generally parted and curled like a small child's short hair). For very dramatically modern hair, a covering sunbonnet or wig may be useful.

*Practice. Get the techniques into your muscle memory, and figure out which elements suit your particular style of beauty.

Saturday, July 13, 2019

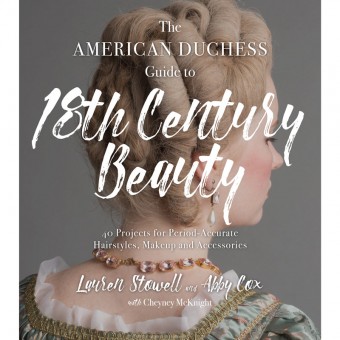
Book Review: The American Duchess Guide to 18th Century Beauty

For the first time, a timely review!
[Translation: my pre-ordered copy arrived today.]

Side back view of the shoulders and head of a  pale woman; her hair is powdered and dressed close to the head in a series of large curls and rolls.

The American Duchess Guide to 18th Century Beauty by Lauren Stowell and Abby Cox (with Cheney McKnight).

I've been excited for this book since I heard about it last January.  First, because I like historic hair-dressing, and second because I have a lot of faith in the authors' work. Their previous book on 18th Century Dress-Making presented well-cited research in a straightforward conversational manner, lavishly illustrated with color photographs. The projects were all based on specific paintings, period publications and surviving artifacts; the techniques were from the period with some reconstruction (not make-dos for hiding modern methods).

Suffice to say, I had moderately high expectations coming in.

Those expectations were met. One of the first projects in this book is a hand-sewn sheer peignoir to wear while dressing one's hair. From that point, it's safe to say they owned my soul.*

This book matches its predecessor in size and heft; it's 215 pages from Introduction to Epilogue, exclusive of notes and bibliography. There are eight general hairstyles covering the years 1750 to 1795, each with its own cushion project (to support the hair in the desired shape) and a suitable cap. Five pieces of outerwear (2 hats, 2 bonnets and a hood), the peignoir, a few ornamental bows, and three hair pieces round out the sewn projects.  There are also cosmetic recipes: 3 pomatums, 2 hair powders, 1 rouge, and 1 lip salve.  All have step-by-step illustrated instructions. Some of the project instructions will refer to other ones (particularly to the pomading and powdering section), but I didn't find this distracting or hard to follow.

As with the dress book, the projects are clustered chronologically: each hairstyle is preceded by the relevant cushion project and any specific texturing techniques (curl, crape) and is followed by the appropriate cap as well as any bonnets/lappets/plumes. Four models appear in the eight tutorials, and there is discussion about adapting the techniques for different hair textures. Ms. McKnight contributed a two-page summary on how women of African descent living in Europe and North America in the 18th century dressed their hair.

Stars: 5

Accuracy: High. The models look like they stepped out of mid/late 18th century portraits, and sources are cited.

Difficulty: All levels. The hairstyles are labelled easy to difficult. Four pages of stitch tutorials are included for the less-experienced sewist (many projects, including all of the shaped hair-pads and accessories, require some sewing). I've not yet tried the hairstyles, as I need to make the pads and hairpieces.

Strongest Impression: This is a very useful resource for anyone trying to understand how late 18th century hairstyles actually work. I think it's invaluable for living historians interpreting c.1750-1795, but also for costume designers, artists, authors, and other people depicting women's life/behavior/material culture.

*The casual humor also won me over.  I will happily pledge fealty to anyone who writes a serious book about historic hair-dressing methods while making their hard pomade in Darth Vader molds.

Saturday, March 9, 2019

Bandoline

Bandoline is used by ladies, and by hairdressers for stiffening the hair, and to make it curl firmly and remain in place. It is applied either by moistening the fingers and passing the hair through them, or by means of a small sponge.
--A Cyclopedia of Practical Receipts (3rd ed. 1856, London)
Bandoline (fixature, clysphitique, eau collante): Victorian setting solution.  Most of the recipes I've found describe boiling quince seeds in water.  A Cyclopedia of Practical Receipts includes a few different versions.

The first one I've tried uses 1.2 oz of gum arabic dissolved in 3 oz of water and 2 oz of rosewater. I tried it on a half scale. Its very easy, you just need to give the gum arabic a day or two to fully dissolve.

A small glass jar containing white-ish liquid and solid resins.
Combined the ingredients, shook, and set aside.

The same glass jar, now containing a clear, light red-brown solution.
Two days later, all of the resin has dissolved.
The bandoline is a bit sticky, causing the lid to adhere somewhat to the jar. To apply, I dabbed it on my fingers and swiped it through my hair. It dries very quickly, and has a nice hold. I didn't notice any of the the "gummy"-ness I've read about, though that may be a reference to the materials rather than a description of the final product. 

When I tried putting my hair up in curlers, I found that I need to dampen each proto-curl immediately before twisting it up--if you try to do two at once, the second will dry before you can set it. Thus, this makes a fast alternative to setting curls wet and waiting hours for them to dry.

The curls also tend to stay better that water-damped curls, and don't brush out so easily. At the same time, I was impressed as how natural the curls felt: they weren't crunchy and hard like the mousse-held curls of my '90s childhood.

Unfortunately, my rag-curler technique is still really sloppy. I need to start doing more early 19th century styles for the curl practice.

Light brown hair, the ends of which have been curled with bandoline and rag curlers.
The bandoline-assisted curls dried instantly,
the water-set ones needed a long time to dry.