Showing posts with label Sewing Academy. Show all posts

Tuesday, November 27, 2018

Fringed Shawl

Fringed Wool Shawl, 1850s reproduction outerwear
A Nice Plaid Wool Twill.

Catching up (again) on blogging my recent projects. With the wet/cool weather firmly established, warm outerwear is in order. 

First off: a simple fringed shawl, based on Liz Clark's instructions. I appreciate the neat finish of the fringe, and how it doesn't add any extra bulk or lumpiness to the finished garment--on another project, I found that this fabric is just thick enough to make awkwardly bulky hems. That being said, the single layer is pleasantly warm while being fairly light (it's slightly heavier than my tropical-weight wool yardage, but not truly a mid-weight). The twill fabric fringes about as easily as the plain-woven wools I've used before, and seems no more inclined to ravel once fringed. The shawl is square, 1.5 yards on the side (including fringe), making a capacious cover when folded diagonally.

Monday, August 6, 2018

SA Cloth Girl Doll

Meet Nelly's new little sister: Harriet. She is made from Liz Clark's 13" cloth girl doll pattern.

Sewing Academy 1850s/1860s Reproduction Cloth Girl Doll
Harriet in new dress and pinafore.
Not visible: chemise, drawers, petticoat.
I don't have a lot to review here, as the pattern instructions and format closely resembles its predecessor, the cloth lady doll (15").  If you liked that, you'll like this.* The differences are in the doll size and garment types: the girl doll is two inches shorter, and her wardrobe includes children's style variations, as well as few different outerwear pieces, such as a sunbonnet and pinafore.  The girl doll pattern also has instructions for making dress and bonnet forms to display additional garments. 

The garments in common between the two dolls are nicely differentiated: the girl doll has a slightly different style of chemise, while other garments (drawers, stays) are cut in children's styles. The main reason for adding Harriet to my kit is to show the differences between womens' and girls' wardrobes.

The other notable difference is that the girl doll pattern is a pdf rather than a paper pattern.  While this felt a little weird to me, I appreciate the ability cut out pattern pieces without having to trace them.

What You Get With This Pattern: 

  • 1 pdf, containing 20 pages of instructions and 8 pages of doll/clothing pattern pieces
  • Patterns include the doll, a dress form, a bonnet form and the following garments: chemise, drawers, stays, petticoats, dress variations (yoked, gathered or pleated bodices cut high or low; 5 sleeves), jacket, basque, pinafore, and bonnet. 

Rating: 5 stars
Difficulty: Varies from easy to intermediate
Accuracy: High. Some background is included about cloth dolls; the clothing rings very true for girls' dresses of the 1850s/1860s.
General Impression: A nice doll, from a pattern than is easy to use and encourages customization.  In quality and user-friendliness, this pattern is the equal of its predecessor.

*I really love using Liz's patterns, finding them straightforward and intuitive to use. Occasionally, someone disagrees with me on this; check out the free compendium articles if you want to get a feel for the writing style.

Wednesday, June 13, 2018

Sunbonnet (take 6?)

Getting back into sewing with graduation presents for some of the awesome living history people I know. First off, a slate sunbonnet from Liz's first pattern. I've sewn it before in children's sizes, as wool hoods, and even for a doll, but this was my first time actually making it up as an adult-sized bonnet. I omitted the optional front ties, as I rarely use the ones on my own sunbonnets, but will add them if the recipient so desires. The material is "Leaf Duo" (cinnamon/parchment) from Jo Morton's "Gratitude" line for Moda.  It's all hand-sewn, and took much less time than I expected.  The slats are double-layers of non-corrugated board.
Sun bonnet from Sewing Academy free pattern; reproduction striped leaf "gratitude" fabric.
Sunbonnet.
The crown depth looks more proportionate when it's not flat.

Flat view of slate sunbonnet, made from the Sewing Academy free pattern.
Hemming the curved edge was actually pretty relaxing.
The stripes provided guidance for the slat channels.


Monday, April 23, 2018

New SA Sunbonnet Pattern

Because the thing you need more than a new free sunbonnet pattern, is one made from an original garment by the multi-talented Liz Clark.

[Update: Mrs. Watkins has already reviewed it here.]

Friday, August 25, 2017

Two More Sewing Cases

Several deserving young ladies of my acquaintance being lately married, I decided period presents were in order--and that it was time to try some more designs out of Fanciful Utility. This time, I made up the other structured sewing kit design: it has a rectangular pocket instead of a scissors case, and no pincushion in the thread box.

Two Victorian-style cotton print sewing cases from "Fanciful Utility" by Anna Worden Bauersmith
Sewing cases with thread box, needle pages, and
pocket. Fitted with bone thread winders, brass thimbles,
cakes of beeswax, emery strawberries, and pins.

Sewing the box to the base/cover was a little trickier in the center (compared to the box being at one edge), but the lack of a pincushion with its extra wall made the box construction easier.  I do like the extra stability that that wall provides (the long edges of the box tend to bend in slightly without it), but it was a bit of a pain to sew.  I also appreciate the convenience of having a pincushion right in the box, but I suspect this design will have other trade-offs: the large pocket and longer box compartment have space for various larger tools (button hole scissors, seam rippers, awls, a spool of thread, etc.).

I may add a loop and button closure to the left one; the ribbon
on the right works well, but obscures the fun striped material.

Per the book, the original this design was taken from had no closure, just the two fold-over flaps. I added the ribbon to the pink-and-green case (tacked to the center bottom) for more security while transporting the case. I think a button-and-thread-loop or two small ties might make a nice closure for the other.

Tuesday, August 22, 2017

Dotted Swiss Basque, c.1855-1856

"A simple white dress of spotted muslin has been made up the skirt trimmed with three deep flounces with a border of pale blue ribbon set on in a vandyked pattern. The corsage is high with a low inside body and has a basque as well as revers or bretelles of the muslin drooping very low on the shoulders. These the basque and the three frills which form the sleeves are trimmed with ribbon to correspond with the skirt below which is a fall of Honiton or Valenciennes lace. A blue sash ribbon with bow and flowing ends." -Godey's, June 1856
Mine isn't nearly so fancy, but I like the elaborate details that went into this "simple" dress. Also, it documents the use of swiss dot in basques.

This thread at the Sewing Academy inspired me to make a sheer, white basque for summer Fort wear. For reference, the first two photogaphs on the conversation are these:

Attributed to "Albert Bisbee, OH, 1850s"
Posted at Jessica Dean By Design

"A Brazillian Woman and Her Baby, 1855"
From The Wikimedia Commons

The basques are both quite sheer, and the top one shows separate 'bodice' and 'skirt' portions on either side of a self-fabric waistband.

My white basque.

As darting the material seemed untenable, I opted for a waist-band on mine as well: it allowed me to control the bodice fullness with a series of small pleats.  The 'skirt' portion was drafted off my velvet basque, and flares a bit more when worn than it appears above. It is, however, a bit scantier than I would like. The lace along the sleeve, neck, and skirt edges is from Fine French Laces, and is based on the finishing shown in Looking for the Mail Packet. Per that painting, I left my basque unlined, and wear it over the detached lining that I use with my yellow sheer dress.

Saturday, January 16, 2016

Sewing Guild References

Sewing class, c. 1830s, from The Workwoman's Guide.
Artist's rendering of the proceedings.
(Or the frontispiece to the Workwoman's Guide.)

Here are links to some of the titles and fabric stores that came up during the Fort Nisqually Sewing Guild meeting on January 16.

Books
The Dressmaker's Guide by Elizabeth Stewart Clark (for sale here) is the book that was being passed around and constantly referenced.  The sewing support forum is found at http://thesewingacademy.org/. [Added: In the February meeting we discussed buttonholes.  Liz also has a tutorial on those here.]

Nancy and Tracy also had a lovely presentation of workbaskets and sewing tools.  Virginia Mescher's article "The Case of the Lost Thimble" has additional information on this topic, including pictures of period tools and notions.  The sewing accessory book that was mentioned is Anna Worden Bauersmith's Fanciful Utility.

The Workwoman's Guide (1838) is the period book that was brought up several times.  A reprinted edition is for sale in the Fort's gift shop or your preferred book retailer; electronic versions are available free on Internet Archives and Google Books (the 1838 version has the pattern "plates" set into the text, while the 1840 version has them all at the end).

Some other period needlework books which I have found interesting include:

The Ladies' self instructor in millinery and mantua making, embroidery and appliqué, canvas-work, knitting, netting, and crochet-work (1853) includes all the aforementioned subjects and then some. Unfortunately for us, the author devotes most of her descriptions to what materials to use rather than giving details on how to execute the stitches.  Images primarily are of embroidery designs, as well as a few fancy stitches.

The Ladies' Work Table Book (1850) is another cornucopia of needlework techniques; I believe much of the plain sewing section was lifted verbatim from this book for the above.  Of the two, I find this one easier to navigate, somehow.

The Girl's Own Toymaker (1860) features period instructions for doll clothes.  The author of The Ladies' Work Table Book opines that sewing doll clothes is the best training for sewing human clothing.

The Sampler by Lady Elizabeth Finch (1855) is a guidebook for school sewing instruction; it walks through cutting and stitching various basic garments.  It's an interesting peek into sewing and pedagogical methods of the time.

Method for Teaching Plain Needlework in Schools (1861) has fewer garment instructions than The Sampler, but does provide illustrations of the different exercises and "plain sewing" samplers.  It also aimed at the public school teacher, and discusses how to arrange and a conduct a sewing class.

Miss Leslie's Lady's House Book (1850) covers many topics, including some very readable sewing advice and instructions for a few basic garments like shirts and chemises.

Fabric Sources
There are some "local" shops carry useful fabrics--I like Nancy's Sewing Basket in Seattle for silks and fine cottons; Portland's Fabric Depot has a nice selection of reproduction cotton prints; the Pendleton Outlet near Oregon City has lovely wools.  Here are some on-line retailers as well:

Reproduction Fabrics. The website is divided by era, which makes it easier to find good prints.  To be foolproof, call the store: they can direct you to good fabrics for your year and project.

Hancock's of Paducah. Also has a large selection of reproduction prints, but they are all mixed together (18th-20th century). Be sure to check the dates on the fabric before ordering (or compare it to original samples).  They also currently have the best price I've found on white pimatex cotton (a really good fabric for undergarments).

Originals by Kay carries garment-appropriate fabrics intended for historical reproductions, including gorgeous silks and hard-to-source items like cotton and silk net.  The proprietress is also a historic costumer and pattern-maker, so if you explain your project, she may be able to suggest fabrics for it.

Fabric.com carries white pima and occasionally has other fabrics suitable for period attire (I once found a fun sheer silk in the home dec department).

Fashion Fabrics Club has a variety of silk, wool, and fine cottons (some in period patterns, some not); their sales can be very good.

Dharma Trading Co caters to the dye market, and carries lots of beautiful materials like silk gauze and longstaple cottons.  Most of it is white, however.

Puresilks has gorgeous silk taffeta, which is an absolute dream to sew, and makes lovely evening gowns, fashionable day-wear, and accessories.  Satin, and brocade silks can also be period appropriate, though harder to work with, in my opinion. Do not buy silk dupioni for period use.

Wm Booth, Draper caters to the Revolutionary war crowd, but some of the fabrics can be used for mid-19th century as well.  Silks, wool, linen, and cottons--including that cotton velvet in my basque.

Lacis carries finer grades of cotton and silk fabric, as well as coutil for corsets.  Incidentally, this a good place to look for esoteric fiber craft supplies.

Monday, November 23, 2015

Teen or Adult Wool Hoods, 1850s/60s

These are the ones that I cut previously; they're for the Fort's lending wardrobe, specifically to keep heads dry during winter events.  As I mentioned before, it's Liz Clark's sunbonnet pattern, done up according to her instructions for a tufted winter hood.

Tufted winter hood from Sewing Academy instructions.
Red Hood

Woman's winter hood (1850s-1860s) from Liz Clark's instructions
Plaid Hood

Hood laid out flat, with tufting.
A Whole Lot of Tying

They're not quite as cute as the original, but I think they'll work fine.  Exteriors are wool remnants from the Ft. Nisqually Sewing Guild's stash, interiors are cotton prints, ditto.  There was no batting on hand, so I made a mosaic of odd-shaped scraps for the interior, hence the close tying. As promised, the pattern is easy to follow and goes together quickly, but the tufting part takes a while: close to three hours per hood, in my experience, with the rest of the cutting and construction clocking in around an hour each. The first one (blue/red girl's hood), with no inner layer, actually went very quickly because I was able to join the facing to the lining, and the lining to the outer layer by machine, turning the seams to the inside and finishing by hand.  For hoods quilted or tufted through all layers, this turning isn't possible, so you'll either need to finish the edges by hand, or have visible machine top-stitching all around.

The plaid hood follows the instructions as given; for diversity I played the with red, turning over the lining to bind the edges and using contrast-lining for both the front and back ties.  I like the effect, except for the the brown lining clashing with the black yarn spots (I didn't think that one through all the way).

Friday, November 13, 2015

Girl's Wool Hood, 1850s/60s

Today's Fort project: cutting out hoods for winter wear.  I even got one finished:

Girl's wool hood, 1850s-1860s, from Sewing Academy "Quick Tufted Hood" project


The pattern is Liz Clark's Quick Tufted Hood (instructions and the sunbonnet pattern it's adapted from).  The first one I made has no batting, just wool with cotton lining and a wool contrast facing, so I skipped the tying step.  It works on this small of a garment, but a larger hood would probably benefit from the added stability tufts or quilting.

Thursday, October 29, 2015

More Infant Gowns and Pattern Review of HMP-105

Cute garments first:
Natural waist, long sleeve dress from SA/HMP-105

Adjustable "infant" style dress from Sewing Academy- #105 infant gowns pattern


With five loaner dresses made, I'm finally ready to review Historic Moments Patterns/The Sewing Academy 105: Infant Gowns.

This is an easy and versatile pattern, and if you need to make 1850s/60s baby clothes, you should buy it.  As with the girls' dresses pattern, there's many different customization options: three bodices (five,counting the high/low options), 4-5 base sleeves, waist treatment options, etc.  In fact, it's basically the same pattern, only sized for infants instead of girls & pre-teens.  The main difference is that the infant pattern includes a straight long sleeve instead of a coat sleeve option  In theory, you could get one pattern or the other and simply size up or down as needed--but then, in theory, you could also drape instead of using a pattern at all.  Also included in the pattern booklet is specific discussion of long versus short infant skirts (for mobile versus stationary babies); fabric choice, yardage calculations, and trim options are also explored.

Undergarments and outwear are available in separate patterns.  All HMP/SA infant patterns are unisex.

Since I'm making clothes to fill gaps in a lending wardrobe, I made up the dress pattern as-is, in the three larger sizes--they'll be getting altered for every wearer anyway, so tucks and waistbands were used.  As noted before, it would be nice if suggested skirt width/lengths pairings were included for those without a good grasp on how wide a skirt should be for a wearer of a given stature.  I imagine this is easier if one has a model on-hand and can experiment a little.  Nonetheless, the instructions are very thorough for making skirts to measure and the smaller range of infant sizes made it easier to guess where on the width range a given garment should fall.

There is an error in the pattern copy I was working from, in that coat sleeve instructions are included, but the long, straight sleeve is not (however, it makes up fine following the short straight sleeve instructions).  This may have been fixed in newer copies.  On the size B jewel-neck bodice, I'm concerned that the neck line is disproportionately small, and will be looking into it (if sewing for a specific child, a toile/mock-up would have solved this problem at the beginning--make a toile!).

What You Get: Pattern Book, 1 page of bodice and sleeve pattern pieces on printer-weight paper (skirts/cuffs/bindings, being rectangles, have cutting instructions rather than printed pattern pieces).

What You Need: Fabric; thread; hooks and eyes or buttons; cording and twill tape (for some styles); sewing tools

Score: Five Stars

Difficulty: Beginner and up.  As in other SA patterns, there's an illustrated explanation of period sewing techniques included, putting this pattern within the reach of even the most novice of sewers. I'm told that those less mathematically-inclined still find them a little challenging, but the designer's accompanying on-line advice forum can help. The small pieces in this pattern make some parts easier to sew by hand than on machine.

Accuracy: Very High.

Strongest Impression: A versatile and accurate pattern that goes together quickly.

Friday, October 23, 2015

Infant Gowns

Part 1, of who-knows-how-many.  For the Fort Nisqually volunteer wardrobe, of course.

Yoked dress from Sewing Academy-105: Infant Gowns pattern

Natural waist bodice with bishop sleeves, from Sewing Academy-105: Infant Gowns pattern

The pattern is Liz Clark's Historic Moments Patterns #105: Infant Gowns (ages 0-2). The first is the yoked bodice (high/jewel neck) with the short, slim sleeves; the second is the natural waist bodice (high neck again) with bishop sleeves.  I chose the use waistbands on all of them, to ease future fitting.
Pattern review forthcoming.

Sunday, August 2, 2015

Cross-post: Victorian Clothing Research and Help for New Reenactors

A group of children, from Der Bazar, 1861
1861 Engraving from Der Bazaar

All self-promotion is purely coincidental. :)

The following are informational posts I've written for my Civil War group's public blog (link conveniently located on the side-bar to your left).


[I've already mention a lot of these resources in this blog, but if helps, here are my round-ups of primary sources available on-line: writings, paintings, and museum collections, as well as some good secondary sources.

Friday, June 26, 2015

One last look at HMP-250

Two more dresses for the fort's volunteer wardrobe, using the Historic Moments/ Sewing Academy Girls' Dresses pattern (see the review here, and more options here).  There's another "infant style" dress, this one with the fullest bodice option, and puffed sleeves.  It has a drawstring in the neckline, and another at the back waist, making it somewhat adjustable.
Adjustable full infant bodice dress with short puff sleeves, from SA/HMP-250
The material is actually a very fine white and pink
"gingham" check, not a solid.
The other is a yoked bodice, this one with the higher "jewel" neckline and the short, smooth sleeve.

Yoked bodice dress with short smooth sleeves, from SA/HMP-250
It's a little small for the hanger.
Yoked bodice with jewel neck.
Better view of the fabric and yoked bodice.


Tuesday, May 5, 2015

Semi-sheer print dress c. 1865

And now, the final installment of the '65 dress adventure (which included two research posts and was aided by original images from members of the SA).

Reproduction 1865 semi-sheer en tablier dress.
Please excuse the wrinkles; the dress was worn three days in a row and then traveled halfway across the country.
Elements specific to 1865 include:
  • Coat sleeves (open, shirred)
  • Gored skirt, longer and fuller towards the back
  • En Tablier decoration on upper skirt
  • Waistband, slightly elevated
1865 Semi-sheer dress, front view.
Front
Neck ruffle on semi-sheer dress.
Shoulder and neck ruffle
Open shirred coat sleeve.
Sleeve
Upper skirt piece.
En tablier upper
Gored en tablier skirt.
Skirt, side view
The narrow, self-fabric ruffle along the "collar" is seen on some sheer dresses. The bodice and sleeve are self-draped (shirred sleeve design from The Dressmaker's Guide). Gore layout and pocket based on an 1866-1867 dress in Janet Arnold's Patterns of Fashion II; the gore-cutting method is from an 1875 diagram reprinted in the same book--originally from How to Dress Well on 1- a Day, if I recall correctly).  The en tablier piece is my own design, attempting to copy the originals linked previously, particularly this one.

And here's the dress as worn, complete with undersleeves, silk belt, mourning badges, and shawl:
Semi-sheer 1865 dress, worn.
Outside Union Station, Springfield, Ill

Saturday, July 26, 2014

Book Review: The Dressmaker's Guide by Elizabeth Stewart Clark


A good seven/eight years after I started reading at her website, I finally got a copy of Mrs. Clark's "The Dressmaker's Guide".  I hadn't done so at first, as I was 1) at college, with little spending money, and thus 2) on hiatus from the hobby.  By time I got back into the swing of things, I felt confident on the basics, and didn't think I'd have much to learn from this particular source.

This turned out to be--very much--not true.

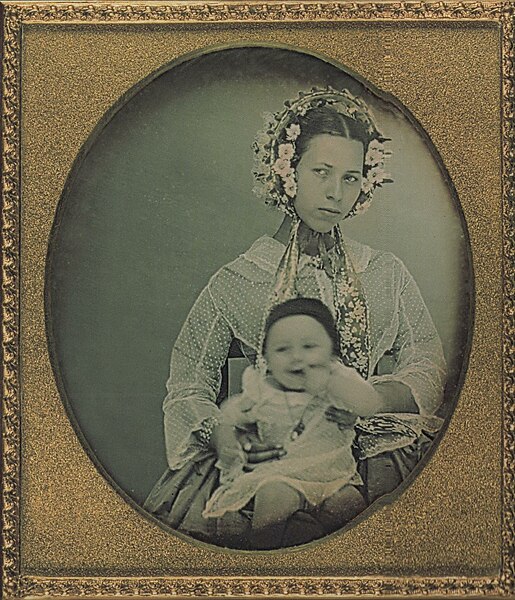
The book is divided into twelve chapters, detailing how to drape or draft and then make up each of the layers* which goes into women's wardrobes c. 1840-65.  The first three chapters cover preparation for sewing and context for one's living history: a year-by-year timeline of events, approaches to progressive reenactment and documentation of research, a timeline of dress styles, and a 50-page tutorial of stitches and fabric terms.  Chapters 4-11 go through each garment or element, discussing how to fit it, what materials to use, and how to make it.  Chapter 12 is a quick-reference appendix, with three "croquis" in different body types (instructions are given in chapter 2 for using these paper dolls to plan your outfits and play with styles).

For a preview of style and content, the free women's patterns found at the 
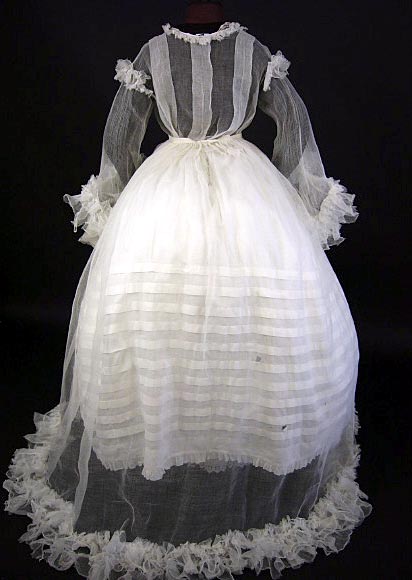
Compendium are mostly taken from the book (except for the sunbonnet, shawl, and apron).  The chemise chapter, for instance, includes the personally-drafted banded chemise found at the Compendium, as well as instructions for a gored chemise, and a discussions of the different fabric choices.  Similarly, the basic drawers and petticoat are given free on-line, but the book offers additional design choices, including decorative tucks and whitework insertions, and instructions for corded and quilted/wadded petticoats.  If you can follow the directions given on-line, you'll have no trouble with the book's instructions.  Additional book content includes a whole chapter on draping a personal corset pattern, cage crinoline instructions, a self-drafted sleeve pattern with 8 different variations, and a chapter on personal accessories.

What I found most valuable were the bodice and sleeve drafting instructions.  Several variants were included for each, with the time period when each is popular, and instructions for personalized fitting. To get an idea of the breadth of the bodice chapter, take the "Having a Fit" article, then add sketches of each step for the draping, advice for fitting commercial patterns, and instructions for creating 6 different bodice variations from the basic pattern (high or low, gathered or darted, V-necks or rounded, and some beautiful pleated/shirred "fan fronts").  The sleeve portion follows, and I'm excited to experiment with some of the variations shown.

I expect this book will prove valuable to sewing enthusiasts of all skill levels.  Despite extensive reading on the subject, I was surprised by new elements like the diagonal tucks.  At the same time, all the basics are present.  A person with no experience in mid-19th century women's clothing could go through every step from selecting an impression to finishing a completed ensemble with the instructions given here.  It may take a while, by the information is all given in a clear manner which should be accessible for beginners.  Additional help is available through the author's website, or at the attached forum.

Looking for downsides, the main things which come to mind are the overall size: there are 100 pages of information before any garment instructions show up.  This is possibly overwhelming, but also provides interesting background information and useful techniques.  The instructions can at times 'run-on' in my opinion (separate tables for calculating yardage for each type of petticoat, for instance, instead of just adding or subtracting from the basic plan), but this may be useful to those not mathematically-inclined or who need to take some things in 'baby-steps'.  Erring on the side of more information and simpler explanations isn't a bad thing.  For those that need visual instructions, there are nice sketches included with most of the techniques, but no photographic images of garments or steps.  I liked the drawings as given; your mileage may vary. The table of contents gives page numbers for the chapters, but the one thing I would change about this book is adding a topical index,*** so you can look up "coat sleeve" or "petticoat: whitework" and go directly to the page.

Score: 5 Stars
Difficulty: Absolute beginner & up.  Basic sewing skills are useful, but not strictly necessary.
Accuracy: No original garments are presented, but the variations and techniques are all very accurate as far as I can tell.  Read Janet Arnold if you want details of original garments, this is more a summary of the the period and its aesthetics.
Strongest Impressions: This is a book to reference.  It's not meant to be the end of your research, but the beginning.  Find an original for inspiration, then use the sketches and instructions in here to reproduce the elements you like.  The introductions and instructions in chapters 1-3 are a good basis for making one's first forays into historic clothing--and will put you miles ahead of the non-fitted, ready-mades found at most reenactments.  Should I even become an eccentric millionaire (half-way there!), I would be giving these out like Bibles.

*On further reflection, stockings & garters, shoes, gloves, and millinery are not included as topics.  All trunk garments from the chemise outward are covered, however.**
**Ok, not aprons.  But you should be able to figure one out from the all the techniques given.
***Edited to add (11/28/14) that a printable index is now available here. Rumor has it that future editions will include an index.