 |
| Shirtwaist and matching skirt, 1902-4, from LACMA. |
Showing posts with label tutorials. Show all posts
Showing posts with label tutorials. Show all posts
Wednesday, June 1, 2022
Original: Shirtwaist & Skirt, c.1902-4
Saturday, March 30, 2019
Short Stays, 1795-1805
Drafted out of the 1795-1805 example in Regency Women's Dresses.
I realized half-way though that this should have been a photo tutorial, so...here's a half-illustrated one.
I started by scaling up the book pattern, whereupon I realized that the scale provided is... not right. As given, the 'short stays' allegedly have a 17" center front and 23" center back length. For comparison, my 'long stays' (which run from mid-bust to upper hip) have a 14" busk. Halfing the given scale (1 square = 1/2") gives a 8.5" center front, which more closely resembles the provided illustration, with the lower edge of the stays reaching the bottom of the rib cage.
Anyway, I drafted my stays using the half-scale length, and adjusted the width to my personal measurements. Since most squishyness is up front, I measured between my shoulder blades, and widened the back pieces of the pattern to that measurement by the 'slash-n-spread' method. For the front pieces, I kept the area near the underarm curve at the initial proportions, and used slash-and-spread to widen the central area of the front pieces. After the first test, I ended up removing nearly 4 inches from the center front, and re-shaped the center back seam to suit the curvature of my back. Much of the curving 'tail' of the original pattern did get revised out this way. I also cut the straps extra long, and then shortened them to fit.
Once I had a working pattern, I cut out a double layer of heavy linen (four copies each of front, back, and strap pieces), and marked the boning channels on the inside layer.
The original garment was apparently stitched by whipping together the individual pieces (the raw edged being turned in and sandwiched between the inner and outer layers). Being short on time, I changed this to machine sewing in the following way:
1. Prepare the two straps by folding in the seam allowances on the long sides of the four strap pieces. Match up inside and outside layers, and topstitch the long edges.
2. Sew together two front and two back pieces to make the lining; repeat to make the outer layer.
3. Baste the straps to the lining.
4. With right sides together, join the lining and outer layer, by stitching along the upper edge. This will sandwich the short, raw edges of the straps between the two layers. [I nearly just pressed the seam allowance and top-stitched this, but I wanted the straps well-secured before doing so].
5. Turn the stays right sides out, press the seam allowances all around the raw edges, and top stitch from the center front, over the previously sewn upper edge (to help stabilize it further), and down the other center front edge.
6. Stitch the boning channels. I started at the center back, paying particular attention to the side seams, where short angled bones meet at the seam. I did the ones on the back pieces as normal, and inserted the bones; for the second set, I stitched the uppermost seam, slide in the bone along the long side of the eventual channel, stitched the middle seam (between the two bone channels), slide in the second bone, and then finished the channel. After all four bones were in place, I top-stitched over the side seam, sealing off the four channels. The angled bones at the center front are more straightforward, but do need to be stitched and inserted before the stitching the vertical channels at the center front.
 |
| The tricky meeting of short, angled boning channels at the side seam. |
8. Mark and make the lacing holes at the center front. I used two-piece metal grommets. Hand-bound eyelets would be more accurate, but time is an issue here. And my particular shape will be putting a lot of strain on the lacing...
 |
| Inserting the grommets. As always, I put one in backward. |
 |
| But seriously, this ink comes out much faster and neater than water-soluble pens. |
 |
| Finished stays. |
Sunday, December 13, 2015
Cable and Rope Chignons
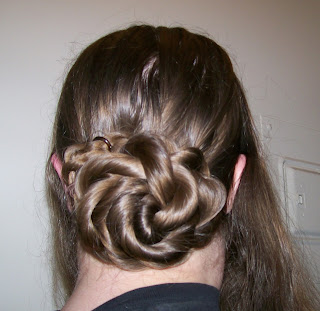
Two more short variations to mix things up: chignons with ropes and cables instead of three-strand braids. The Englishwoman's Domestic Magazine (1856) recommended this two-plait method for making chignons with cable-plaited hair, and I decided to try it with ropes as well.
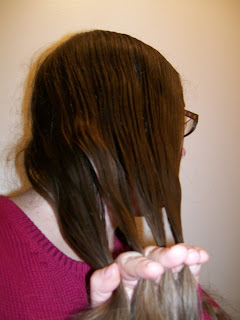
1. Part the hair, as usual, dividing the back into two sections. (See basics post.)
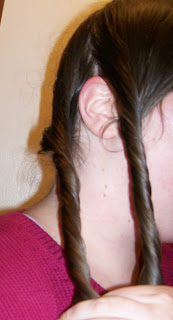
2. Rope or plait each of the back sections. (Rope instructions. Cable plait instructions.)
3. Twist the two back ropes/plaits around each other, making one thick rope.
4. Coil the rope at the back of the head, tuck the ends under, and pin.
1. Part the hair, as usual, dividing the back into two sections. (See basics post.)
2. Rope or plait each of the back sections. (Rope instructions. Cable plait instructions.)
 |
| Rope version. |
4. Coil the rope at the back of the head, tuck the ends under, and pin.
And here's the cable plait version, per the original instructions:
They's both easy while looking complicated, but I think the uniformity of the roped version is more pleasing. They also remind me of this 1863 coiffure from Godey's:
 |
| "Coiffure for a young lady", back view. There's a ribbon run around the hair, but the description only says that it's "tied very low on the neck" |
Thursday, December 3, 2015
"Roping" the Hair, 1854
An alternative to a plait/braid or twist, is the "rope". Instructions from Arthur's Home Magazine (1854), page 238:
Step 2: Twist each section; as a right-handed person, I found it easiest to twist the hair counterclockwise.
Step 3: Bring the right section over the left. If you twisted the strands clockwise, you'll want to bring the left section over the right, instead. (If you twist CW, wrap CCW; if you twist CCW, wrap CW).
If you wrap the sections in the same direction they're twisted, instead of a neat rope, you'll get a large twist of hair that won't stay together when tied off:
Step 4: Bring the new left section over the new right, repeating until the hair is all incorporated, or the desired length of "rope" is reached. For long hair, it will be necessary to stop periodically and twist more hair before roping it. I found a half twist as I moved each section over to be sufficient.
Step 5: Fasten off the "rope" with a thread, ribbon, or unobtrusive modern hair tie.
I've still not found definitive evidence of how ladies' braided/plaited/roped up-dos were tied off in the mid-19th century. The advice books condemn thread for tying braids, and ribbons are mentioned for little girls' plaits, but I've not found an image of braid ends for adult women, nor is the fastening method explained.
Here's the colored yarn version of the "rope":
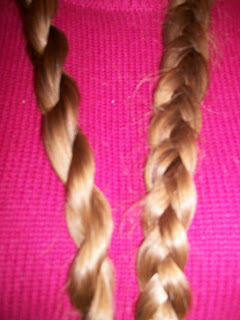
Not that it's needed, but here's the rope compared to a three-strand braid of the same size:
"Roping" the hair is done by dividing it in two equal parts, and twisting one over the other, a kind of round braid, taking its name from the resemblance it bears when smoothly managed to a hempen rope or cable.Step 1: Divide the hair into two sections.
Step 2: Twist each section; as a right-handed person, I found it easiest to twist the hair counterclockwise.
Step 3: Bring the right section over the left. If you twisted the strands clockwise, you'll want to bring the left section over the right, instead. (If you twist CW, wrap CCW; if you twist CCW, wrap CW).
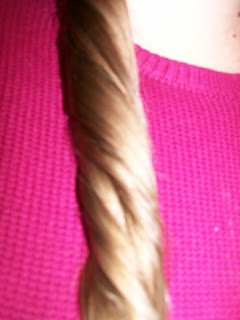 |
| What not to do: twist the section counterclockwise, then attempt to wrap them together counterclockwise. |
Step 5: Fasten off the "rope" with a thread, ribbon, or unobtrusive modern hair tie.
I've still not found definitive evidence of how ladies' braided/plaited/roped up-dos were tied off in the mid-19th century. The advice books condemn thread for tying braids, and ribbons are mentioned for little girls' plaits, but I've not found an image of braid ends for adult women, nor is the fastening method explained.
Here's the colored yarn version of the "rope":
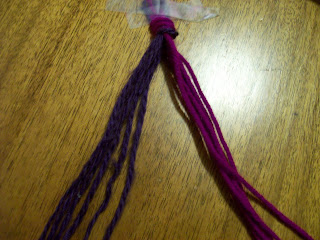 |
| Make two sections. |
 |
| Twist the two sections; here they're twisted counterclockwise. |
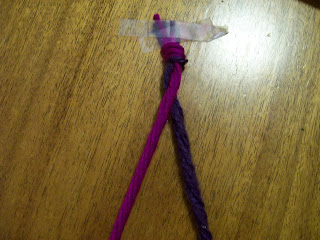 |
| Bring the right (pink) section over the left. |
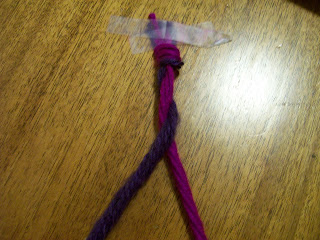 |
| Bring the new right (purple) section over the left. |
 |
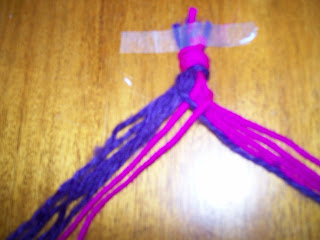
| The finished rope, correctly done. |
 |
| An incorrect rope: the sections were wrapped in the same direction as they were twisted, and collapse together. |
Wednesday, December 2, 2015
Braid Styles of the 1850s (and 1880s): Basket Plaits
The third fancy plait from The Englishwoman's Domestic Magazine (1856) / Sylvia's Book of the Toilet (1881), is the basket or chain plait. It's basically the standard three-strand plait, with a fourth strand running straight through the middle, which the other three wrap around.
Step 1: Divide the hair into four sections.
Step 2: Take the right-most section and bring it over the nearest section, then under the next and over the last. The formerly-right-most section of hair should end up as the new left-most section.
Step 3: Take the second-left-most section and take it over its right neighbor, then under the far right section, making it the new far-right section.
Step 4: Take the second-right-most section over the mid-left and under the far-left sections.
Step 5: Repeat steps 3 and 4 until the desired length is reached.
And voila:
This one definitely makes more sense with all four strands differentiated, so here it is in multi-colored yarn. As before, orange starts on the far left, pink in the middle, and purple on the far right; the new white thread begins in the left-center position (pink in right-center), and so will never move. It will stay in the middle while the other three strands braid around it.
Here's the basket plait with a regular three-strand braid braid crossing it. The fourth strand makes it look more elaborate and "woven" than with three alone, but it's not difficult once you get started.
Step 1: Divide the hair into four sections.
Step 2: Take the right-most section and bring it over the nearest section, then under the next and over the last. The formerly-right-most section of hair should end up as the new left-most section.
Step 3: Take the second-left-most section and take it over its right neighbor, then under the far right section, making it the new far-right section.
Step 4: Take the second-right-most section over the mid-left and under the far-left sections.
Step 5: Repeat steps 3 and 4 until the desired length is reached.
This one definitely makes more sense with all four strands differentiated, so here it is in multi-colored yarn. As before, orange starts on the far left, pink in the middle, and purple on the far right; the new white thread begins in the left-center position (pink in right-center), and so will never move. It will stay in the middle while the other three strands braid around it.
 |
| The four strands. |
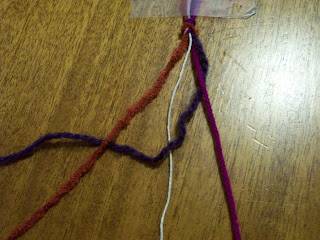 |
| Purple goes under pink, over white, under orange. |
 |
| Orange having already gone "over" purple as it worked across, continues under the white and over the pink, to its new far-right position. |
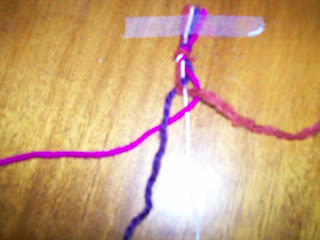 |
| Pink already having gone under orange, continues over white and under purple. |
 |
| Continue picking up the last thread crossed and taking it back the other way; under/over/under or over/under/over, depending on the last move. |
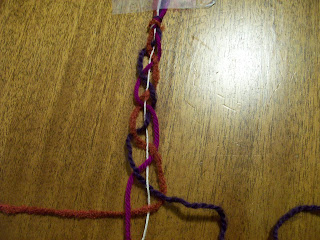 |
| Left open, you can see the orange, pink and purple strands making a basic three-strand braid. The white strand stays in the middle, but weaving in and out of the three-plait. |
 |
| Braid drawn tight. |
Tuesday, December 1, 2015
Braid Styles of the 1850s (and 1880s): Grecian Plaits
The COIFFURE, intended for a soiree, is composed of a Grecian braid passing over the top of the head. Against this lies a basket plait, which is crossed by a Circassian braid, that likewise confines the ends of the Grecian braid below it. Frizzled puffs are worn in front, with drooping sprays of jasmine. The yellow jasmine is especially admired for this purpose.
 |
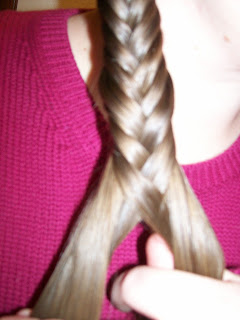
Grecian plait is woven as follows: Take a tolerably thin lock of hair, divide it into two equal parts, take from the outside of the left hand portion a very small piece of hair-about a sixth part-pass it over into the centre, and unite it with the right hand portion: do the same from the right hand portion, and pass it over into the centre, and unite it with the left hand portion; proceed thus: taking the small and even-sized lock alternately from the left and the right hand portions until all is plaited. Be careful to keep this plait very smooth.This is basically a modern "fishtail" braid. It's also, apparently, the specific plait used to make soutache or Russian braid.
Step 1: Divide the hair into two sections.
Step 2: From the right-hand section, separate out about 1/6 of the hair on the "outside" of the section (the farthest right portion). Take this bit of hair over the rest of the right-hand section into the center, and add it to the inside of the left-hand section.
Step 3: Repeat on the left: take a small (1/6) portion of the hair from the far-left side of the left-hand section, and take it over all the other hair to join the inner side of the right-hand section.
Step 4: Repeat on the right side, then the left, and continue until the braid is the desired length, or no more hair is available.
Step 5: Tie off the plait.
The finished Grecian plait is noticeably flatter than a standard three-strand-plait, while still being thick. The small sections of hair used in each pass give it an ornate appearance, while the simple passing motion allows it to progress quickly. It does take a bit longer than doing an ordinary braid.
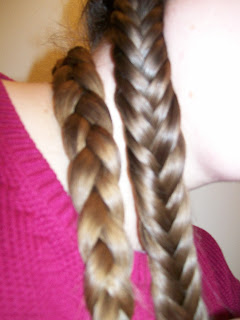 |
| Normal braid (L) and "Grecian plait" (R) |
 |
| Step 1: Divide strands into two sections. I used 12 strands, so that it'd be easy to pick up 1/6 of a section at a time (it's just one strand). |
 |
| Step 2: Take 1 strand (1/6 section) from the outside of the right/pink section, lift it over the rest of the pink section, and place it on the inside edge of the left/purple section. |
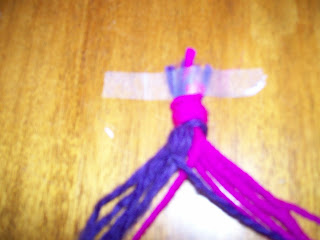 |
| Step 3: Take 1 strand from the outside of the left/purple section and lift it over the rest of the purple section, to the inside of the right/pink section. |
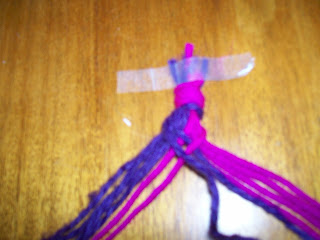 |
| Do the same on the right. |
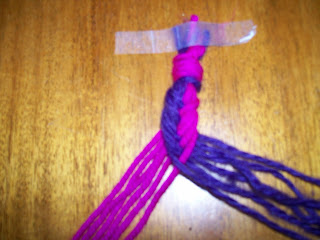 |
| One neat thin about doing two-color braid is how, after twelve passes (six on each side) the two sections have switched places. |
 |
| Make the braid as long as you want, then tie it off as normal. |
Subscribe to:
Posts (Atom)


