Saturday, December 31, 2022

Reviewing 2022 Goals


Looking back on this year, it mostly didn't go to plan. I did a little mending and worked on some long term projects, but mostly only wrote up my culinary experiments. I also spent more time on knitting projects than I had anticipated.


Main Wardrobe Goals (c.1855-65)

Four chemises. I did a lot of emergency make-it-work-one-more-day repairs, but didn't get the nice ones done.

Four pairs of drawers. Ditto.

Four pairs of everyday stockings. Started sorting these, but didn't make any new ones.

Silk and wool stockings maintained. Also made new wool stockings.

Quilted and corded petticoats maintained. Took my corded apart and still need to get it on the new waistband.

Three nice white petticoats. Repaired the one where some of the stroked gathers came out.

Four usable collars (most 1855, one 1860s). Currently at 3 for 4.

Four useable sets of undersleeves or cuffs, suited to the dresses (most 1855, some later)

Make or re-make one work dress (1855)

One fashionable ensemble (1855). Arguably my blue plaid, which I did alter. However, the sleeves still tear out every time I wear it, so there's more alterations in its near future.

Two aprons. Repaired both the pink print and my white sewing apron.

One nice bonnet (1855) It has problems, but technically my white crepe meets this.

One sunbonnet Techincally true: the purple plaid's still holding on, and I have been working on its replacement.

Winter Mantle (c.1855) Posted just under the wire.


UFOs

Embroidered coif. Slowly progressing.

That red-print Empire gown. Paused with finished bodice, skirt, and sleeves needing to be joined, but I haven't touched it since Jan 2020 and it probably will need to be re-sized now.

Repair sewing kit. Needs to be a priority in 2023. I use it all the time, but the cardboard is truly given out.

Puffed Undersleeves. Paused from January 2020, though not for a particular reason.

Straw soft-crown bonnet. Nearly done!


Stretch Goals (I have materials but no pressing needs)

New 16th century kirtle and gown Did preliminary drafting and fitting, but not complete.

New 16th century smock Was waiting on Typical Tudor

Rustic straw hat

Linen sheets

Tablet or pick-up woven bands Not exactly.

18th century peignor Still paused with a million yards of ruffles to hem.

18th century short gown and petticoat

18th century skirt supports for fancier gowns

18th century pocket

18th century hair pads

18th century cape Actually making good progress on this.

Empire pelisse

Coarse straw bonnet

Net lappet cap, 1850s

1870s spoon-busk corset

1900s corset  

1912 Wrap Cloak Mock-up cut out, still fussing with the dart adjustments.

Undergarments for early 1900s traveling suit

1940s/1950s skirts and dresses One finished. And a second almost done.

Dancing slippers

Knit Stockings Modern. Period for the early 20th century technically...

Refresh 1860s bonnets

New 1800s/1810s bonnet

Bathrobe. Drafted and cut out. Sewing in progress.


Unplanned projects:

Linen hose 

Plain Coif and Forehead Cloth 

16th-17th Century Cloak

Knit wristlets

A Whole Bunch of Muffatees

Apron from The Workwoman's Guide 

Straw Mattress Experiment


Mending posts? I did one or two (and three). There was more mending that never got written up, though not as much as I would have liked to get done.

Research posts? I didn't post any of these, but made substantial progress on four, which should go up early in the new year.

Drafts: 88

Friday, December 30, 2022

Winter Mantle, 1857

Just in time for winter events, I finished my new 1850s mantle, based on a pattern from the December 1857 issue of The Englishwoman's Domestic Magazine.

Winter Mantle. Englishwoman's Domestic Magazine, December 1857.

Per the description, the mantle is made of wool broadcloth, trimmed with velvet ribbon and fringe. Black or brown with matching trim is the preference, though the description also suggests using black trims "with any dark cloth."

I selected a grey broadcloth, which ended up being a few shades lighter than intended. That being said, I think the lighter color is more cheerful than a solid black would have been, and I like how it looks with my mauve hood and knitted comforter.

The buttons and cord fastener don't photograph well against the velvet.

Materials: 

Scant 3 yards grey broadcloth

6 yards of  2" black (cotton) fringe

12 yards 3/8" wide black velvet ribbon

5 yards 1.5" wide black velvet ribbon

8 wood button molds

~6 yards of black beading silk to make the cord fasteners.

Scraps of black silk taffeta and white linen for covering buttons

Scraps of fringe for the 2 tassels

I sketched the 3 pattern pieces--front, back, sleeve--to scale, then made a muslin to test the shoulder and neck fit. The sleeves were delightfully easy, in that there's no underarm seam: just a generous side opening that will easily fit large 1850s pagoda sleeves, and a cape to cover. I sewed the construction seams using a double row of running stitches in grey silk thread, based on the construction notes from an 1780s broadcloth cape in Costume Close Up (which also proved successful on my 16th-17th century cloak). The ribbon and fringe are both attached by small uneven running stitches.

I attempted to make silk tassels out of size FF beading silk, but didn't like how the material behaved; instead, I used the off-cuts of the fringe, sewn tight around the head, to form the two tassels. The finished mantle shows a double line of buttons with cord, which is how I interpreted the fasteners (based on examples like this mantle which uses more elaborate frogging). I considered applying the buttons as a decoration only, and using concealed hooks-and-eyes, but decided to try the buttons and cord loops first. I couldn't find any black cord that I liked, so I used my straw-spinner to twist an 8-strand cord (first twisting two sets of 4-strands, then plying them together). 


Plying cordage.

Compared to the original image, I could have used a darker broadcloth, and I think the proportions would stand for wider trims. I went with these ones because I couldn't find any fringe longer than 2" or velvet ribbon wider than 1.5", and I wanted to maintain the proportions of the narrow and wide ribbons. That being said, I rather like how it turned out, except that the 3/8" ribbon was difficult to manipulate over the fringe header. Practically, I find the current fringe length very practical to wear

Thursday, December 29, 2022

December Mending

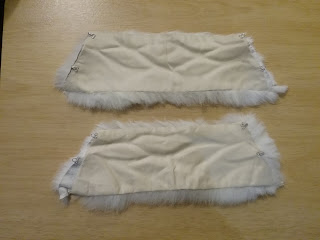
Lots of little mending projects, mostly for Fort Steilacoom. Reattached a bow that came off my sewing apron. Fixed the plaid dress sleeve again. Reattached a loose lining on my fur cuffs and finally added the hooks and eyes, so I can stop pinning them in place.

Trapezoidal-shaped 1850s fur cuffs, lying with the white fur facing down and the polished-cotton lining facing up.
Very warm even when pinned, but the hooks are much easier to fasten with one hand.


Wednesday, December 28, 2022

Book Review: Costume Close Up

Book cover showing a red cloak on a black background with the title "Costume Close Up
Costume Close-Up (1999) by Baumgarten & Weston
 
Another book-review that I keep neglecting to post. Costume Close-Up: Clothing Construction and Pattern, 1750-1790 by Linda Baumgarten and John Weston is a detailed exploration of 25 items of the late 18th century clothing from the Williamsburg Collection. Three are ensembles with multiple components, giving a total of 30 garments featured. 
 
The book itself is 120 pages. It begins with a 6-page introduction which broadly covers 18th century fashionable silhouettes, how to study antique clothing, 18th sewing techniques, and garment terminology. Excepting 2 pages of end-notes, the rest of the book is divided into 25 sections, each investigating one garment or ensemble. Thirty short 'side topics' (each about a paragraph long with an illustration) are scattered throughout the relevant sections to provide context on how the garments/materials were made, what kinds of people worn them, etc. There's also a 5-page spread of color photographs.
 
The different sections each begin with the artifacts' identifying information. Short paragraphs then discuss the garment category, the materials used in this example, any evidence of how this specific garment was altered, and the construction methods present in it. The last category is the longest, with each technique or point of interest getting its own short paragraph. Each garment or outfit has at least two black-and-white photographs (full length and a detail), as well as line-drawings of all its component pieces on a scaled page (in inches & cm). Where relevant, line drawings are also used to show embroidery patterns or particular construction methods. There are one or two asides depending on the item, often accompanied by a contemporary image of similar garments. For example, the #5 quilted petticoat has an aside addressing 'who wore quilted petticoats?' with an 1783 engraving of a woman wearing one, and a second aside on block printing accompanied by a c.1780 print.

Per the authors' introduction, this book is not a manual for sewing 18th century clothing, but was intended as an introduction to studying antique garments. I think that it does this job admirably, while also providing useful information for recreating specific garments. I appreciate the amount of detail that is included, and admire how approachable the authors have made it. I have my copy shelved right next to Patterns of Fashion 1, but I could see myself handing this book to a new researcher or repro sewist where I would hesitate to start someone on PoF.
 
The two things that would make this book even better are more color pictures, and an actual grid on the pattern diagrams. Admittedly, I believe the latter was a deliberate choice, as it allows the scales on the edges to be marked in both metric and standard, but I do personally prefer having the grid when scaling up designs. For the former, Williamsburg has digitized over 1200 items from their costume collection (including every item from this book that I've searched for).

Stars: 5

Accuracy: High. It's all original garments.

Skill Level: Suitable for all levels as a guide to garment study. Advanced for garment recreation (would be need to be comfortable scaling pattern diagrams, fitting, determining work order, etc.) 

Strongest Impression: Really shines on the details. Has the diagrams and descriptions of a Janet Arnold book, but with more pictures and more explanations.


Tuesday, December 27, 2022

1855 Warm Undersleeve, Circular Knitting Machine Edition

Revisiting these 1855 knit undersleeves, which I have previously made all the component for (sleeve, ruffles), but never finished due to frustration with the instructions.

Line drawing of a knit sleeve ending in a double layer ruffle of lacey openwork.
Warm Undersleeve.

A few changes to make this project circular knitting machine compatible:

First, brioche stitch isn't happening. I can do a double knit by running two threads, or I can just plain knit it. I decided to make a plain tube this time, since it's my first attempt at doing this pattern on a machine, and also the dress I'm going to wear this with is a nice warm wool in the first place.

The frills, as written, have a bit of a problem: they include decreases (knit 2 together) with no corresponding increases. I tried it as written, and again with yarn-overs to balance out the knit-2-togethers, but only got a closely-set eyelet motif. Helpful fellow volunteer Cynthia identified the original pattern as "Old Shale" and recommended the following variation as producing something more like the illustration (especially if the frill is worked on thicker needles than the sleeve itself):

Row 1: Knit

Row 2: Purl 

Row 3: Knit two together (3x), yarn over & knit 1 (6x), knit two together (3x). Repeat for the whole row

Row 4: Knit

[Per the original instructions, repeat the four rows 5 times (for 20 rows total) in white, then knit all four rows once in a colored yarn.]

If I make the fourth row a "purl", I can knit this in the round on the machine, though at the cost of the the ridged effect between repeats. For all the flaws of the illustrations, I think the stronger horizontal lines are meant to indicate this ridge.

The pattern is a 96 repeat, and the original calls for 90 stitches, but the largest cylinder I have is an 80, so I'll need to repeat the motif in row 3 four times, which will leave 8 stitches left over. I decided to solve this with a partial motif as follows:

1-2. Knit.

3. On the third, k2to 3x, then (yo k1) 6x, k2to 3x; repeat this 4 times, and for the last 8 needles k2to 3x, yo, k1, yo, k1, yo. [On the machine, this look like: starting at the 3 o'clock mark, move the stitch on the second needle to the first, then the stitches on needles 3 & 4 to needle 2, then the stitches on needle 5 & 6 to needle 3. Leaving needle 4 empty, move the stitch from needle 7 to needle 5, leave 6 empty and move the stitch from needle 8 to needle 7; needle 8 is also left empty and needle 9 keeps its stitch in place. Count to the end of the motif, and double up the stitches on needles 13-18 so that there are two stitches each on needles 16-18 (as at the beginning of the motif), while needles 13-15 are temporarily empty. Then move the stitch from needle 12 to needle 15; leave 14 empty; move the stitch from needle  11 to needle 13; leave 12 empty; move the stitch on 10 to 11, leaving 10 empty. Repeat for a total of 4 and half repeats around one circuit.]

4. Knit. 


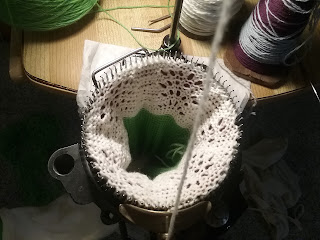
A circular sock knitting machine with a lacy piece of knitting in progress.
Frill on the machine (working the 5th fancy row)


As previously noted, after the 3 plain rows of the header, this four-row figure is repeated 5 times in white, and then once in color, then bound off. Of course, I was halfway through the fourth piece when I realized that the 8 extra stitches could be divided up between the motifs (2 extra plain stitches at the center of the sets of doubles, for instance), which would be a bit more symmetrical than having an extra half-motif.

I set my machine to the loosest possible tension for working this frill, after knitting the sleeve itself on the tension setting one rotation higher/tighter. [I denote it "1L1" in my notes, because the dial reads "1", and it's at the lowest dial position that can read "1"].

For the main sleeve, I set my knitter to "1L2", knit 20, hung the hem, then knit 130 rows, then adjusted the tension down to the its very loosest setting ("1L1") and started on the frill.


White knitted tube with a scalloped effect and eyelets. The piece terminates in a narrow blue border, above which it is attached to bright green waste-yarn worked in plain stockinette.
Frill with waste yarn. It scallops and has eyelets, at least.


After finishing the sleeve with it's frill, I ran some waste yarn, then did a single frills with its 3 rows of header (on 1l2, before adjusting back to 1L1 for the frill), then ran the other sleeve with its built-in frill and the second separate frill.

Blocking the completed frills and sleeves.

Off the machine, I bound the edges of each of the four frill edges, then whipped the separate frills onto the sleeves. I had intended to bind the edges before blocking each component flat, but holiday logistics meant I needed to complete the blocking before I had the chance to binding off more than one edge. I think this actually helped the scallops set better. 

Whipping the active stitches on the frills (the topmost of those 3 plain rows) onto the sleeves was actually the worst part. I could not keep a consistent horizontal line across the sleeve (counting was complicated by the frill covering that part of the sleeve, the lace motif itself made both frill and sleeve pucker into scallops, and attempting to eyeball the frill placement sent it rapidly veering onto diagonals). In the end, I ran a thread of waste yarn along a ruler in an approximately flat line, and stitched over it. For one frill, I removed the waste yarn as I bound the open edge, for the other I transferred the live stitches onto a circular hand-knitting needle to hold them; the waste yarn ended up being marginally easier to handle.

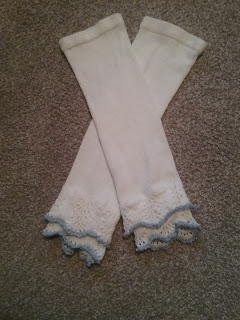
Et voila:

Two white knitted tubes with hung hems at the top edges, terminating in two layers of lacey scalloped frills, each edged with a narrow blue border.
At long last, the finished sleeves.
 
I'm glad these are done, and I like the scallops and the light touch of blue at the edges. If I were to make these again, I'd position the frill more than the indicated 1" up, so that the scallops overlap a little less. I'd also try knitting the sleeve on a smaller cylinder than the frills, so they can be gathered rather than put on straight. Knitting the sleeve on machine and then hand-knitting the scallops (so that the ridged rows happen) would also be an option to explore.

Monday, December 26, 2022

1850s Make-Do Beds

I sometimes accumulate trivia while researching other projects. In this case, primary source descriptions of camping and improvised beds in the 1850s:

The Prairie Traveler  (1859) lists for each person's bed: two blankets, comforter, pillow, and a water-resistant ground cloth of gutta percha or painted canvas. A large piece of sole leather may also be used as a waterproof layer. However, the book does give diagrams for two styles of folding field cot. [This is a guidebook from a military perspective, but apparently aimed at general audiences.]

Commerce of the Prairies (1851) claims that tents are rarely used, with men instead wrapping up in a Mackinaw or two, sometimes with a buffalo robe.

Scenes and Incidents in the Western Prairies (1857) describes mule-drivers sleeping under only a single blanket, while wealthy travelers through Mexico allegedly carry mattresses and other bed furnishing among their luggage, in order to comfortably camp outside. The author's other remarks indicate that it was common practice in the region is to carry one's own blankets, whether for camping outdoors or in unfurnished inns.

On military duty in Florida, blankets over rough 'clapboards' (supported by four sapling-posts) make improvised beds for soldiers. (c.1838-68)

Ezra Meeker refers to using cedar boughs for a bed when traveling west in 1853. [Mr. Meeker traveled overland with a wagon, and then from Oregon to Puget Sound on foot and by raft.]

The David & Catherine Blaine letters mention using clothing to improvise or improve sleeping places. On a ship deck, they share David's greatcoat as a blanket. While staying overnight in settler's cabin with a 'filthy' guest bed, they arrange Catherine's petticoat over the objectionable linen and again use David's coat as a blanket.

Sunday, December 25, 2022

Thursday, December 22, 2022

Book Review: The Typical Tudor

 At long last: The Typical Tudor.

[Full disclosure: as an early pre-order customer, I did receive an advanced version of the chapters on men's jerkins and on women's coats & waistcoats, and also provided feedback on one of the round gown patterns.] 

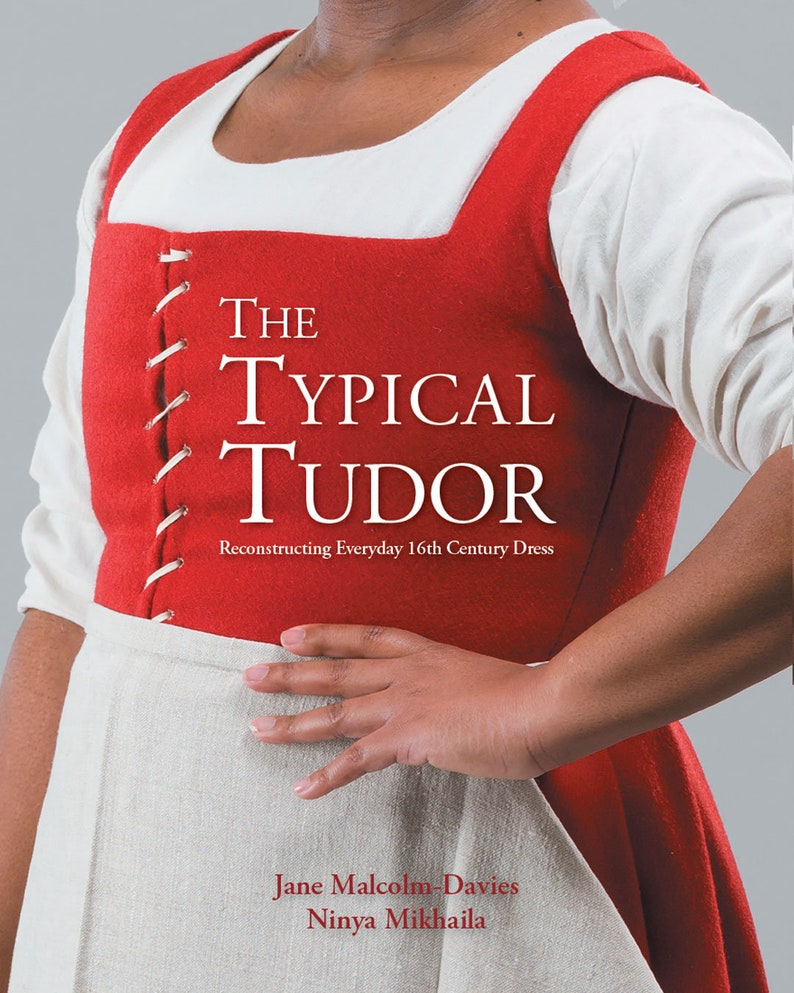
Book cover showing the torso of woman wearing a red front-lacing kirtle with a white apron and smock.
I ordered this in The Before Time. It was worth the wait.

The Typical Tudor: Reconstructing Everyday 16th Century Dress by Jane Malcolm-Davies and Ninya Mikhaila is the 6th book from the Tudor Tailor. I've previously reviewed three of their other works: The Queen's Servants, The Tudor Tailor, and The Tudor Child.

Chronologically, The Typical Tudor covers a lot of the same period as The Tudor Tailor. At 191 pages (excluding bibliography), this book is substantially longer than the other books from this publisher. Where it really distinguishes itself is in its meticulous research--to provide context to the garments, this book includes a very thorough overview of 16th century English economics and social class divisions. There's also detailed discussions of fabrics available (fiber, processing, finishing, price, usage), the cloth- and garment-making trades, trimmings, sumptuary laws, annual income by professions, etc. The first 35 pages are devoted to these topics, including many period illustrations, and photographs of surviving garments--as well as some excellent tables quantifying the extent garments which were researched.

There are 14 pages of general construction notes which include scaling the pattern grids, sewing methods, and knitting techniques. Next comes 135 pages of projects. These are grouped into 5 categories (undergarments, men's wear, women's wear, headwear, and others). Each grouping begins with a research overview including the evidence for each garment type, who was using the garments, the frequency of different materials/colors, and changes over the time period. Not counting variations, there are 40 base projects covering the beginning, middle, and end of the Tudor period for men and women: stockings, garters, hose, smocks, shirts, doublets, jerkins, kirtles, petticoats, coats, gowns, caps, coifs, hoods, aprons, and more. Knitting projects include stockings, sleeves, and caps. As in the earlier publications, each project includes line drawings and photographs of the reconstructed garments, a materials list, the pattern pieces drawn out on a grid (scaled down), and basic instructions for how to construct the garment.

In scope and topics, this book most closely follows The Tudor Tailor, and does include updates of some of the same patterns (like the woman's round gown and kirtle or man's hose). However, The Typical Tudor has benefited from an additional 16 years of research, and includes both new garments and updated interpretations of others. One notable update was the different shapes and construction methods for the coifs. The "everyday dress" aspect of The Typical Tudor puts an emphasis on the garments worn by the working class and gentry, which comprises a huge swath of the population: the only groups that are really excluded are the monarch's family and upper nobility/clergy.

This book also incorporates some features I that appreciated from its more recent predecessors. Like The Queen's Servants (and I presume, The King's Servants), each project is accompanied by pie graphs showing the most common colors and fabrics used for that garment.* Each project also has a small chart the year-range and social class to which the garment is appropriate, which was a feature I appreciated in The Tudor Child.

Project drafts and instructions are suitable for intermediate to advanced sewists; scaling up and fitting the patterns will be needed, though instructions are provided. If you've worked with any of their previous titles, this is very similar to the writing style in those. The only problem I've found with the book is a cut-off sentence on page 87 at the end of the research on Men's Doublets.

I would honestly recommend this book for anyone doing any form of 16th century costuming. Even if you're looking to recreate nobles' garments from the reigns of Henry VIII-Elizabeth, I think the techniques and shapes provided give a more more historically-grounded starting point than any other reference book I know of.

*From the research the authors conducted, which included documentary evidence from wills and inventories, as well as surviving garments.

**The exception being, that if you're looking for nobles' attire in the reign of Henry VII, I would steer you towards The King's Servants and/or The Queen's Servants.

Stars: 5

Accuracy: High. This is easily the most thoroughly-researched (and certainly the most thoroughly-cited) costume book I have encountered to date.

Skill Level: Intermediate, tending Advanced

Strongest Impression: Incredibly scholarship; this book is full of accurate detail, while also providing fairly user-friendly instructions and diagrams. 


Sunday, December 18, 2022

Ribbed Muffatees c.1845, on CSM

Actually completed a few Christmas presents before the holiday this year, though most of my friends are still on track for New Year's presents. Or Groundhog's Day.

 
I knit these on my circular sock machine, based on these hand-knitting instructions:
Ribbed Muffatees 
No 12 PINS. Cast on each of three pins about twenty four loops, or any number according to the size you intend to make your muffatees, and with the fourth pin pearl four stitches and knit two alternately; every round is the same. They are generally made about five inches long." --The Practical Companion to the Work Table (1845)

The 1844 edition uses the same 4-2 pattern for "Lambs' Wool Muffattees", made to any desired length.

Tranlated to my Autoknitter, I set up a 4-2 mock rib on the 60-cylinder, with the tension set to 5L4. To knit, I made a narrow hem (knit 2 rows, pick up the first and knit the 3rd row together), then cranked 50 rows in the round. I then knit 14 rows flat to make the thumb-gap, and finished with 10 rows in the round. I used the double-pass off-machine bind-off on the top edge.

The material used for these muffatees was Knitpick's "palette" fingering-weight wool, in the currant colorway.

Tuesday, December 13, 2022

Scottish Shortbread, 1845

Also for the recent holiday event, Scottish Shortbread (Excellent) from Eliza Acton's Modern Cookery (London, 1845). 

Shortbread. Not quite excellent.

I made a whole batch: 1 lb (~3.5 cups) all-purpose flour, mixed with 1 oz of orange peel, and 2 oz of granulated sugar. I melted 8 oz of butter and combined it with the dry ingredients, making a dry dough. I baked the shortbread at 350F for 20 minutes. ["Mold it onto tins" was a little weird, so I went with "press the dough into two pie tins."]

The shortbread was alright. It mostly held together, had a decent texture and taste. There was a slightly off aftertaste which I suspect was the peel (instead of homemade, I used a jar of purchased peel, which I don't think I'll do again).

Compared to the last receipt I used, all the cookbooks I found this time specified that the butter should be melted (which made it much easier to incorporate versus cutting in solid butter as for pie-crust), and also called for citron, candied orange peel, and/or caraway seed to flavor and adorn the shortbread. I recall making shortbread with only butter, sugar, and flour (and eggs?), with the orange peel being an optional decoration, so know I'm wondering where I originally found that receipt. I thought it was Beeton's, which I was using a lot when I started out, but her receipt definitely calls for almonds and candied peel, even in the caraway is optional.


Saturday, December 10, 2022

Molasses Gingerbread, 1798

Revisiting this receipt from Amelia Simmon's American Cookery (1798, 2nd ed) which I originally tried in the third season of the Historical Food Fortnightly.

Upside: I finally have pearlash to experiment with. 

Downside: I miscalculated the amount of molasses, and ended up substituting in honey for about half of the volume. I also managed to put in only half the required butter.

Neutral: On my second time making this dish, I finally realized that there's no ginger in the receipt.

Mixed together 2 lb (~7 cups) all-purpose flour, 1 Tbsp cinnamon, and 2 tsp cardamon, cut in 2 oz unsalted butter (should have been 4 oz), then stirred in about a pint of combined molasses and honey, and finally 8 oz of cold water with 4 teaspoons of pearlash dissolved therein. I mixed this into a sticky dough with a stand mixer (which was basically at capacity), then worked the dough by hand to incorporate the last of the dry ingredients. I pressed this dough into a 9"x13" glass sheet-cake pan (buttered), and baked it for 30 minutes at 350F. 

The gingerbread had a perfectly decent texture; the tops were pretty ragged, which made me second-guess whether the dough was too dry. I definitely could taste the honey, which was fine, but just not quite how it's supposed to be.  All in all, this is a perfectly serviceable gingerbread receipt, and relatively quick and easy. 


Thursday, December 1, 2022

Original: Muff and Collar

Warm accessories for a cold December day:

Lambswool muff and collar, 1850s. LACMA.