Wednesday, September 30, 2020

Yet More Masks

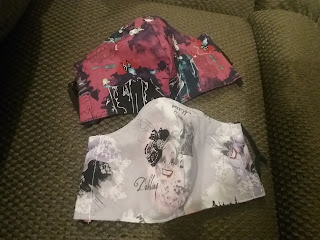
 It's the never-ending project, but the fabrics provide some novelty. I've started using longer wires along the upper end of these seamed masks (~8" instead of ~3"), as it gives a closer and more comfortable fit along the nose.

Two cloth facemasks printed with Disney villainesses.
Featuring Red's favorite villains.

Tuesday, September 29, 2020

Carrot Harvest

A ceramic plate handpainted in blue and yellow with the figure of a woman playing a violin. On the plate are dozen tiny orange or purple carrots with their leaves.
A successful carrot harvest. Relatively speaking.

My container garden definitely isn't cut out for vegetables, but this summer has been my most successful for carrots to date. The orange ones are oxhearts (which, per the name, usually get much larger), a heirloom variety from the late 19th century; the purple ones are black Spanish carrots, a 16th century heirloom.

Sunday, September 20, 2020

Virtual Sheep to Shawl

First time trying one of these; with distancing, it ended up being a sort of relay with the different participants. As the team weaver, I was measuring and dying the (purchased yarn) warp while the other three members were preparing the fleece and spinning it up. 

Measuring out 275 ends of 100" each. .

Need to remember to allow for shrinkage on dyeing.

The spinners dropped off four full bobbins of a yarn.
I used 3+.

The warp is Harrisville Shetland yarn; I dyed it with Dharma's "forest green" fiber reactive dye. The weft is grey/"natural-colored" Romney ewe fleece, spun in the grease. Most of it was done as a 2-ply "thick & thin", to maximize consistency among the 3 spinners' singles, with one bobbin of Navajo (3) ply that worked out to the same diameter.


Finnish Birdseye Twill is fun.

I used a Finnish Birdseye threading (4-3-2-1-4-3-4-1-2-3) on my 4-harness table loom, because it's a pattern I enjoy in two-colors. Within that, I opted for the zig-zag, since it's fun and the treadling is easy to remember when working at speed (treadle 12, 14, 43, 32--just a 2-2 twill). The warp had 275 ends; I used a 12 sett with 2 threads floating for selvedges on each side.

A (1) shawl, woven in a single 4-hour stretch.

To finish, I made a simple two-level fringe using square knots, then steam-pressed the whole shawl with an iron. The steam-pressing is fairly fast, and I like that it doesn't shrink the final piece as much as more vigorous fulling/finishing processes.

The handspun has some lovely subtle color gradations.

Zig-zags are fun.


The completed shawl is 20" wide and 72" long, with 2" of fringe along the short sides. It involved three spinners (who did all the fiber prep, spinning, and plying), and one weaver (warping, weaving, finishing). Prep (dying/warping) was not counted for the final time; my timed part was 4 hours of weaving plus 40 minutes of tying fringe, trimming threads, and steam-pressing the final product. 

Friday, September 18, 2020

Autumn Masks


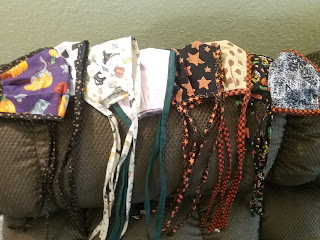
Halloween-themed cloth masks.
Eight more masks. now with Halloween prints.

I'm well past 100 masks at this point, though I lost track of the total tally some months ago. I definitely didn't image in March that I'd be making Halloween-themed ones. Now I think I should be looking ahead to Christmas prints...

Thursday, September 17, 2020

Lovely Fans c.1860

I'm not sure what project I was originally compiling these for, but they are fun:

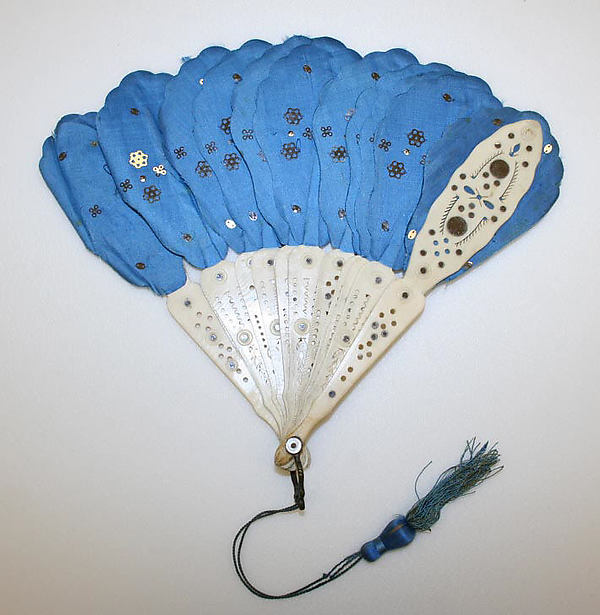
American Fan, 1858, in The Met.

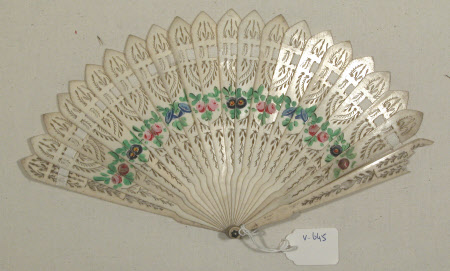
French Fan, 1859, in The Met.
Spanish (?) fan, c.1855-1865, in The Met.
American (?) fan, c.1850-1860, in The Met.

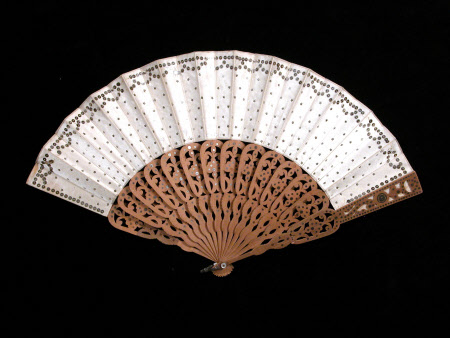
Fan, c.1830-1870, UK National Trust Collections.

French or Spanish Fan, c.1860, LACMA.

Fan by Edouard Moreau (French), c.1860, in The Met.
Fan, c.1830-1870, UK National Trust Collections

Fan, c. 1860, from The Met.

Spanish (?) fan, 1858, in The Met.


Tuesday, September 15, 2020

HFF 4.19: Eat Your Veggies


Detail of an 1850s painting showing a table laden with food, and a woman's hands holding a spoon over a dish.


The Challenge: Eat Your Veggies! Make a dish featuring a vegetable.

The Recipe: Carrots from Mrs. Shaw's Receipt Book and Housekeeper's Assistant

Carrots--When young it is not necessary to scrape them. but wash carefully. Put in boiling water with a little salt, and cook three-quarters of an hour, or in winter an hour and a half. Serve with butter and pepper. 

The Date/Year and Region: 1878, Portland, Maine 

How Did You Make It:  I picked all the mature carrots from my planter box, washed them, and cut off the top. [These tiny carrots are oxhearts, and they're the best crop I've yet gotten from my balcony garden. The light levels are much better for herbs than vegetables]. Per the instructions, I boiled the carrots for 45 minutes, with a pinch of salt in the water. I removed the carrots from the water, sprinkled them with a pinch of pepper, and let 1 Tbsp of salted butter melt over them.

Time to Complete: About 50 minutes (five minutes to prepare plus 45 to cook).

Total Cost: No immediate expense, as I grew the carrots and already had salt, pepper, and butter on hand.

How Successful Was It?: More than I thought. I really feared 45 minutes would have these cooked into a mush, and I generally avoid cooked vegetables because of textural issue. However, these carrots remained firm and flavorful, and were actually quite good. The salt, pepper, and butter suited the carrots well, and while distinctly cooked, the carrots themselves still had structural integrity.This is going into my dinner party/event rotation as an easy hot side dish.

How Accurate Is It?: Very good. I didn't make any substitutions, and used an 1870s heritage carrot variety for an 1870s recipe, which feels appropriate. The butter is store-bought, and I cooked on my electric range, but "boiling water" isn't practically changed by the heat source.

Fourteen short carrots, each 1-2 inches long, most with their leaves still attached.
A bumper crop of carrots, relatively speaking.

A purple transferware plate with ten small boiled carrots arranged on it.
A cooked vegetable I will actually eat. For a change.

Sunday, September 13, 2020

Raspberry Salad (1850-83)

I came across this Raspberry Salad during the last Historical Food Fortnightly challenge and couldn't resist trying it. This one appears in Cassell's Dictionary of Cookery (1883), but I've run across similar 'pour alcohol over fresh fruit' salads in 1850s sources (like this receipt for strawberry, raspberry or currant salads from 1854, or orange/peach/strawberry versions from 1857, or all of the above plus pine-apples from 1850).

I mixed strawberries and raspberries, added some white wine, and found it delightful. With or without the called-for sugar.

A transferware tea cup full of strawberry slices and raspberries, with a little white wine poured over the fruit.
Victorian fruit salad is the best fruit salad.

Saturday, September 12, 2020

Renaissance Velvet Purse

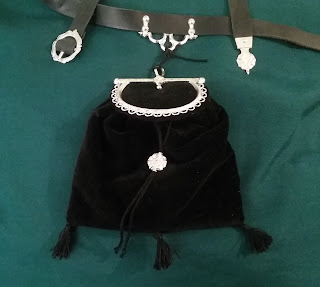
I finally made up the framed purse for my 16th century outfit. One more small step towards respectability.

The finished purse suspended from a leather belt with pewter fittings.
The rose bead echoes the rose buckle.

I used the late 15th century large purse frame from Billy and Charlie's. It's a bit of a stretch for my usual 16th century events (~1570s), but I don't know of any other repro frames that get closer--and it's not terribly dissimilar from some 16th century purse frames. The outer fabric is black cotton velvet left over from a Victorian basque.

It doesn't show up above, but I decorated the exterior with the fabric stamps I impulse-bought from The Tudor Tailor earlier this summer. The finished effect may be a bit rich for my usual persona, but then mercenary companies were rather famous for 1) pillaging, and 2) dressing ostentatiously above their stations. For that matter, if Stubbs is to be believed, everyone is dressing above their stations.

Two metal fabric stamps with wood handles, posed next to a pieces of black velvet imprinted by the stamps in rose and starburst shapes.
Stamping was quick and easy. Unfortunately, the light must be hitting
this cotton velvet just right to see the impressions at all.

I lined the purse in white linen (Fabric-store.com's "IC64" mid-weight). Despite my intentions to actually use the machine where it wouldn't show, the velvet had other ideas. I ended up folding the raw edges down, running the lining to the exterior wrong-sides-together, then whip stitching the sides to form the purse.

The purse turned inside out, showing the lining attached to the velvet outer material, and a partially stitched side seam.
Whip-stitching the side seams.

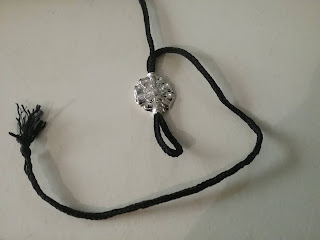
The laces and tassels are all handmade from size FF beading silk. I made a lucet cord to attach the purse frame to the hanger*. The drawstring is a 5-bow fingerloop braid, specifically "A Round Lace of 5 Loops", the #2 pattern in Tak V Bowes Departed. This lace ended up being a perfect fit for the pewter bead that came with the purse frame--the bead can be easily moved along the doubled cord, but otherwise stays securely in place.  

A black finger-loop lace with a pewter rose-shaped bead strung on it.
Rose-shaped pewter bead on the 5-loop round lace.

I was a bit concerned with how to insert the drawstring. It has ten threads at each end, and I figured I'd need an awl to open the fabric, and some drastic measures to coax the cord through. Then I remembered I own a trapunto needle. The eye held all the thread ends easily, while the point passed through the linen without difficulty (and the velvet with only a little work). I lost a little of the braiding at each end, but again less than I feared.

The silk fingerloop lace threaded through an 8-inch needle, which is being used to run the drawstring along the opening of the purse.
This is the largest needle I own by far.

* The frame's top loop is too short for my 1/2" belt (much less the chape) to pass directly through it. I suspect the hanger's meant for unframed purses to be suspended by their closure strings, but it'll do for now.

Wednesday, September 9, 2020

New Ironing Board Cover

Finally down below 100 drafts on this blog. Huzzah!

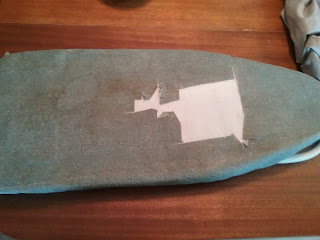
In celebration, I decided to finally fix my ironing board. It's had an adventurous life so far, but the already-stained-and-somewhat-worn cover suffered a major mishap with a rotary cutter when I was cutting out masks this summer.

Ironing board on a tabletop; the ironing board has several large squares of material missing from its cover.
I was taught better than this. Honestly. 


Fortunately, while I was ransacking my stash for mask material, I can across two packs of thermal-insulating padding and some heat-resistant yardage. I believe these were inherited from my aunt's stash. After long years of waiting, their moment has come.


The same ironing board as before, but the stained and cut blue cover has been replaced by a flawless grey cover.
I (very professionally) fitted this with
knotted shoelaces as drawstrings

Monday, September 7, 2020

HFF 4.18: Labor of Love


Detail of an 1850s painting showing a table laden with food, and a woman's hands holding a spoon over a dish.


The Challenge: Labor of Love--Make a dish that's hard work, uses an ingredient you love, or is a combination thereof.

The Recipe: Baked Raspberry Pudding from Cassell's Dictionary of Cookery

Featuring my very favorite fruit.
Raspberry Pudding, Baked.--Put a pint of fresh raspberries into a pie dish and sprinkle a little sugar over them. Beat the yolks of three eggs and the whites of two with a quarter of a pint of milk; add a little sugar; whisk the custard till it froths and pour it over the fruit. Put it into the oven immediately and bake till the custard is set. Let it get cold, sift powdered sugar over and serve. This pudding should not be eaten hot. Time to bake half an hour. Probable cost 8d to ls. Sufficient for four or five persons.

The Date/Year and Region: 1883, London

How Did You Make It:  I attempted this at half scale (being one person, and having sadly finite quantities of berries). I put 8oz of fresh red raspberries into a glass baking pan/bowl (the largest one that's still smaller than a pie tin), and sprinkled ~1/8 cup granulated sugar over the berries. I then beat in an electric mixer 1 egg yolk and 2 egg whites with 1/4 cup of milk and another 1/8 cup sugar. [This was intended to be 2 yolks and 1 egg white, but I only caught the error while writing it up afterwards. A true 'half-scale' would have been 1.5 yokes and 1 egg white.] After ~3 minutes on high, the liquid was looking frothy, so I poured it over the berries and put the dish into the oven, pre-heated to 350F. The pudding baked for 30 minutes, then cooled for 2 hours before serving.

Time to Complete: About 40 minutes, including baking time

Total Cost: Raspberries were on sale this week, so about $4.00 including the berries and eggs.

How Successful Was It?: I had the nagging feeling that I forgot something... and realized 20 minutes in that the answer was "custards need to be baked in pans of water". By that point, the top was fairly browned, and I decided to just go with it. 

The taste is quite good. I think the sugar proportions I used worked very nicely, and the raspberries are delicious. The texture, however, is a mess. There's liquid, there's weirdly spongy bits around the sides, there's the solid 'skin' of the top. Basically, I still am dreadful at making custards, and shouldn't have been deceived by the straightforward instructions here.

If I ever get better at making custard, I'd love to give this receipt another try. It uses seasonal ingredients, it's not terribly complex, and has a great flavor for a cool summer dessert. If that should happen, I could see working this into my ball/dinner party repertoire, or including it in a cooking presentation in a historic kitchen. The need to refrigerate ingredients (not to mention the baking) would make it less useful for camping or other outdoor events like picnics.

How Accurate Is It?: The egg reversal was already mentioned, but even if I hadn't messed that up, the half-scale proportions have slightly more yokes than usual. I ended up guessing on the sugar amount, which was never specified. The usual electronic conveniences (mixer, oven) were used.


Thursday, September 3, 2020

Kitchen Garden, September 1819

A lot more planting this month that I was expecting...

Sow lettuce of various kinds; when up, shelter them under a sloping reed hedge, or hand-glasses. Make mushroom beds; thin your turnips; weed all young plants; transplant herbs, and earth up celery; sow young salading upon warm borders; clean asparagus beds in this manner: cut down the stalks, and pare the earth off the surface of the alleys, and throw it upon the beds half an inch thick, and sprinkle over it some dung from an old melon bed. Ridge the ground for winter; plant some peas and beans on warm, well-sheltered borders, to stand out the winter. 
-Elizabeth Hammond in Modern Domestic Cookery, and Useful Receipt Book (London, 1819)

Tuesday, September 1, 2020

Original: Mid-1850s Fanfront with Flounces

Day dress, c.1853-1856, in The Met

It's a beautiful fanfront, but what I really love is how the narrow fringe trim delineates the flounces and bodice details which otherwise disappear into the print. Also, the very mid-fifties flounced sleeves. Note the fiber content is 'wool, silk' (probably a wool fabric with silk trim), and the fall of the fabric suggests a very light-weight material.