Though good with color, material, and dimension, the instructions are somewhat lacking in method. I suppose it's time to 'make in the usual fashion'. What follows is my best attempt to make the pieces look like the picture.
First off, I cut out a lining piece to back the embroidery. Dividing workbaskets seems to be a common practice (based on Miss Leslie's & Miss Beecher's opinions, along with others I don't recall by name), so I attached pockets to the right side of the lining. Being short of silk, I decided to do the interior in white linen. The scissor pockets are in leather, with a loop of silk ribbon to hold a thimble.
(The angle of the largest scissor pocket was altered after this picture was taken; when arranged vertically, the angled pocket didn't suit).
I measured the worked side and divided by pi to get a bottom diameter of 11 1/8", which I then cut out of pasteboard. The instructions didn't specify a pasteboard bottom, just sides, but I thought the added structure and stability would be useful. Using this a as template, but adding seam allowances, I cut the silk and linen lining. I also cut a rectangular piece of pasteboard for the sides, using the worked area of the canvas as a guide.
With those six pieces to hand, I started actually constructing the basket.
First, the bottom was assembled; right sides out, I attached the bottom silk and lining to the pasteboard circle, using a small amount of bookbinding glue* to keep them in place.
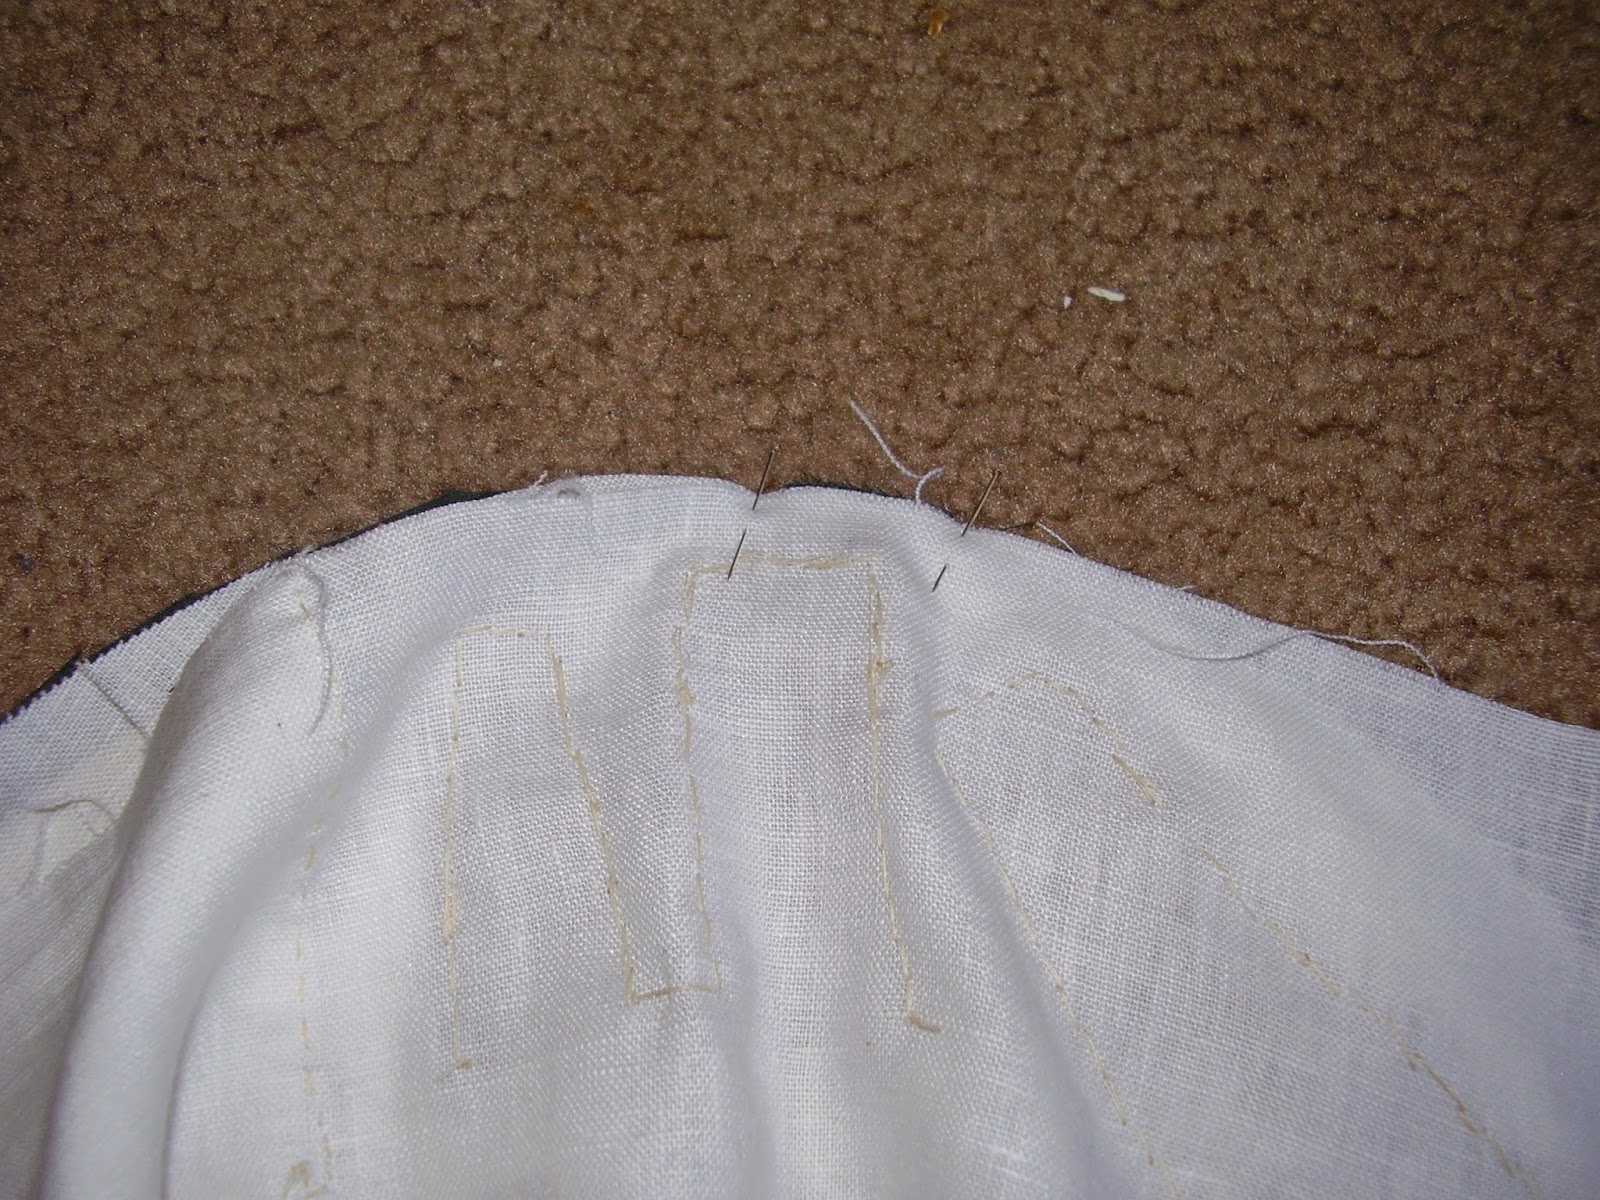
Next, I pinned the linen side lining to the bottom circle (right sides of the two lining pieces together):
The worked canvas went on next, with the right side of it to the right side of the silk. I then proceeded to back stitch along the edge of the Berlin-work, catching all four layers of fabric (canvas, silk, bottom linen, side linen), while stitching as close to the pasteboard as possible.
I started at the center and worked towards the side-seam (not yet made), so that any sizing discrepancies could be adjusted at the seam. Happily, this only involved the linen lining being a hair too large, and was easily fixed by taking a larger seam allowance on the side seam.
Once the side pieces were closed and fully attached to the bottom, I turned the canvas sides up, forming the basket:
Next, I checked the size of the pasteboard side, and trimmed it for a better fit. I then glued it into a circular shape (using strips of paper with more bookbinding glue), and allowed it to dry overnight. The pasteboard was then placed between the side and lining, and the fabric pinned tight over it.
Now the top needs to be added. From the magazine picture, the silk "bag" portion doubles the height of the 'sides', indicating that it should extend some 5" above the bag. With seam allowances and a channel for the ribbon-drawstring, I decided to cut the silk 7" wide (length= bag circumference, 35" around + seam allowances). I cut it in two piece, to fit on the fabric available, and to make the drawstring opening easier, and finished one long side of each piece with a 1/2" channel.
These were then joined (run & fell) at the sides, into a tube; the piece was then back-stitched to the canvas side. The cord handles were basted to the canvas before the silk was joined, concealing the ends in the seam. I meant to finish the inside edge by folding over the linen lining, but discovered after attaching it that I neglected to add a turning allowance. Cotton twill tape was applied over the inside join instead (as this necessitated an additional 36" of concealed hand sewing on a 3D object, I would definitely use the 'turn-over' method if I ever repeat this project).
The cord handle was made using 3/2 perl cotton, following the instructions in Tassel Making for Beginners by Enid Taylor. From the illustration, I figured on a cord 12" long for each handle. After some experimentation, I ended up cutting 6 1-yard lengths of cotton to make each cord, which ended up closer to 14" each.
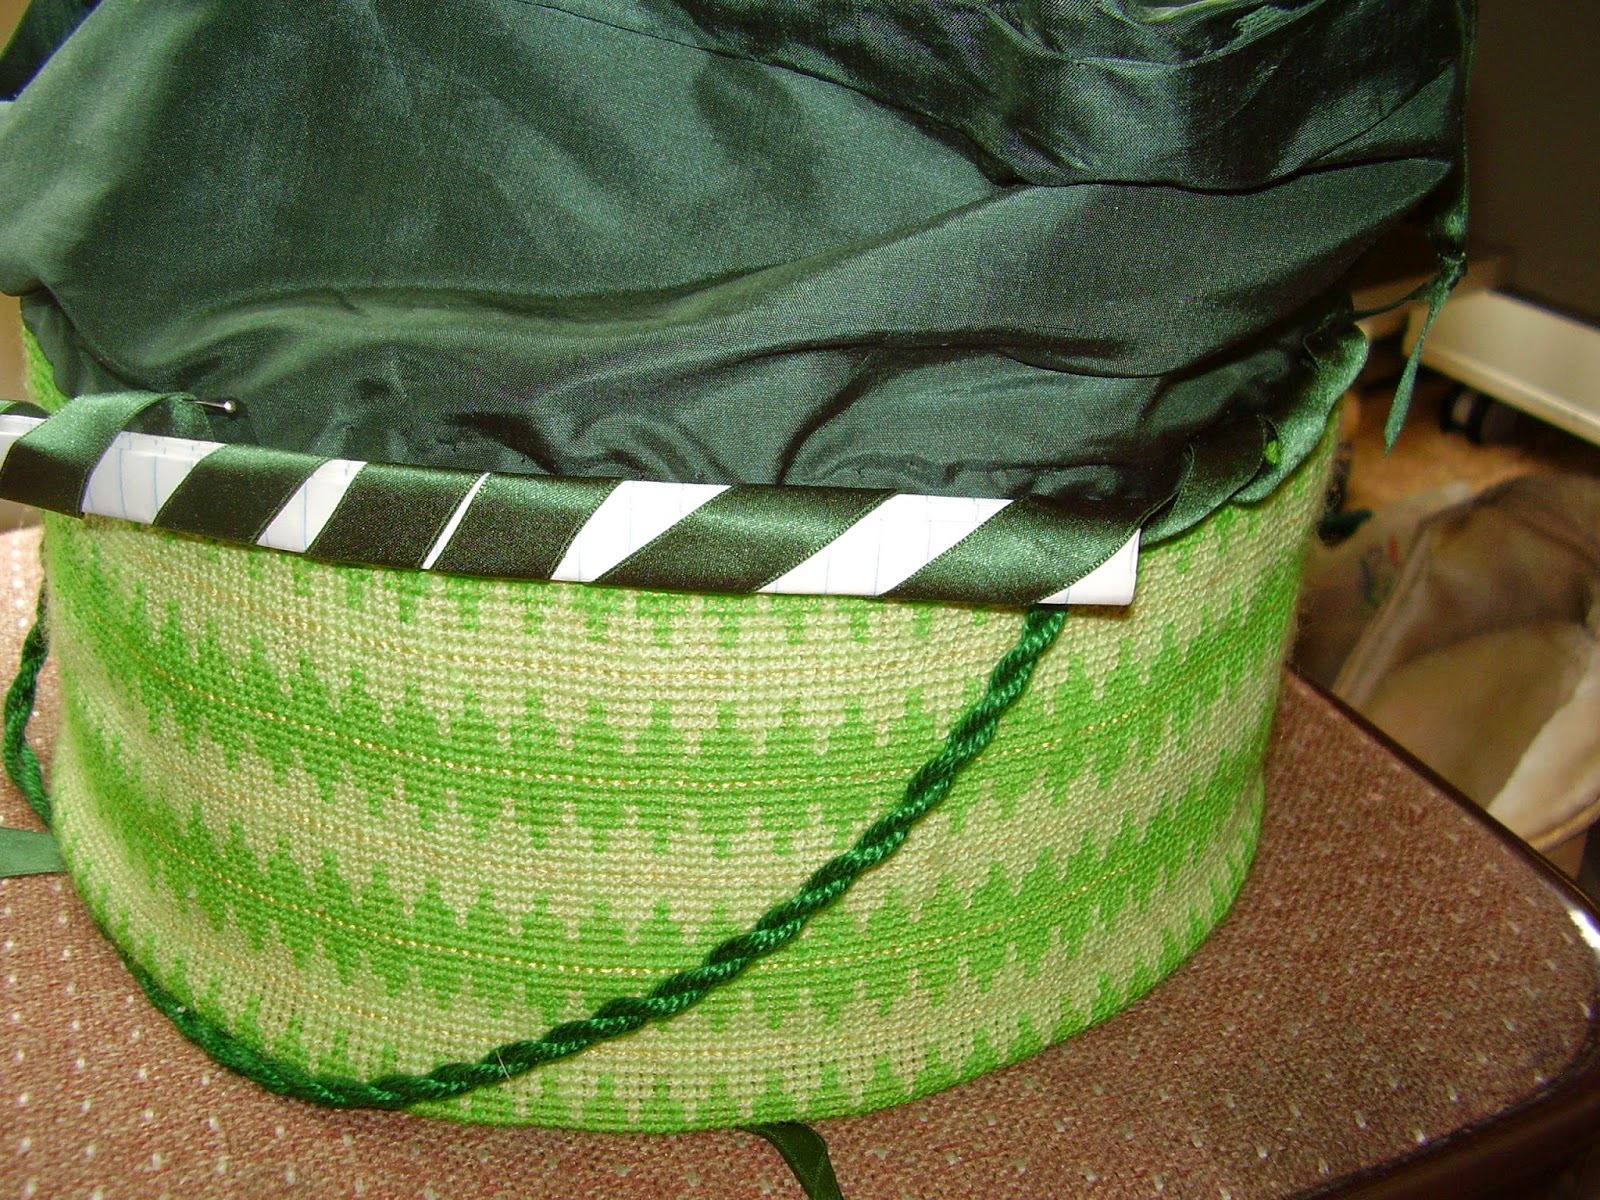
The last piece is the decorative ribbon at the basket/bag join. I used a running stitch to gather ('quill') 2 yards of 1/2" wide silk satin ribbon (using a very fine needle, because satin snags easily). This was then tacked down on the outside of the basket, following the join. Unfortunately, I didn't like the effect, and so removed the gathered ribbon, ironed it flat, and attempted to knife pleat it instead. At this point, I re-discovered that--unlike taffeta or lace--satin doesn't hold a fold nicely. So, I took that off, and attempted a rouleau, following Miss Leslie's instructions in the Lady's House Book (1850). The ribbon is wrapped around a piece of paper in a spiral shape, and then tacked down to the surface. The paper is removed, leaving a roll of ribbon.
It's not the neatest job, but it's neater than the other attempts, and it eases the otherwise-abrupt transition between the Berlin-work and the dark silk. To conceal the ends of the rouleau, I added a small constructed bow done in the same ribbon (for balance, a second bow was placed at the opposite end of the basket):

Voila:
Interior, with my 'period' sewing supplies for living history:
Supply notes: Green embroidery in DMC "medici" wool, colors 8567 and 8904; yellow silk is soie crystal brand; worked over 10-count Penelope cloth, all from Nordic Needle.
Green satin ribbon from Nancy's Sewing Basket, in two widths (1/4" for the drawstring, 1" for the decoration). The green silk for the upper portion originally came from S.R. Harris, aka the Disneyland of Fabric stores. White linen from Our Fabric Stash; leather recycled from a thrift store jacket.
Perl cotton for the cords came from The Weaving Works (left over from a weaving project, as it happens).
*Other types of glue would probably work; this is just what I had, and it convenient is meant for attaching fabric to cardboard without showing through.


No comments:
Post a Comment
Thanks for commenting!