Monday, July 30, 2018
Tuesday, July 24, 2018
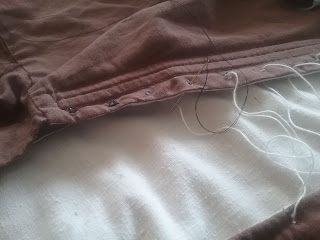
Chemise
Wednesday, July 4, 2018
July 4, 1852
"What to the American slave is your Fourth of July? I answer, a day that reveals to him more than all other days in the year, the gross injustice and cruelty to which he is the constant victim. To him, your celebration is a sham; your boasted liberty, an unholy license; your national greatness, swelling vanity; your sounds of rejoicing are empty and heartless; your denunciations of tyrants, brass-fronted impudence; your shouts of liberty and equality, hollow mockery; your prayers and hymns, your sermons and thanksgivings, with all your religious parade and solemnity, are, to him, mere bombast, fraud, deception, impiety, and hypocrisy--a thin veil to cover up crimes which would disgrace a nation of savages. There is not a nation on the earth guilty of practices more shocking and more bloody than are the people of these United States at this very hour. "
--Frederick Douglass, "The White Man's Fourth of July", reproduced in Frederick Douglass the Orator (1893)
[Full text at Teaching American History.]
Tuesday, July 3, 2018
Findings and Sewing Implements, Renaissance Amsterdam
First off, I want to applaud the design of Amsterdam's Below the Surface online exhibit. It has a really nice chronological listing of all the artifacts (with an intuitive and powerful search functionality), as well as a virtual copy of the exhibit with tour. So, you can float around looking at the different objects, or follow a highlights tour with labels, or click any item you like to more information, or skim through a time line (and click any item you want for more information). The integration of these different parts--chronological organization, object type display, and a text search function--make it very versatile, and a power research tool.
.png) |
| Iron garment hook, dated 1350-1650. |
A timeless design. I've read about hooks-and-eyes/thread-bars being in use back to the 14th century, but was surprised at how modern the round-wire hook looked (compared to the 19th century versions I've seen, which tend to be flattened rather than truly round). A moment later, I came across its buddy:
.png) |
| Iron garment fastening eye, dated 1350-1650. |
At which point, my browsing became a scavenger hunt for garment findings and sewing implements. Like these alternative eye designs:
.png) |
| Iron garment fastening eye, dated 1350-1650. |
.png) |
| Brass garment fastening eye, dated 1300-1700. |
And some sewing tools:
.png) |
| Brass thimble, dated 1450-1550. |
.png) |
| Brass sewing ring, dated 1450-1550. |
.png) |
| Silvered brass pin, dates 1400-1700. |
.png) |
| Bone needle case, dated 1300-1700. |
| Iron needle, dated 1300-1875. |
.png) |
| Iron scissors, dated 1400-1600. |
There are also all manner of buttons, shears, buckles (with and without leather belt fragments), garment hooks, and purse frames/fragments. It's a really fun, varied exhibit of the detritus of ordinary life from about 1350-2005. Now if only the Arabia had a similar website...
Monday, July 2, 2018
Lacing Kirtle Eyelets
So, if you ever find yourself without an appropriately-sized bodkin or needle (ie, one with an eye large enough for your lace, cord or tape, and a maximum diameter smaller than your eyelets), here's how to insert the laces with a smaller sewing needle and some thread:
 |
| 1. Cord on inside (lining side) of kirtle. |
 |
| 2. Threaded needle inserted into eyelet. |
 |
| 3. Needle goes around the cord and back through the eyelet. |
 |
| 4. Pull the thread through, bringing the cord with it. |
Step 4: Holding both the needle and the thread tail, pull the thread back up through the eyelet, bringing the cord with it.
Repeat as needed, until all holes are laced. This is a bit slower than putting the cord through a large needle and threading it directly, but it was a lifesaver when I found myself with needles that were too small for the task.
Sunday, July 1, 2018
Medieval Barley Bread
 |
| Barley Bread |
The dough had a grainy texture while I was working it, and (probably from insufficient kneading, possibly from the grain used) didn't achieve that elastic texture bread dough really should have before rising. However, it baked up really nice--evenly cooked all the way through, with a nice rich flavor and surprisingly light texture. My bread tends to be mediocre, but turned out rather well. It also went over very well at the camp-out this weekend, and will definitely be made again.
Subscribe to:
Posts (Atom)

