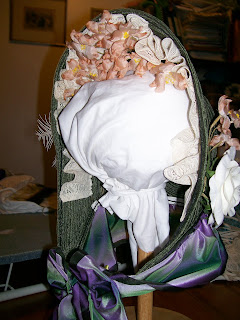
I made this up in 1/2" hemp straw braid, purchased from the same shop. Between making the largest size and overlapping some of the brim rows more than was probably necessary, I ended up 7" short on the straw braid--fortunately, at that point, it was just covering raw edges in the interior, so I supplemented it with some cotton bias tape. In purchasing the pattern, be sure to select the appropriate brim size; instructions are provided for adapting the bonnet to your own back-neck measurement during construction.
 |
| The form: sewn and wired, prior to stiffening. |
The pattern really covers how to make the straw form, and decoration is left to the maker's initiative; the reader is advised to consult original images and bonnets in doing so, which makes this pattern less-susceptible to “cookie cutter” issues. Each step of the process is illustrated with color photographs. The brim rows may be sewn by hand or by machine, but the crown portion needs to be worked by hand.
What you get: 12-page instruction
packet
brim pattern sheet (printer-weight paper)
What you need: 1 roll straw braid (18 yd of
1/2” or 36 yd of 1/4”), bonnet wire, thread, parchment paper, wire
cutter, pressing ham, fabric stiffener (optional); ribbons, lace,
trim, etc., as desired
Score: 4.5 stars
Difficulty: Intermediate and up. The
instructions are clear, and the only specific techniques one needs be
acquainted with are a back-stitch and a modified whip stitch (method shown).
However, the shaping was tricky, and I wouldn't recommend it
for a beginner. New milliners may find a buckram form slightly easier.
Accuracy: The shape closely follows
surviving bonnets (such as this, this, and this), though pictures of
originals are not included with the pattern. It does, however,
include period images of and magazine excerpts on straw bonnet
production.
Strongest Impression: The pattern
instructions could be more polished in their presentation/formatting,
but the steps are clearly explained; the shape and methods appear
well-researched.


No comments:
Post a Comment
Thanks for commenting!