Friday, November 30, 2018

Quilted Hood, Gold and Maroon Floral Foulard

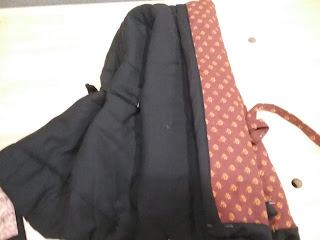
Black quilted wool hood, faced with calico (a gold floral foulard on maroon background).
Yes, there are pins.
No, they are not in the finished hood.
I needed to get the picture taken while the light lasted.

Second hood. It also has a black wool exterior, wool batting and calico lining. The lining fabric has a small gold floral motif in a foulard pattern on a maroon background. This time, I used the outer wool fabric for the back ties, and the lining cotton for the interior ones; the interior ties are double-folded and stitched as in the instructions, but I used a narrow hem and the selvage to reduce the bulk on the wool ties.

This hood's unique points are that it is quilted (by machine, in lines parallel to the brim), and the edges are finished by folding the outer material over the lining. Having done both that and a bias binding, I think the bias binding is marginally easier. Folding over the fabric works alright when hemming by hand, but I do not recommend trying it on a machine as you can't ease the fabric.

Thursday, November 29, 2018

To Render the Eyes Brighter and Darker

Anyone else thinking of the Byron poem? Besides myself, and the 1824 author of this advice (who earlier referred to Byron as a connoisseur of fine eyelashes...)

Anyway, while looking for the burned cork information, I came across several references to using burned resin or mastic to darken the eyelashes and eyebrows. The most explicit instructions came from The Family Oracle of Health (1824), repeated almost verbatim in The Toilette of Health, Beauty and Fashion (1833):
To render the Eyes brighter and darker
Take an ounce of frankincense the same quantity of resin and pitch and half as much mastic. Throw all these ingredients upon a piece of red hot charcoal receive the fumes into a large funnel  and a fine black powder will adhere mix this with a little oil of Benjamin, Eau de Cologne, or what is perhaps better the juice of elder berries, and it is fit for being applied to the eye lashes or to the eye brows.
The later source calls for a plate rather than a funnel for collecting the product.

***
DO NOT TRY THIS AT HOME

[I am not qualified to advise on how to do this stuff safely. What follows is my own experiment, which I am not recommending anyone follow.]

***
I mixed together:
1 oz frankincense
1 oz resin*
1 oz pitch (pine resin)
1/2 oz mastic (gum arabic)

*resin is a general class; the term is commonly used for by-products of distilling turpentine, basically pine rosin

Bowl containing pine rosin, frankincense, gum arabic, and pine tar.
The large pale yellow chunks are pine rosin, the orange stuff
is gum arabic, the frankincense is the smaller white solid.
The pine tar is the black liquid.

I then lit a charcoal fire (outside) and threw the mixture on it a little at a time. I used a plate on a trivet (raised above the fire on rocks) to collect the soot.

Upside down plate on an iron trivet, each of the three legs of which is supported by a paving stone. A small charcoal fire beneath.
Holding the plate in the smoke proved untenable.

The different ingredients burned at different rate: the pitch went very quickly (and smelled awful), while the solid resins took longer to burn (the frankincense smelled nice). The mixture produced a great deal of smoke, but one of the solid resins tended produce more and darker smoke than the others.

The material deposited on the plate very well.
A completely flame-blackened plate.
But it did collect a lot of soot.
The knife ended up being slightly more effective for scraping.

But it also ended up being 1) somewhat sticky, and 2) more of a smooth coat that a sooty powder. Scraping it off was a challenge, and produced very little usable, solid material. Basically, the soot stuck to anything that touched it--the knife, my fingers, etc.--except for itself. Not useful when I'm trying to collect a solid/powder.

Very low yield on the soot.

To use, I damped the soot with a few drops of Eau de Cologne (the 1859 receipt is still separating a month later). It made the soot flakes a little easier to move, but did not dissolve them.

Cologne I previously made, soot in gallipot (from Williamsburg),
applicator from Little Bits Apothecary.
I tried applying the soot to my right eyebrow and eye lashes. It seems to have had no effect. I'm not entirely sure that any actually stuck to my lashes.  Some did get on my eyebrow, but I don't think it was enough for a noticeable color change.

The author's face. There is no noticeable difference between the eye with the mascara and the one without.
Not seeing a difference.
In conclusion, I won't be trying this again. It's much more expensive and labor-intensive than using cork or cloves, and produces negligible effects.

Wednesday, November 28, 2018

Tufted Hood, Leafy

Black wool hood with white tufts, faced, bound and with ties made of orange calico (leaf motif on narrow striped ground).
Tufted Hood
I made some warm hoods for my co-workers; most are from Liz Clark's tufted hood sunbonnet variation, as mentioned in my "Dressing for Winter" post.  I tried to make each a little bit different.

This first one sticks most closely to the tufted hood project: it has a black wool exterior, and is lined and bound with orange calico (the "Leaf Duo"from Moda, which I previously used on a sunbonnet). I used wool batting for the wadding, and the layers are tied with white wool yarn. The front and back ties are both of narrow-hemmed calico.

After making three of these I realized the wool batting too thick for a project of this size (and drape). In the future, I should split the batting, or use a thinner one.

Tuesday, November 27, 2018

Fringed Shawl

Fringed Wool Shawl, 1850s reproduction outerwear
A Nice Plaid Wool Twill.

Catching up (again) on blogging my recent projects. With the wet/cool weather firmly established, warm outerwear is in order. 

First off: a simple fringed shawl, based on Liz Clark's instructions. I appreciate the neat finish of the fringe, and how it doesn't add any extra bulk or lumpiness to the finished garment--on another project, I found that this fabric is just thick enough to make awkwardly bulky hems. That being said, the single layer is pleasantly warm while being fairly light (it's slightly heavier than my tropical-weight wool yardage, but not truly a mid-weight). The twill fabric fringes about as easily as the plain-woven wools I've used before, and seems no more inclined to ravel once fringed. The shawl is square, 1.5 yards on the side (including fringe), making a capacious cover when folded diagonally.

Wednesday, November 21, 2018

Thanksgiving Receipts

Elaine Kessinger has compiled a lovely little booklet of period receipts for popular Thanksgiving dishes.

Friday, November 16, 2018

Dressing for Winter

It's that time of year again.

Good winter event safety and warm clothing advice from millinery genius Anna Worden Bauersmith. See also her articles on clothing layers, and how Victorians kept warm in different situations.

Suggestions for children's and infants' warm clothing from Liz Clark. She also has relevant garment projects: a shawl, and a sunbonnet that can be made as a tufted hood.

Colleen Formby's sontag pattern also makes for a warm knitted garment. Virginia Mescher wrote a simple muffatee pattern, also knit. [I compiled a list of warm clothing projects at one point, but not all the links are currently active].

Need 1850s/1860s project inspiration? A quilted petticoata sontagfur cuffswinter hood and red riding hoodtufted hoods, and a girl's hood.

Tuesday, November 13, 2018

Coif-Wearing

I'm going to need to keep this in mind for my next one: How to Wear the Coif. I love the "experimental" part of experimental archaeology/history, and how we can refine our understanding of material culture by trying things, and changing our hypotheses as necessary.  [See also, Jane Malcolm-Davies and Ninya Mikhaila's work on 16th-century dress support.]

Sunday, November 11, 2018

Original: Cotton Dress, c.1914-1918

On the 100th anniversary of Armistice Day, a WWI-era dress.

Dress, American, c.1914-1918.
The Met

Thursday, November 8, 2018

Book Review: Regency Women's Dress

Cover art for Regency Women's Dress by Cassidy Percoco

Regency Women's Dress: Techniques and Patterns 1800-1830 by Cassidy Percoco.

"Dress" is not limited to dresses: this book contains patterns for two chemises, two sets of stays, and three outer-garments (two spencers and a morning robe), as well as nineteen dresses. The earliest date on any garment is c.1795, the latest c.1827.  The narrow scope and large number of examples allow for greater specification than in many books of this type. The "type" being books diagramming the construction of garment artifacts, such as Janet Arnold's Patterns of Fashion series or Jill Salen's Corsets: Historical Patterns and Techniques.

The book starts with a three-page overview of fashion changes through the ~30 years in question; I liked that the table of contents employed sketches of each garment, making a nice fashion timeline for comparison, as well as a visual reference. Each garment featured in this book in an original from the late 18th/early 19th century, with full citation.  All the garments are held in American collections (mostly in New York, or else Old Sturbridge Village in Massachusetts).  Knowing the whereabouts of each garment is useful, in that looking up additional images of the garments online is almost required in order to make any of them.

I really love the scaled pattern diagrams of each garment (two pages), the inclusion of contemporary images and fashion plates (most of one page per garment), and the description of how the garment is assembled (also most of a page). Each garment also gets a colored photograph, and a pencil sketch. The problem I'm having with making any of these garments is the lack of comprehensive images: the line drawings are front-view-only, as worn, and the photograph is always a detail shot. While this is great for seeing the fabric (and occasionally the interior), not seeing the whole thing is really hard when you're trying to actually construct something. There's a ~3" tall line-drawing of each finished garment, shown from the front only as it is worn, but that's like trying to sew from the image on the back of pattern envelop (with no back view included).  The assembly information is descriptive rather than instructive--which makes perfect sense, but also makes internal and back views more necessary, for figuring out which seams should cross over which others, etc. Particularly for things like figuring out how to fasten the bib-front dresses (pins? buttons? additional ties?), there is simply not enough information included in the written instructions, and not enough back or internal views of the finished garment (photograph or sketch) to answer the question.*

The format begs for comparison to the Patterns of Fashion books: I think that Regency Women's Dress makes a nice addition to this genre for its narrow temporal focus, and inclusion of multiple garment types. I also like the color photographs of garment detail and the use of contemporary illustrations for context; but I think that the lack of detailed whole-garment sketches makes this book harder to use than Patterns of Fashion

Stars: 3**

Accuracy: Very high. All original garments, with some useful context.

Difficulty: Advanced. Additional sources or a lot of assembly know-how will be required to make the garments (above the usual 'scale and fit' skills).

Strongest Impression: Potentially a nice all-in-one reference for Regency/Empire styles, including undergarments, dresses, and some outerwear. However, there isn't quite enough construction information (and/or detailed images) to make the garments without consulting additional sources. A good reference for costume designers, and almost an amazing one for reconstruction sewing.

*For the other garment I've tried so far, a chemise, an internal photograph of the sleeve seams would have make construction infinitely easier. The written description of joining the sleeve to the main garment was almost impossible to follow: the sleeve is encased in the two-layer strap, and that is then sewn to the front/back pieces.  How, then, is the sleeve attached to the front/back without leaving a weak raw edge or a lumpy transition to the felling?  A photograph would have solved this instantly: instead, I spent a lot of time trying to find photographs of similar pieces, and finally ended up sewing several half seams, tacking down other pieces, and going back to finish seams out of order. Even so, there's a slight lump where the sleeve seam allowance transitions from being faced to being felled.

**I revised this down to three stars after attempting a further three garments from this book. Between scaling issues on the stays, a lack of fastener information on the bib-front dress, and sorely needed construction explanations on both gowns, this is simply not an easy book to use. You really need additional sources (or, ideally, a picture or sketch of the interior and back view of the garment) to actually make most of the garments I've attempted.
Wednesday, November 7, 2018

Another Regency chemise

Made a new regency chemise, this time based on a c.1800-1820 original in the Albany Institute of History and Art, featured in Regency Women's Dress. The Albany Institute does not appear to have digitalized the original (or any undergarments), but their collections database has some very fun shoes, hair-work pieces, and a few dresses.

Linen chemise/shift/smock in 1800-1820 regency/empire/neoclassical style.
New linen chemise, style c.1800-1820.
The material is a light-weight linen from Fabric-Store.com (IL-020, I believe). It's entirely hand-sewn, with all the seams felled (having learned my lesson about linen raveling along unfinished seams). I adjusted the front width and sleeve depth to my measurements--the sleeves were a necessary change, but I ended up taking in a lot at the front sides after having expanded them.  As I found out last time I tried to made a regency chemise, I run into trouble getting a garment that sits securely at the neckline but is also cut generously enough over the bust. With the Victorian chemises I've made, the extra material is simply gathered into the yoke or band; with the Tudor shifts, I just cut the shoulders to fit and then flare the front sides out as needed.  Here, I ended up cutting the bust wide enough, then fiddling with the strap placement and pinning in the excess material at the sides. It's not perfect--the front neckline still gaps slightly and the straps are sitting further out on the shoulder than they probably should be--but it's an improvement over my first regency shift, and quite comfortable.

I'm going to put my thoughts on the pattern in a separate book review. 

In other news, linen is still a pleasure to hand-sew, and I routinely hit 14-16 sts on all the seams this time.

Monday, November 5, 2018

Bruegel Paintings

This awesome on-line resource comes from the Kunst Historisches Museum Wien. In addition to extreme zoom-in capabilities on twelve of Bruegel's 1559-1568 paintings, Inside Bruegel also has infrared photographs of the paintings.

Saturday, November 3, 2018

ALHFAM Western Regional Conference

Was in Tacoma this year.  I really enjoyed the speakers on Thursday, who spoke on topics ranging from audience participation to historic roads, and cultural sensitivity to carriage restoration (also musical programs!). On Friday, I got to take a watercolor workshop, and learn about the relationship between military cartography and landscape painting.


Watercolor of Mt. Rainier
I am not Edmund Coleman.

(I also taught a workshop on hair-dressing. There was less paint involved.)