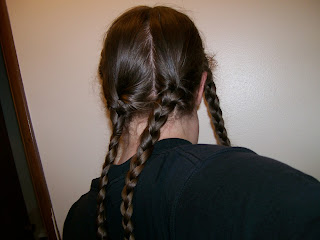
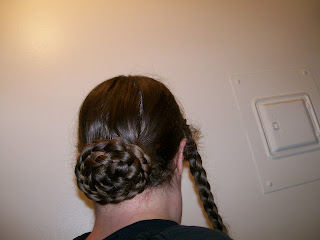
First, the two-braid version. Liz Clark suggested this, and it's now my favorite way to do the back hair. It takes a minute or two longer than with one braid, but it's much neater. As someone with thick hair, I like it because it gives me twice the length of braid to work with, at half the width; this means a bun that doesn't stick out from the head as far, but instead has more visual volume against the head, and a more consistent width of braid. For shorter hair, it gives a more workable braid length vs. width (just as a short section of a thin rope is easier to tie than a piece of very thick rope the same length.)
1. Part the hair T-style (see Hairdressing Basics ), giving two sections of side hair and one of back. Divide the back hair into two bunch (right and left). Braid the back bunches.
2. Take the top of left-hand back braid and position it in the center-back of the head, right where you want the chignon to be. Take the right-hand braid and begin to wrap it tightly around the other. Secure with pins as you go.
3. Finish coiling the right-hand braid and tuck in the ends. At this point, you should have a small braided bun with a second braid spouting from the center.
4. Take the remaining braid and bring it along the outside of the existing bun. Wrap it around, securing with pins as needed, and tuck in the loose ends when done. Voila:
Even though my hair was mis-behaving rather badly, the final result is still fairly neat and tidy. It's also the single most secure way I've found to get my hair up.
Option two, the twisted and not-braided coil. This gives a different visual when done neatly (no braids obscuring the line of the coil), and goes quickly, but I find it a little less stable than the braided options. Lay on plenty of pins.
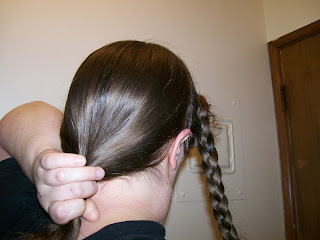
1. Part the hair into two side sections and one back. Apply a small amount of pomade to your hands and run it through the back section, smoothing with a brush to spread it around and keep the hair neat.
(I didn't do a good job on this step, and it shows.)
2. Gather the back section in your dominant hand and hold it near the top. Give it a twist (CW in right hand, CCW in left). Continue twisting until you have a workable length of twisted hair; for me, this about 6"-8".
3. Start coiling the twisted hair, using your free hand to add pins every time you get half-way around the circle. I find it easiest to alternate which hand is twisting the hair as I go around. The direction of the coil should be the same as the twist: you can check this by over-twisting the hair so that it kinks up and doubles over itself.
4. Once all the twisted hair is coiled up, tuck the raw ends underneath the chignon. Add extra pins to secure the ends and the outer edge of the coil, and wherever the hair feels loose.
*Browsing the primary sources, the term "bun" does not appear. Instead, we see reference to "knots" or "twists" for the back hair, as well as "chignons" (which term includes waterfalls) and "coils". Both braided ("plaited") and twisted chignons are period.
 |
| "The back hair, which may be either plaited or twisted, is fastened in a chignon very low down... " -Peterson's, 1856 |


No comments:
Post a Comment
Thanks for commenting!